The Coupe Quattro
My CQ
Ongoing Restoration
Gallery
Info / Data
Suppliers
Links
T85q.com
More Cylinder Head progress 13-25 Feb 2006
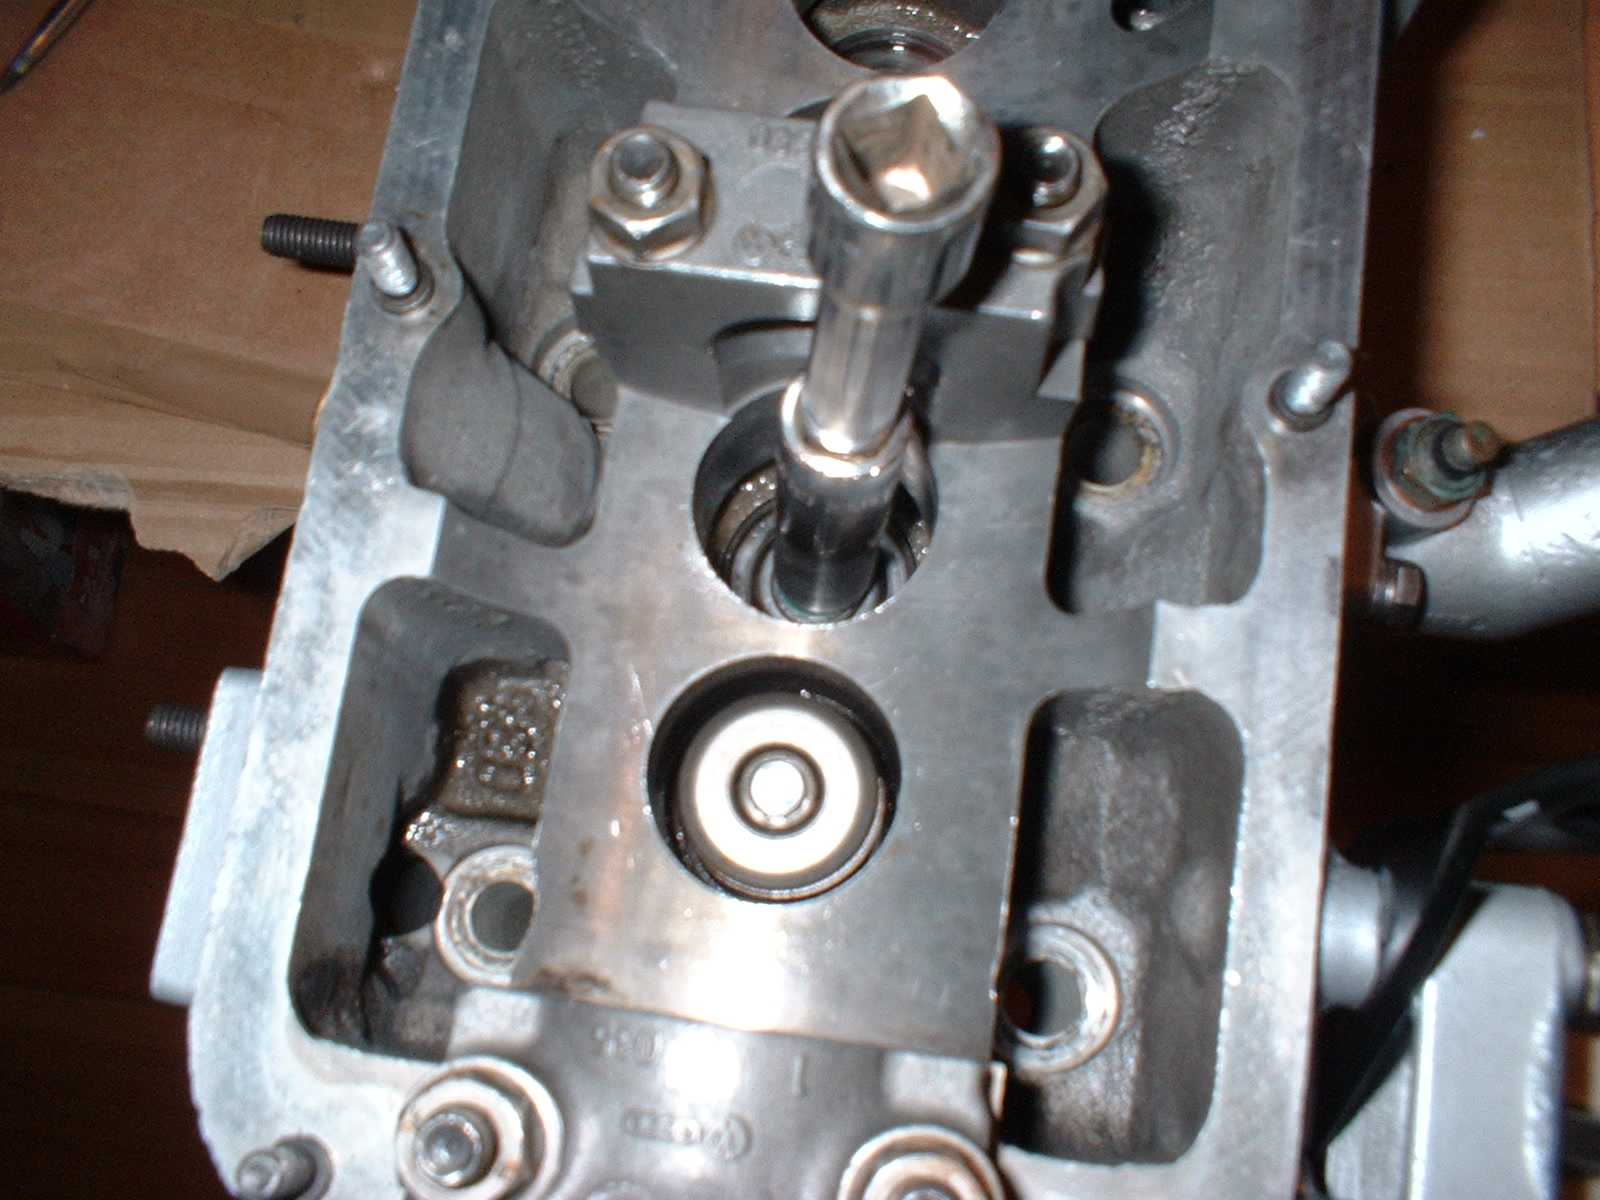
The old valve stem oil seals after I hacked them out with a pair of needlenosed pliers

The head bereft of it's stem seals
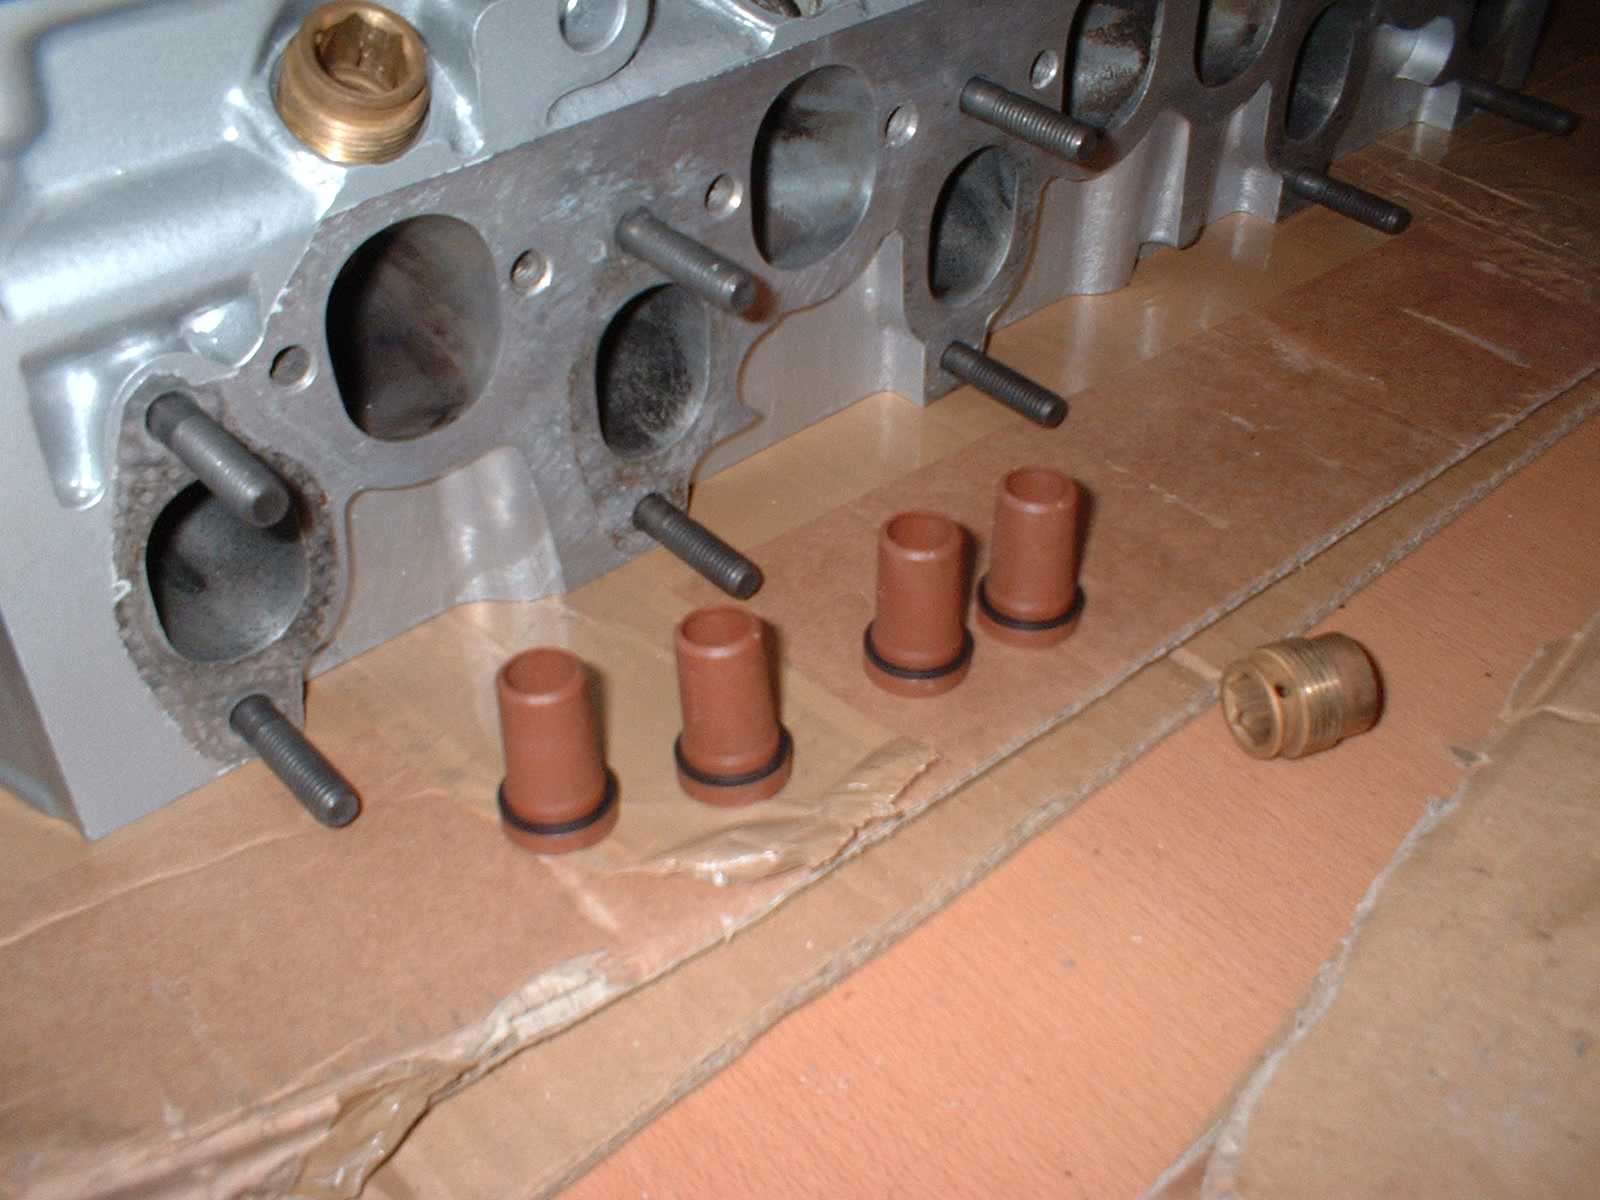
These are the new injector shrouds and seals.
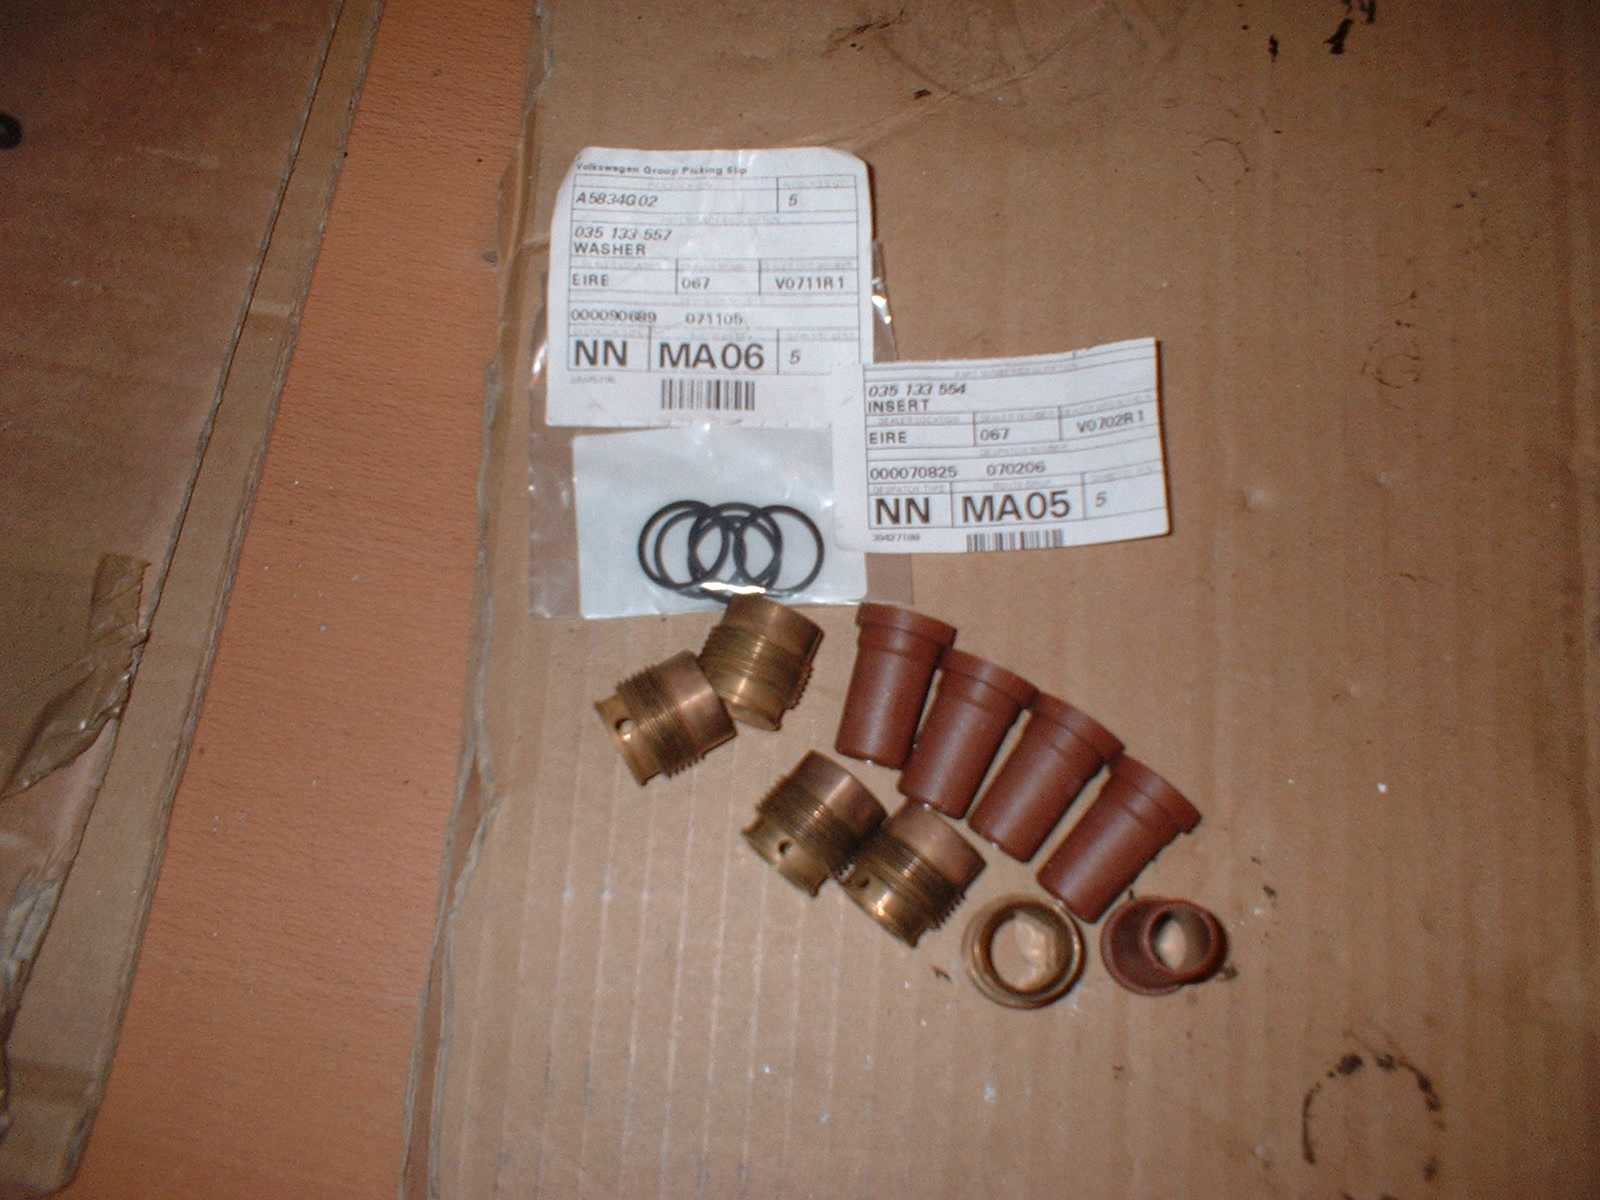
Drops in place so.

The seal goes on the head face of the shroud
And the shroud clips onto place on the injector socket
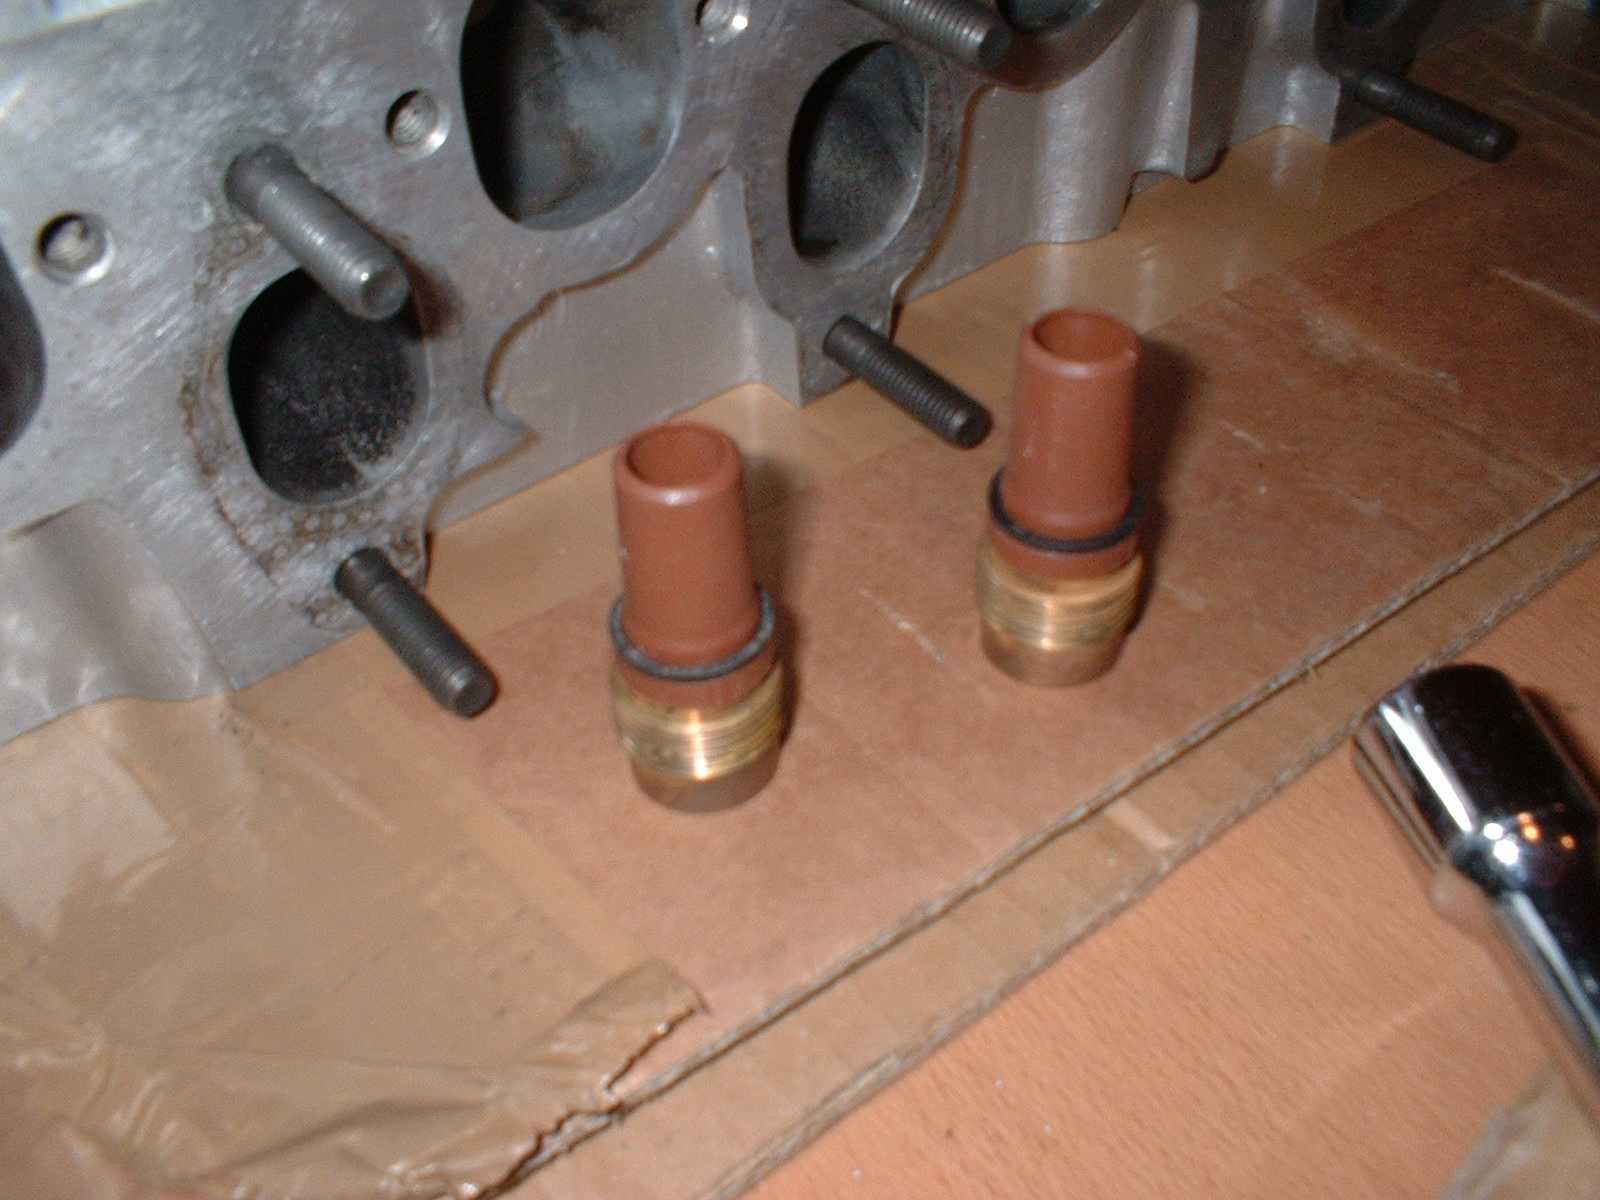
Fitted to the head. I didn't do these up to tight, I reckoned that just a bit over handtight should do it.
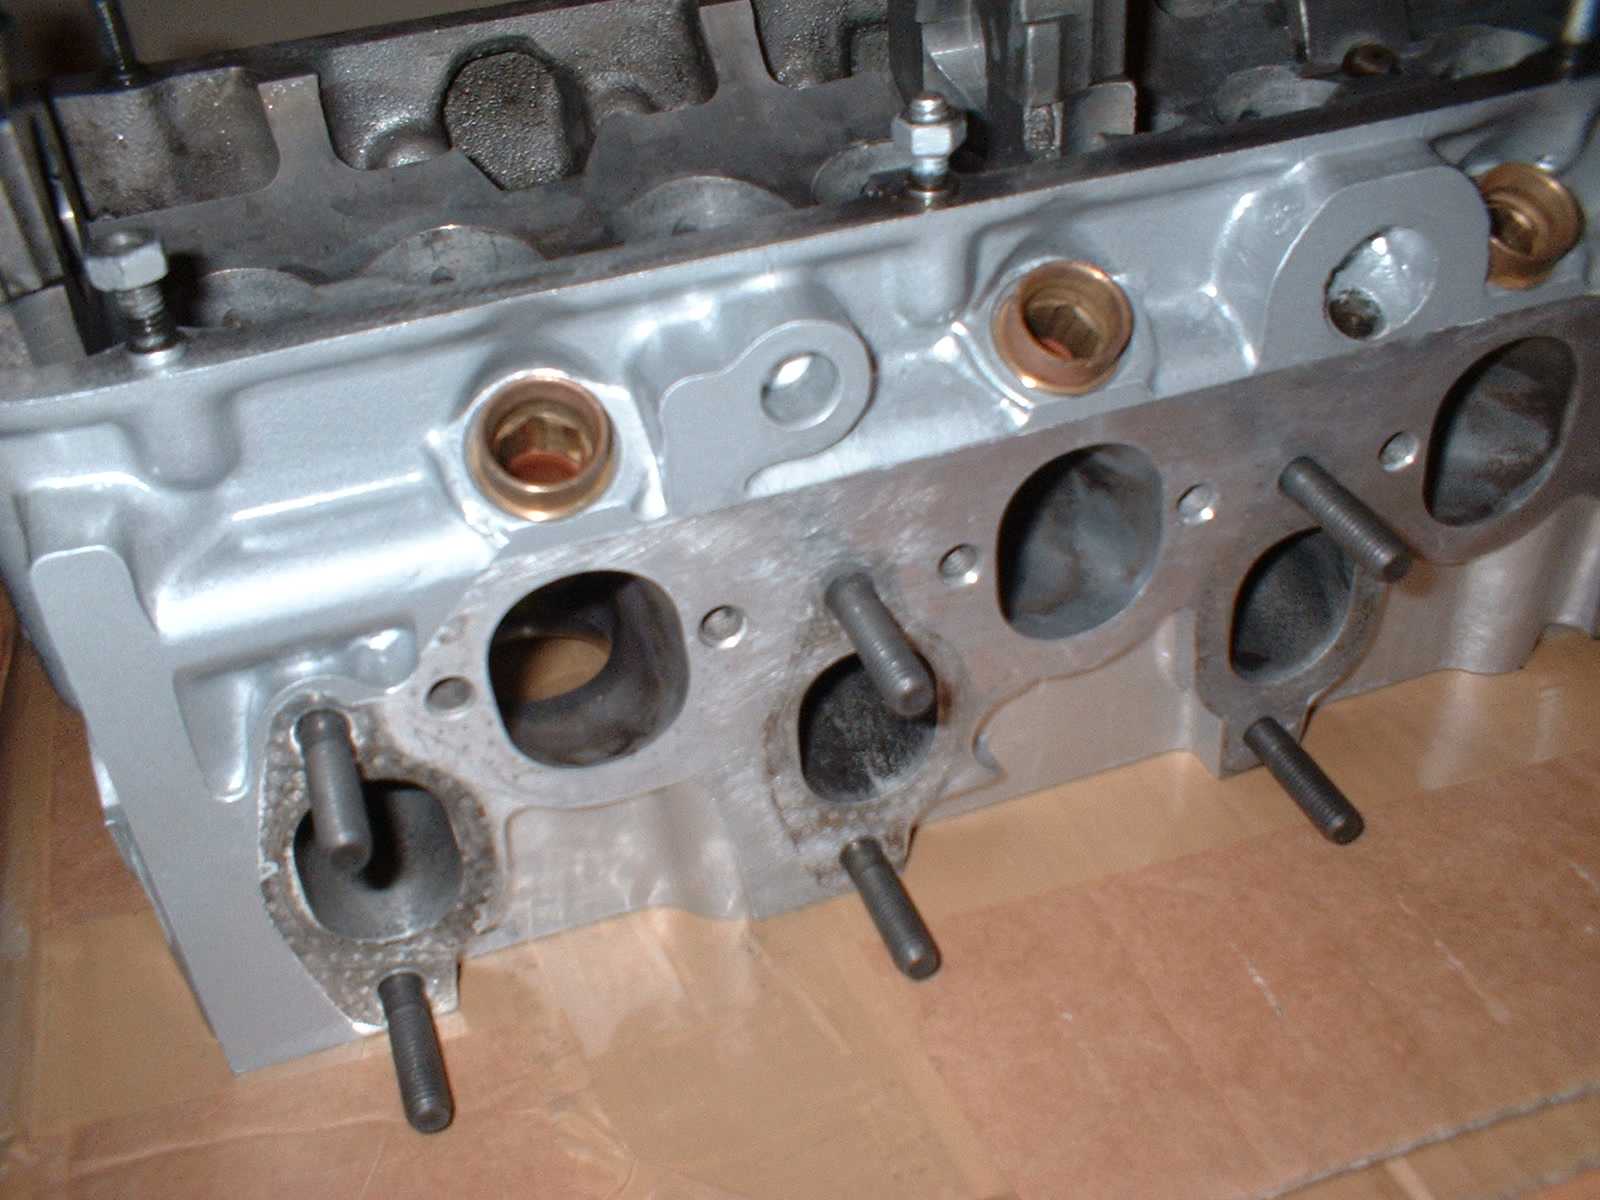
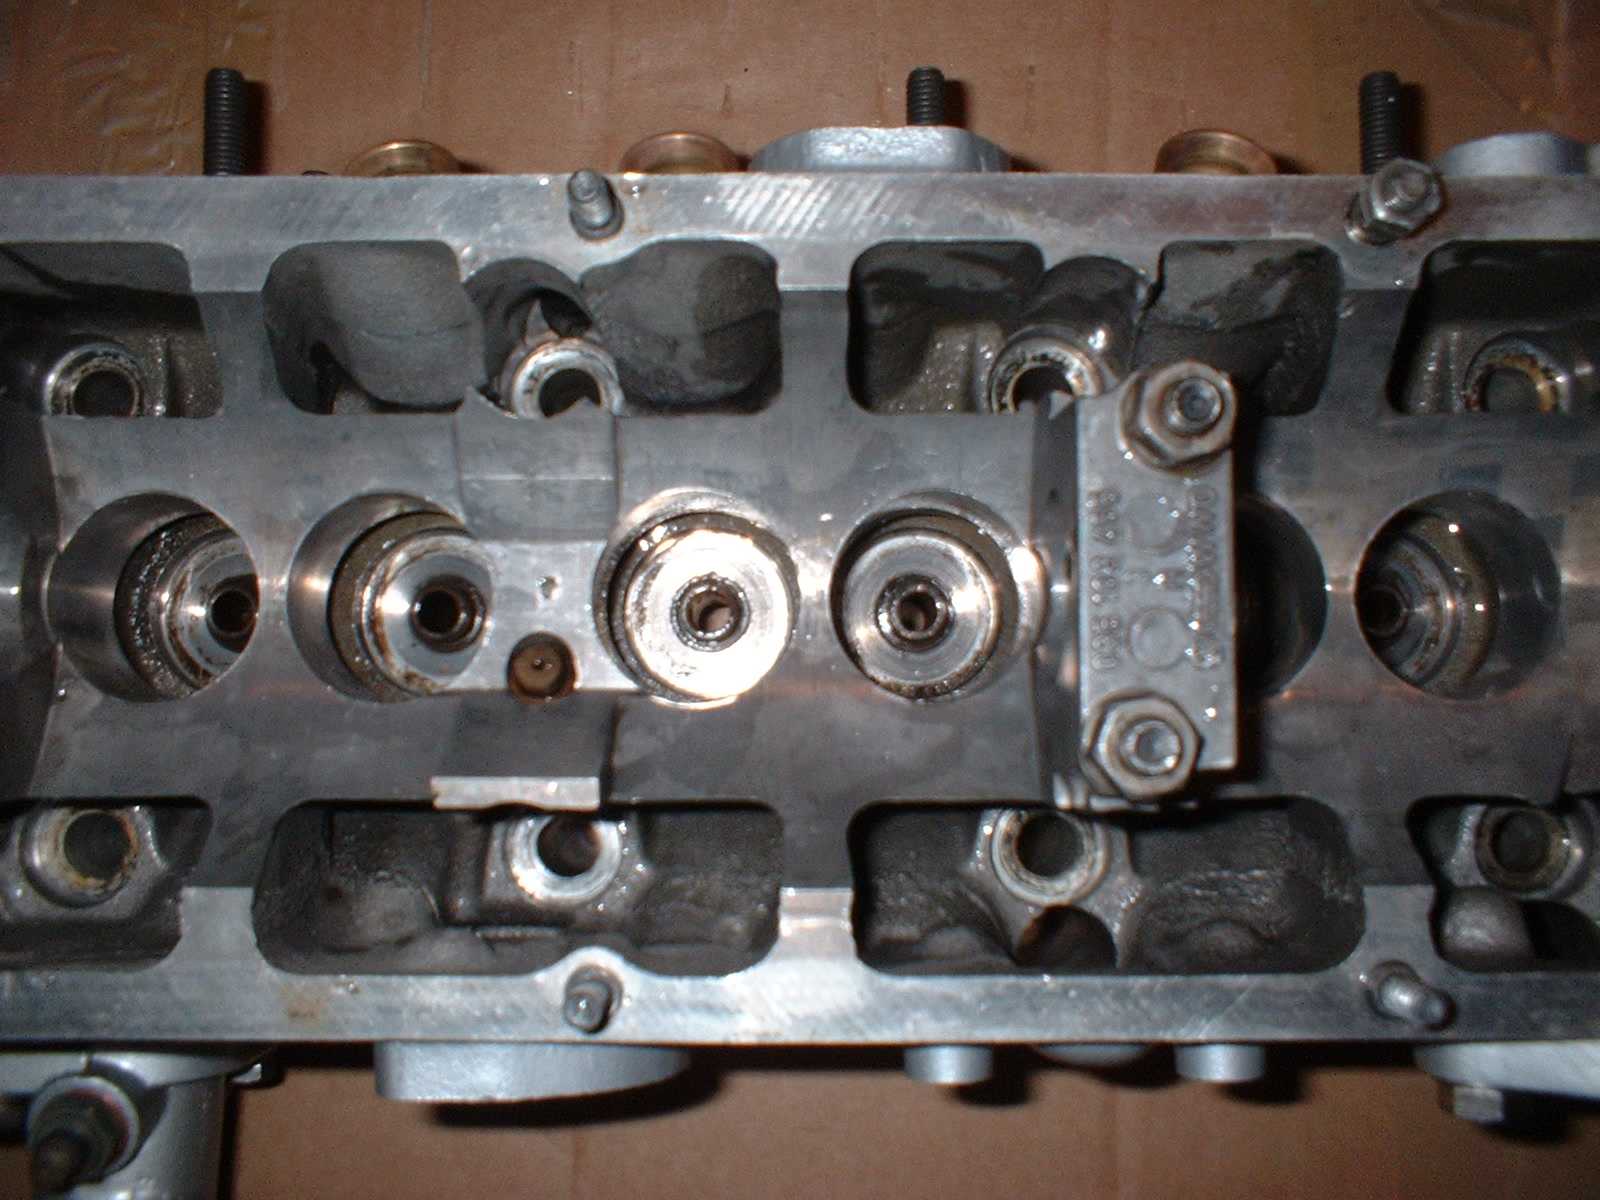
This is the new air supply pipe for the injector tip cooling system. Note the drilling through the bottom end of it, it needs to be aligned with the drillings in the head.
Located into the bore so.

And gently tapped into position. If you can blow through it, you're ok.
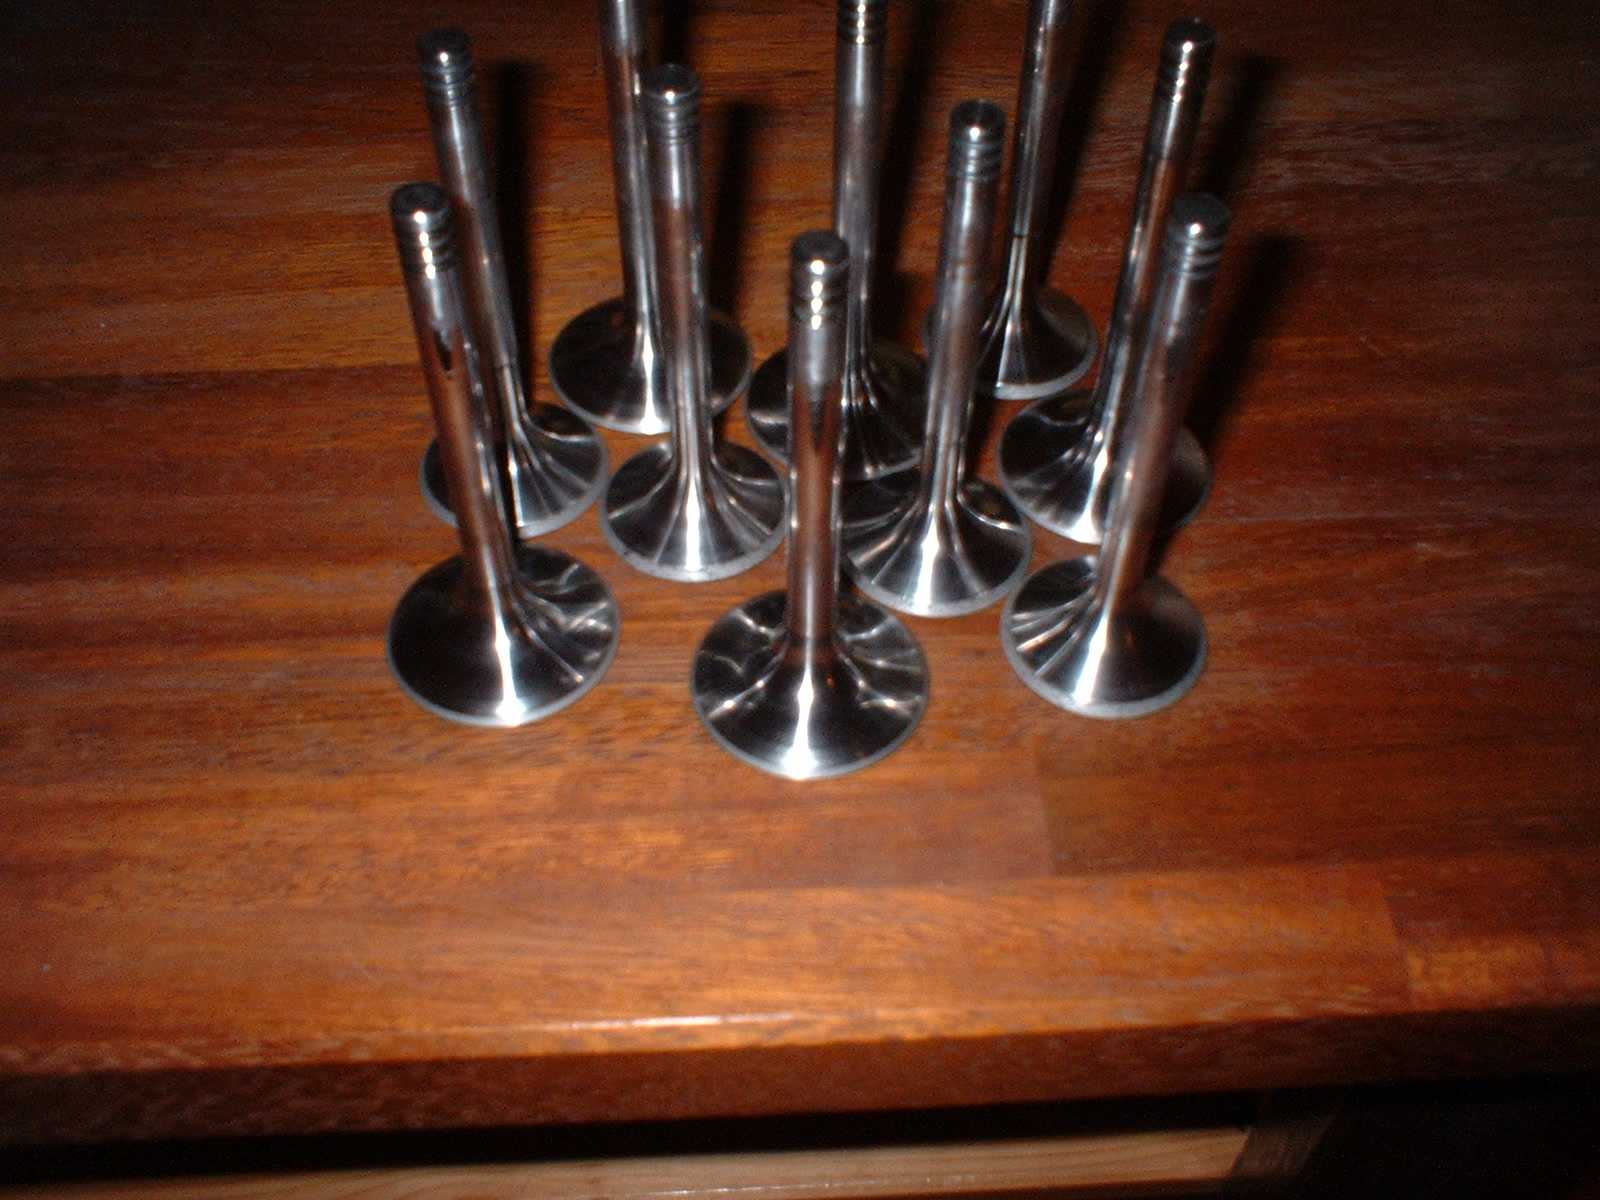
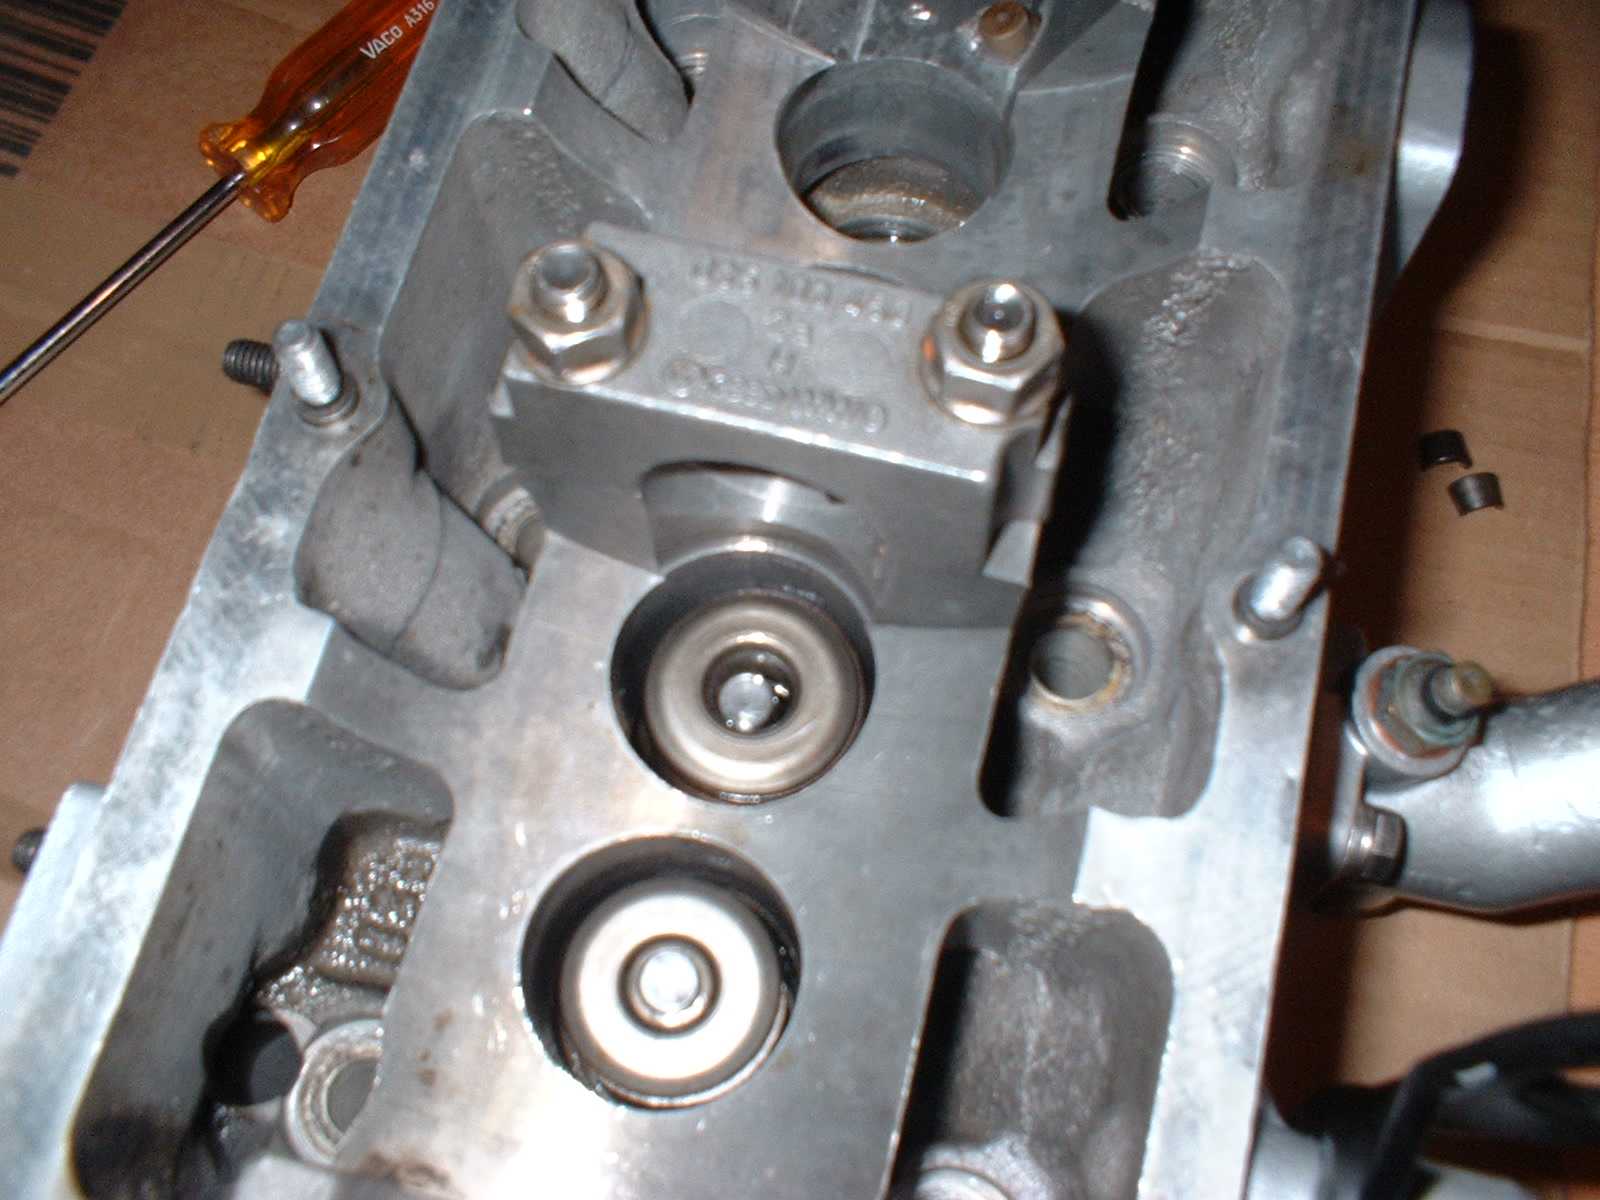
I gave the valves a final polish before fitting them.
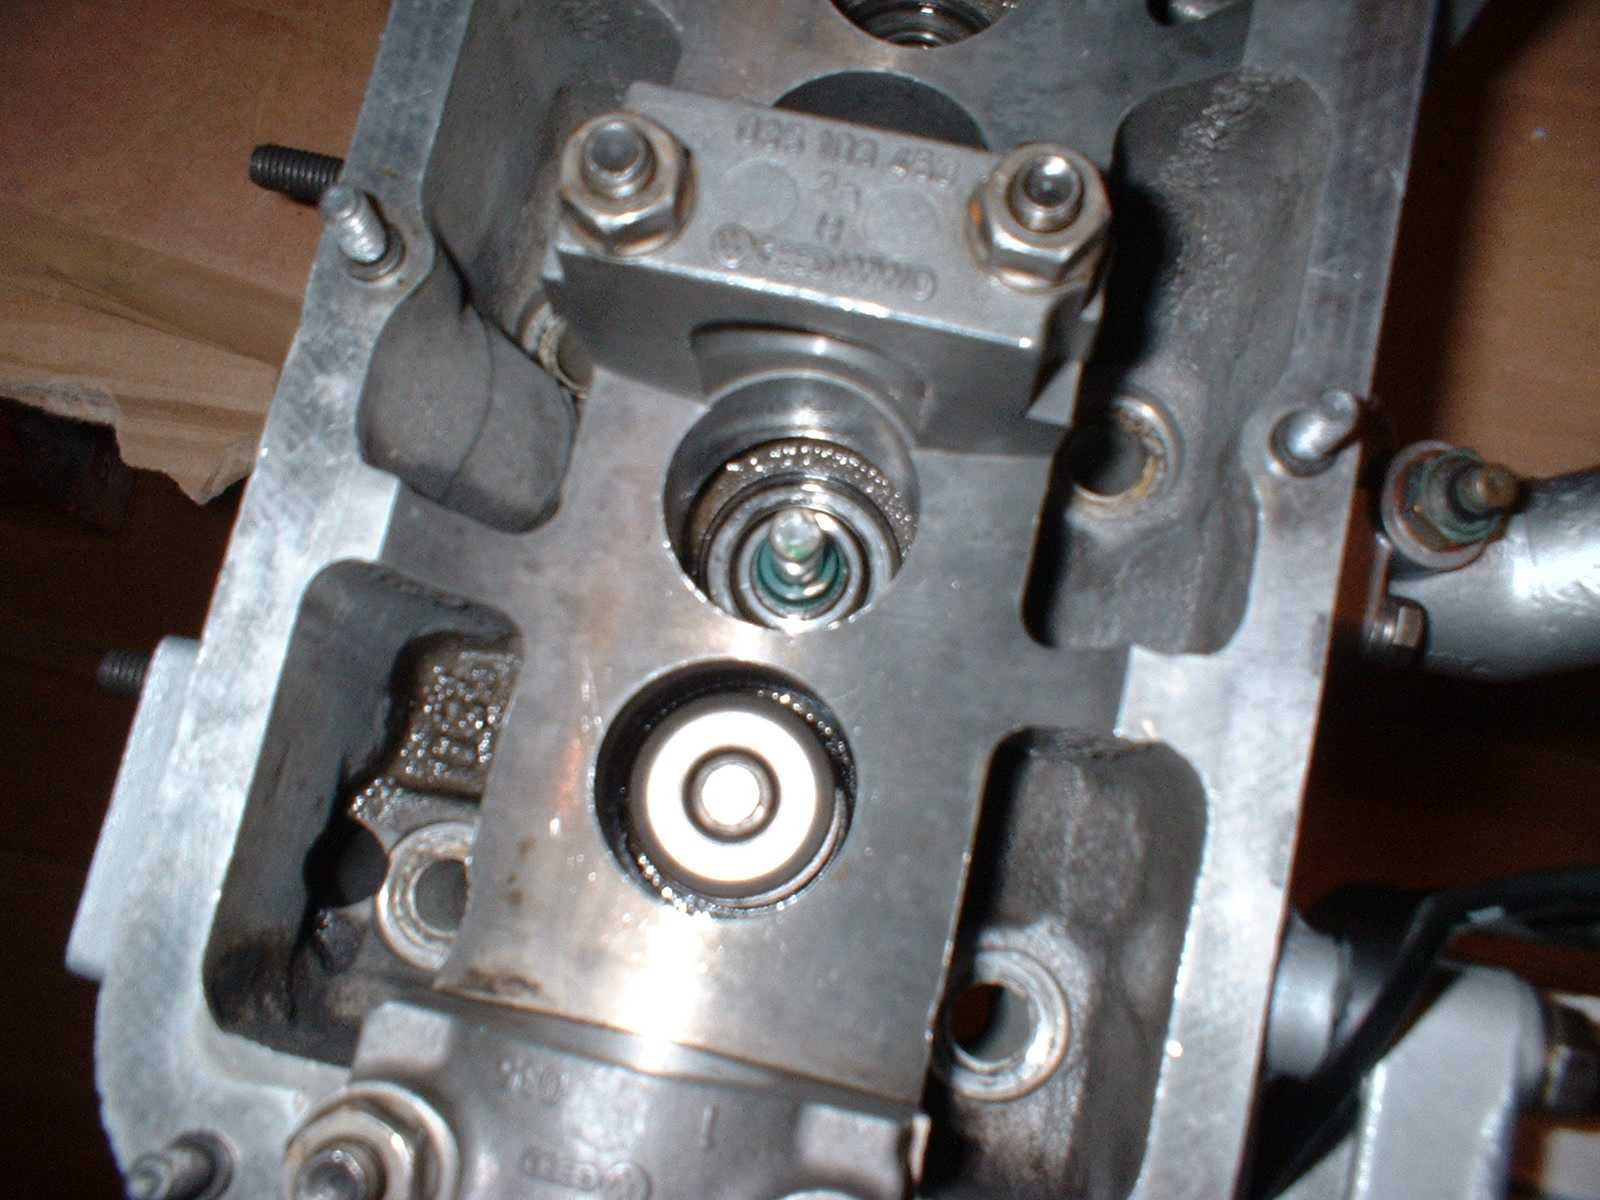
Here's one fitted, with springs as well.

I used a 7/16" deep socket on a short extension bar to push the new valve stem oil seals home. Don't forget to fit your valve spring seats BEFORE doing this, or you will have to buy new seals and replace them again....
1. Clean and fit the valve seat.
2. Insert the valve from underneath.
3. Fit the clear plastic tube supplied with the stem seals to the stem of the valve.
4. Spray with WD40 to lubricate.
5. Push the valve stem oil seal onto the stem of the valve. Make sure that you get this the right way up.
6. Push the seal down gently with the socket / extesion bar.
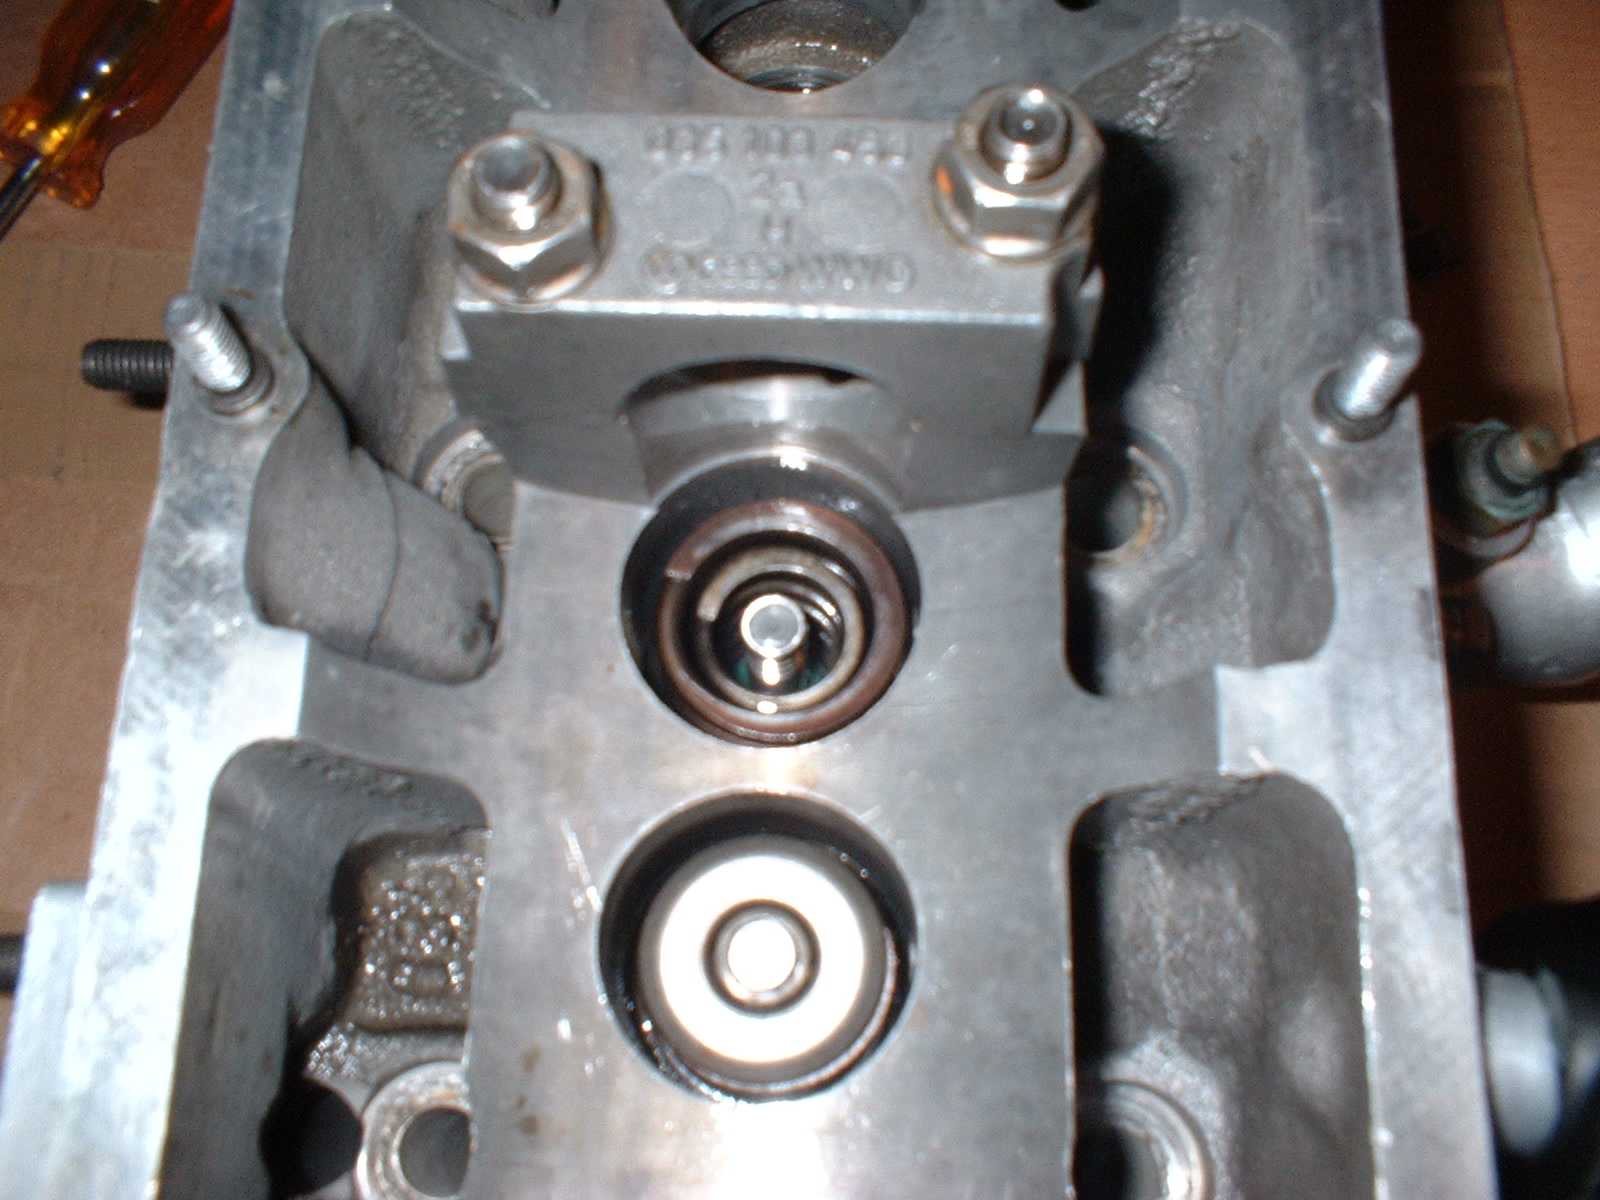
And this is what you will see
Drop the valve springs into situ. Quick squirt of WD40
Then the spring cap.
Compress the valve springs using the valve spring compressor that you bought / borrowed / hired / stole....... Then drop the collets into position. Make sure that they are correctly aligned. Release the valve spring compressor carefully, and check that the collets are in the correct location.
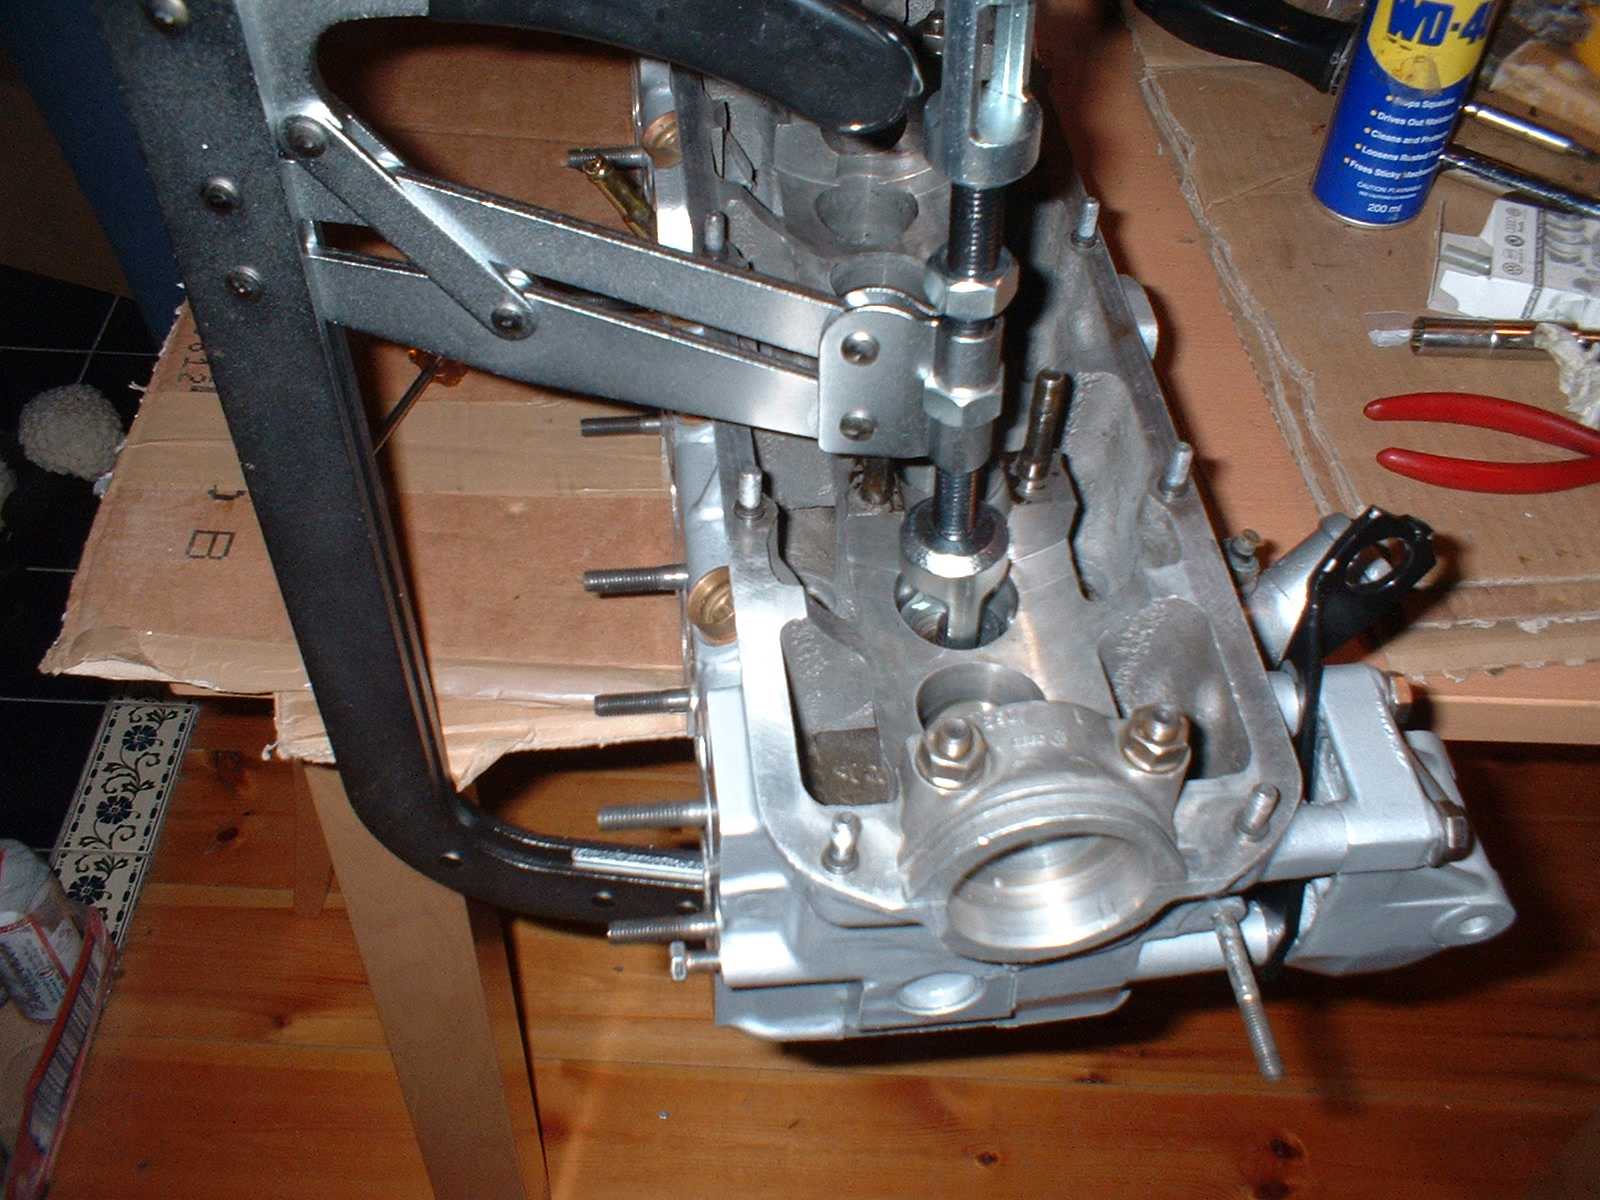
It should look like this
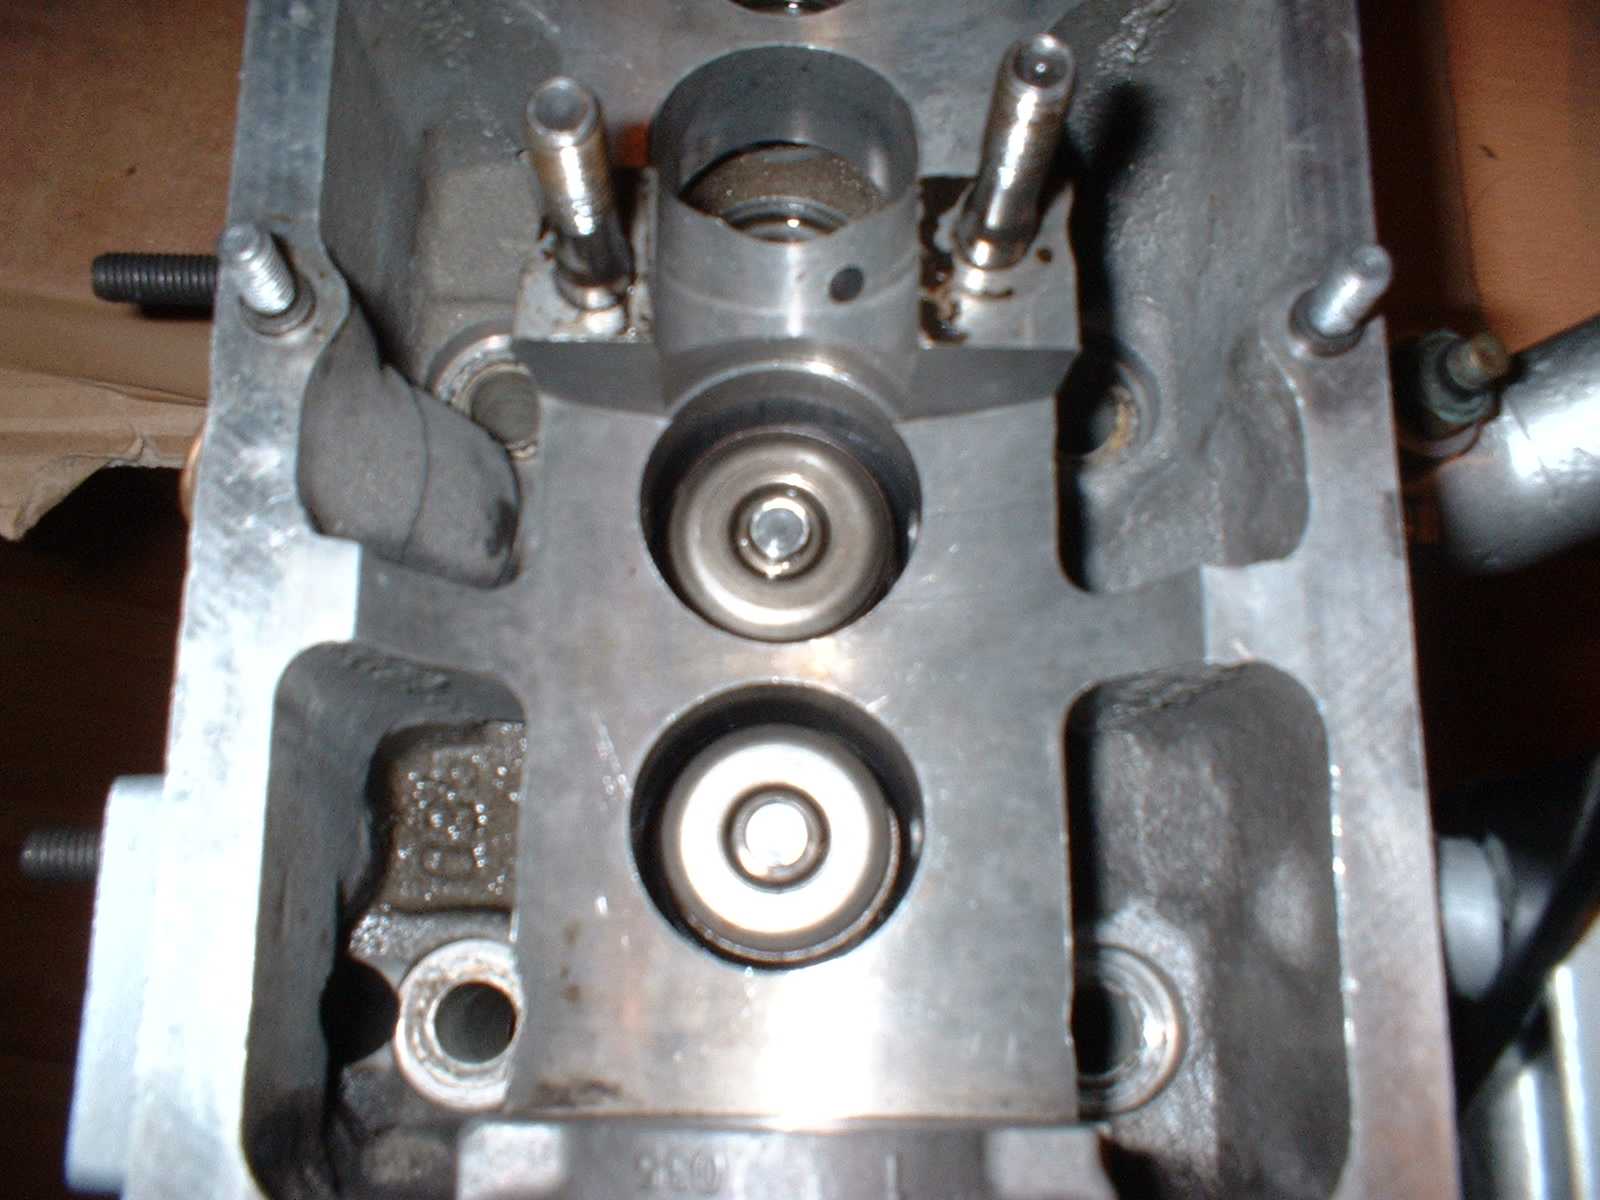
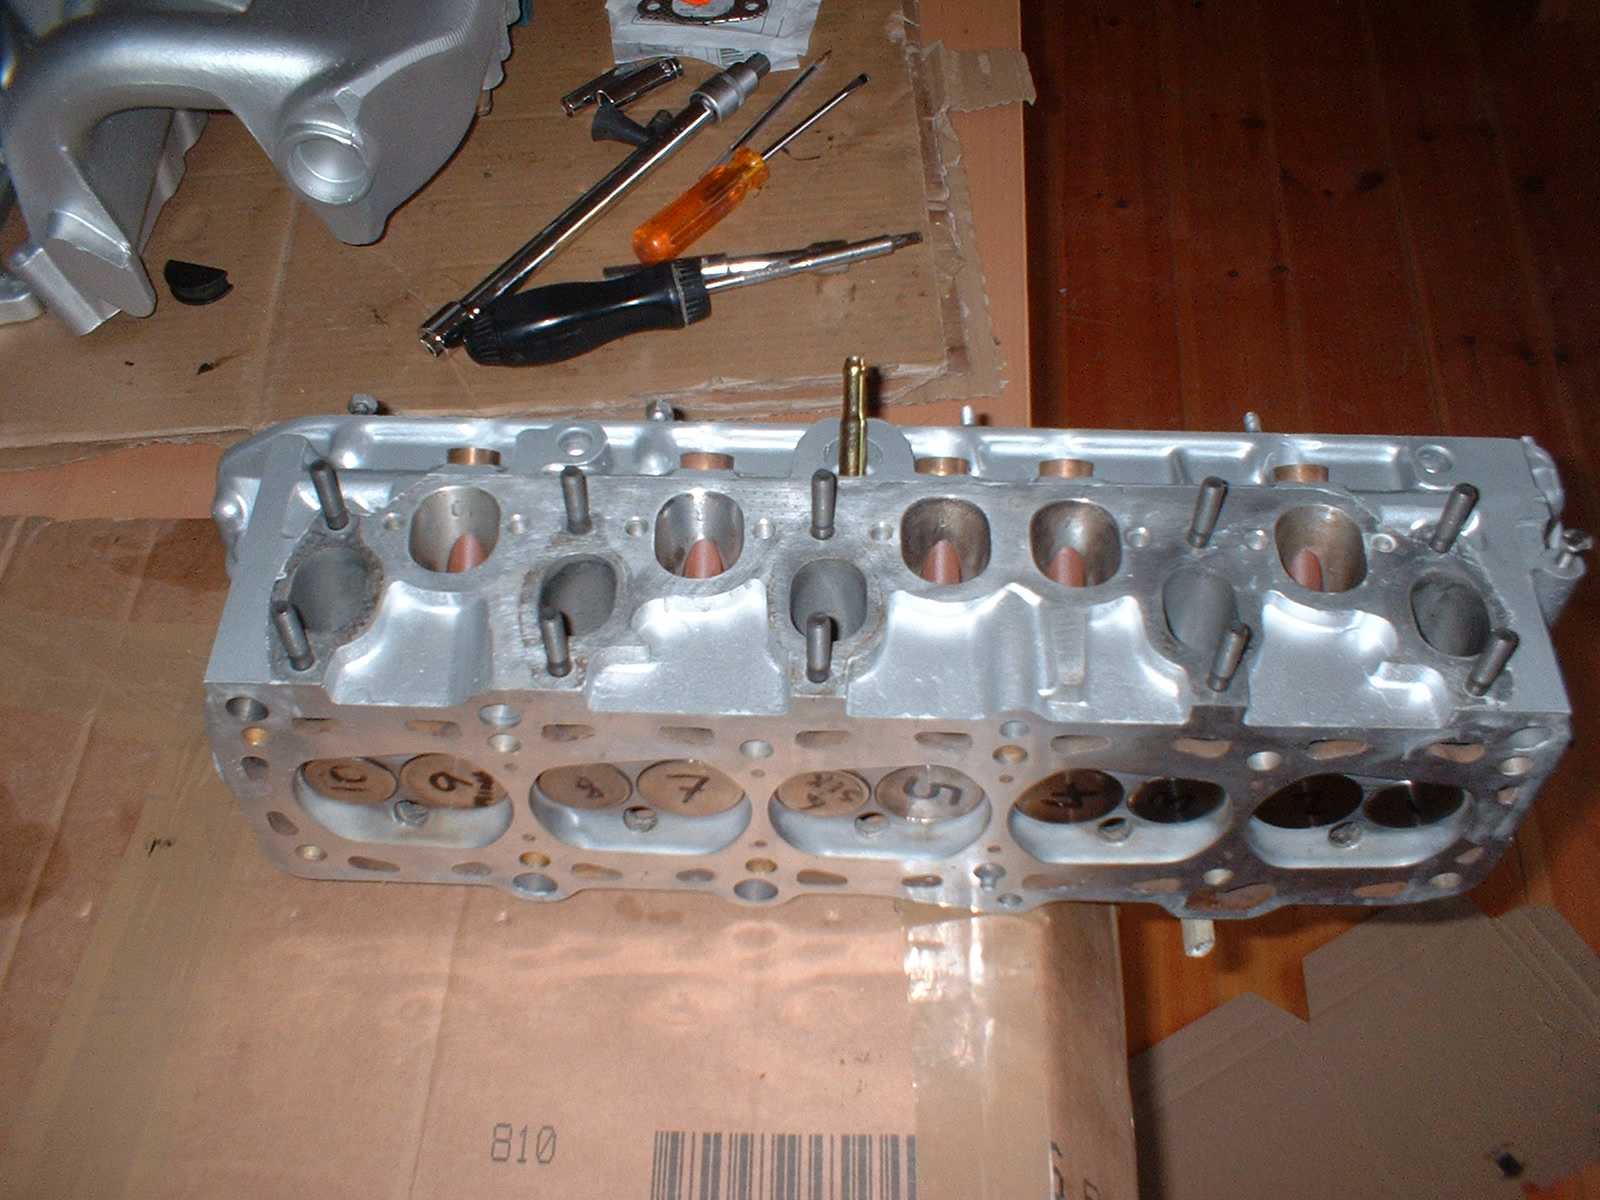
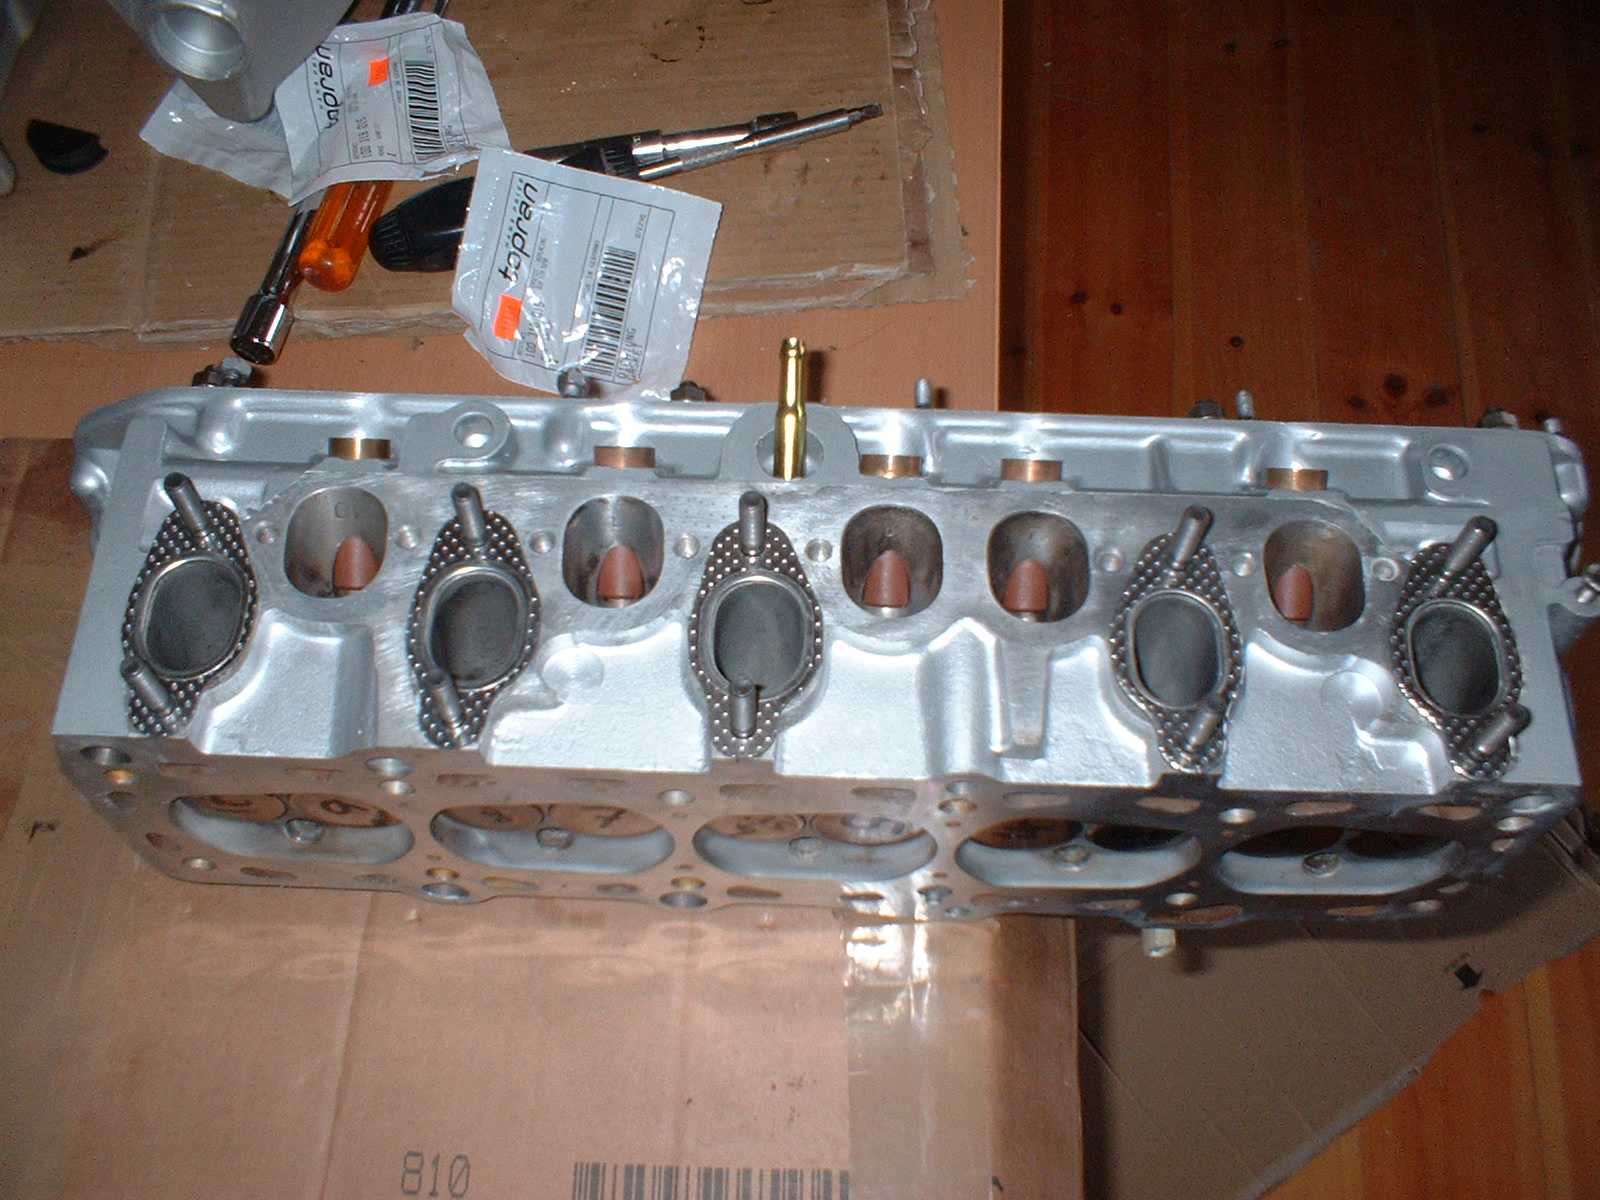
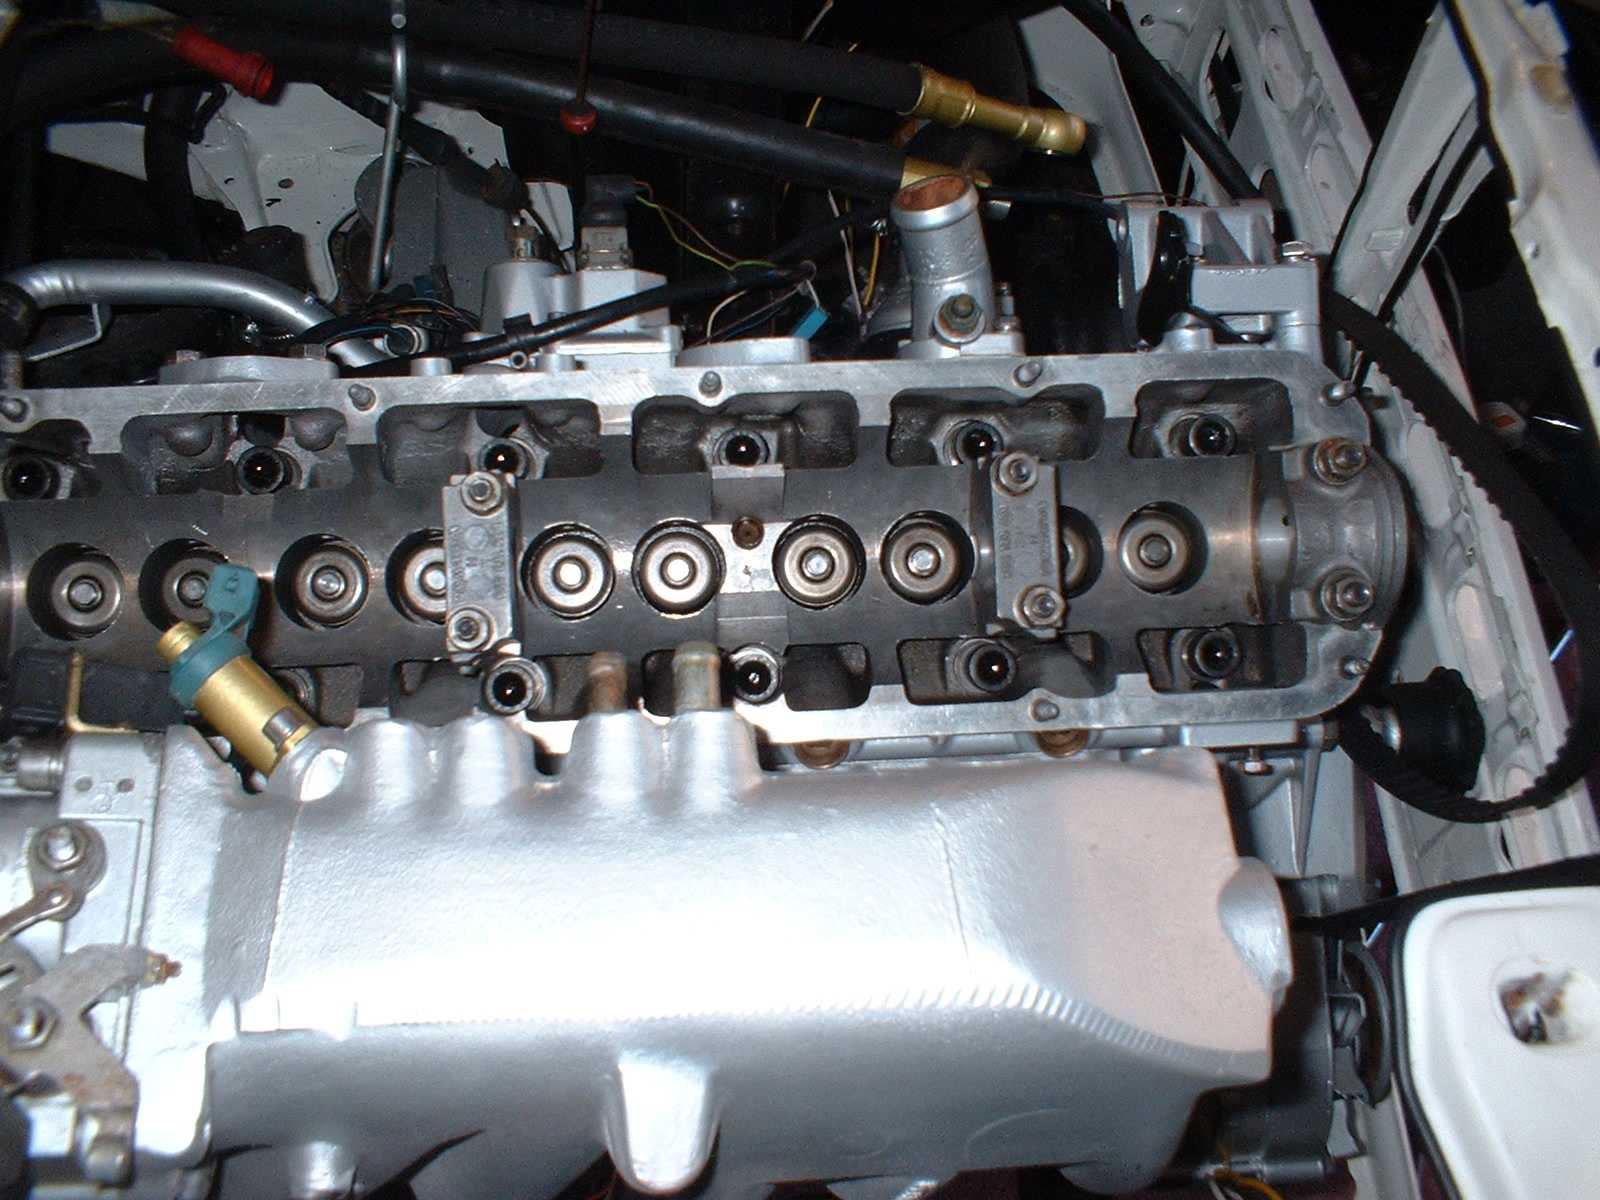
And here is the head with all ten valves fitted.
 I forgot to clean off the marker pen..... Still, it proves that I
put them all back in the right locations.....
I forgot to clean off the marker pen..... Still, it proves that I
put them all back in the right locations.....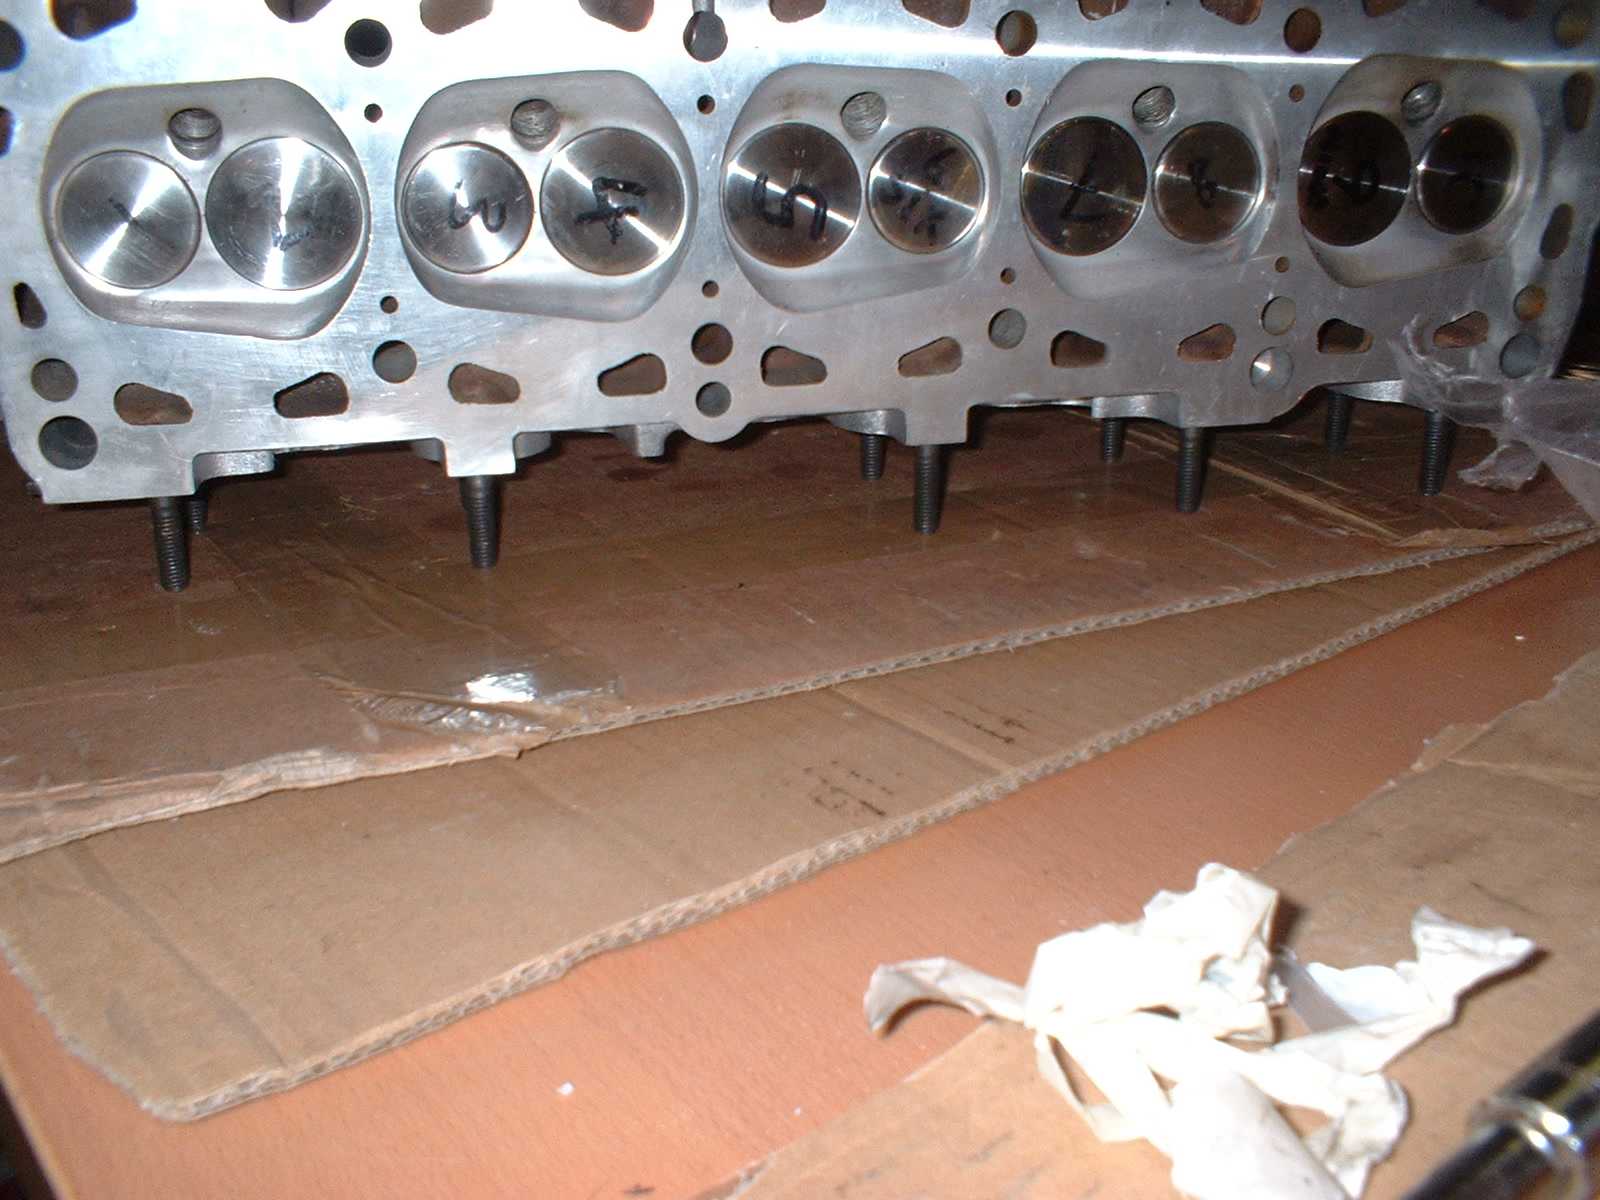
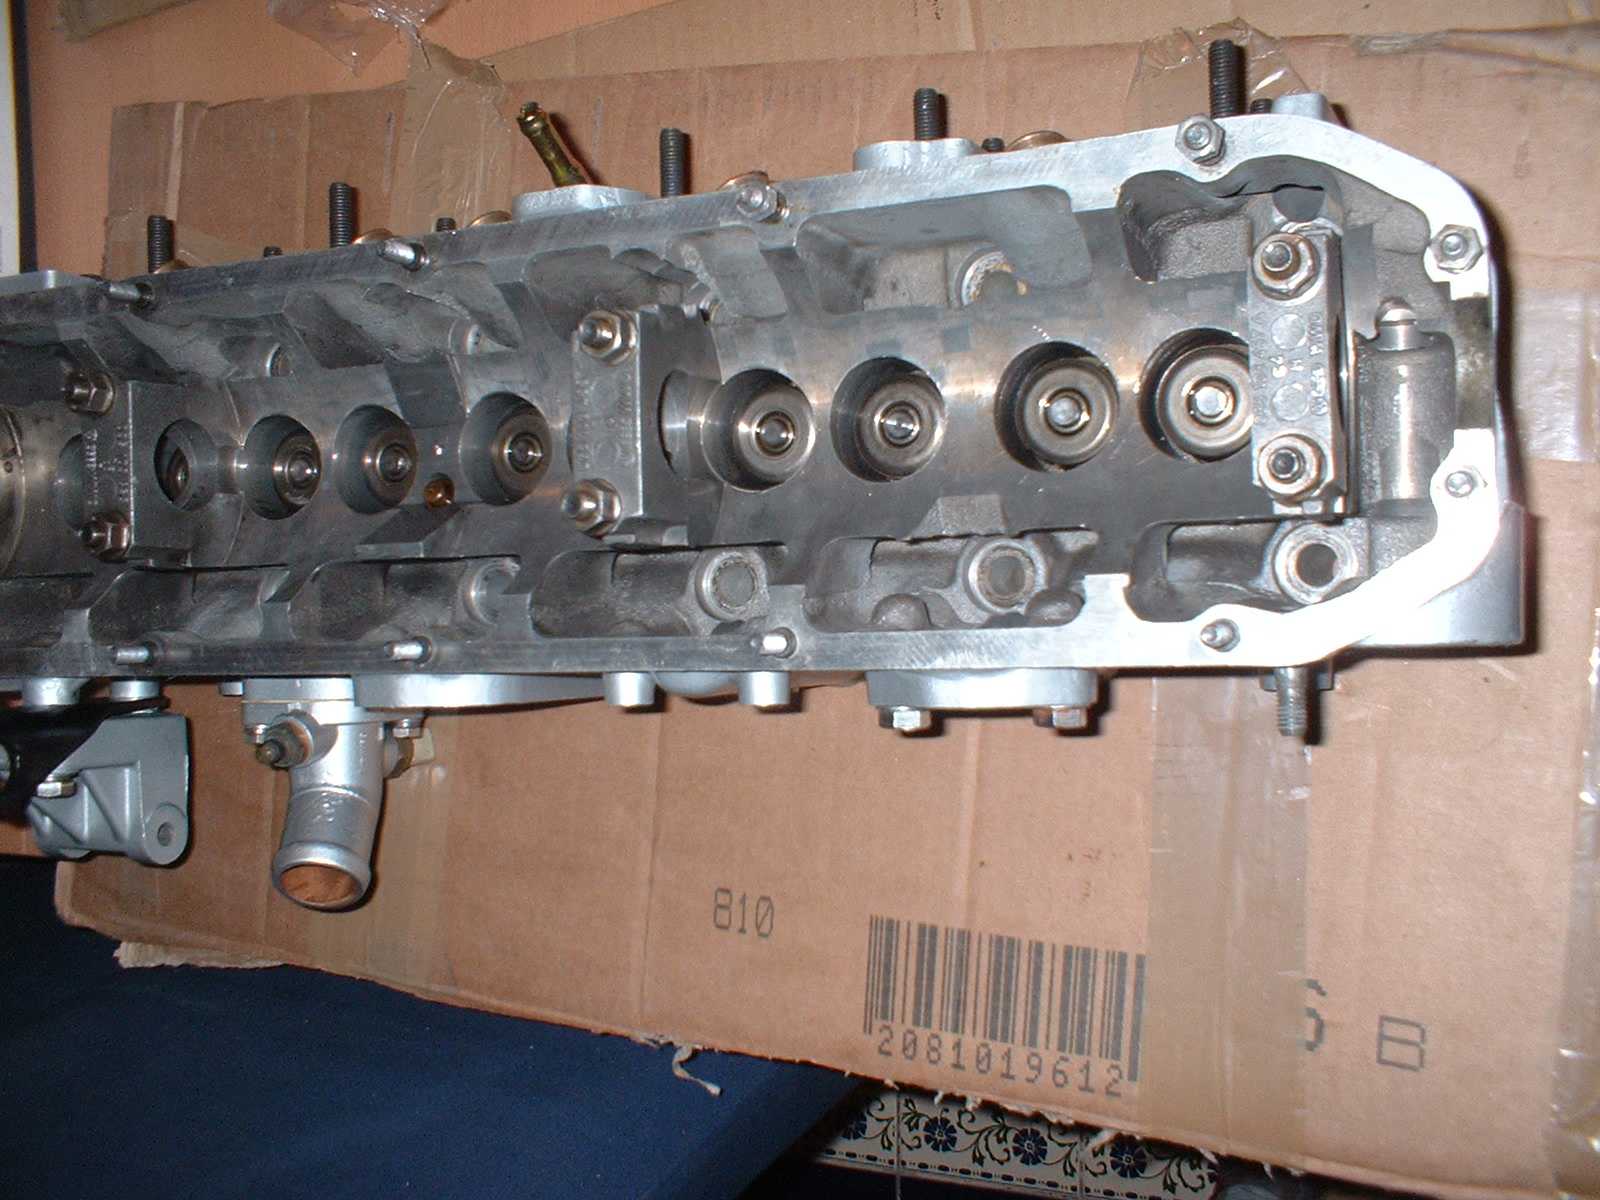
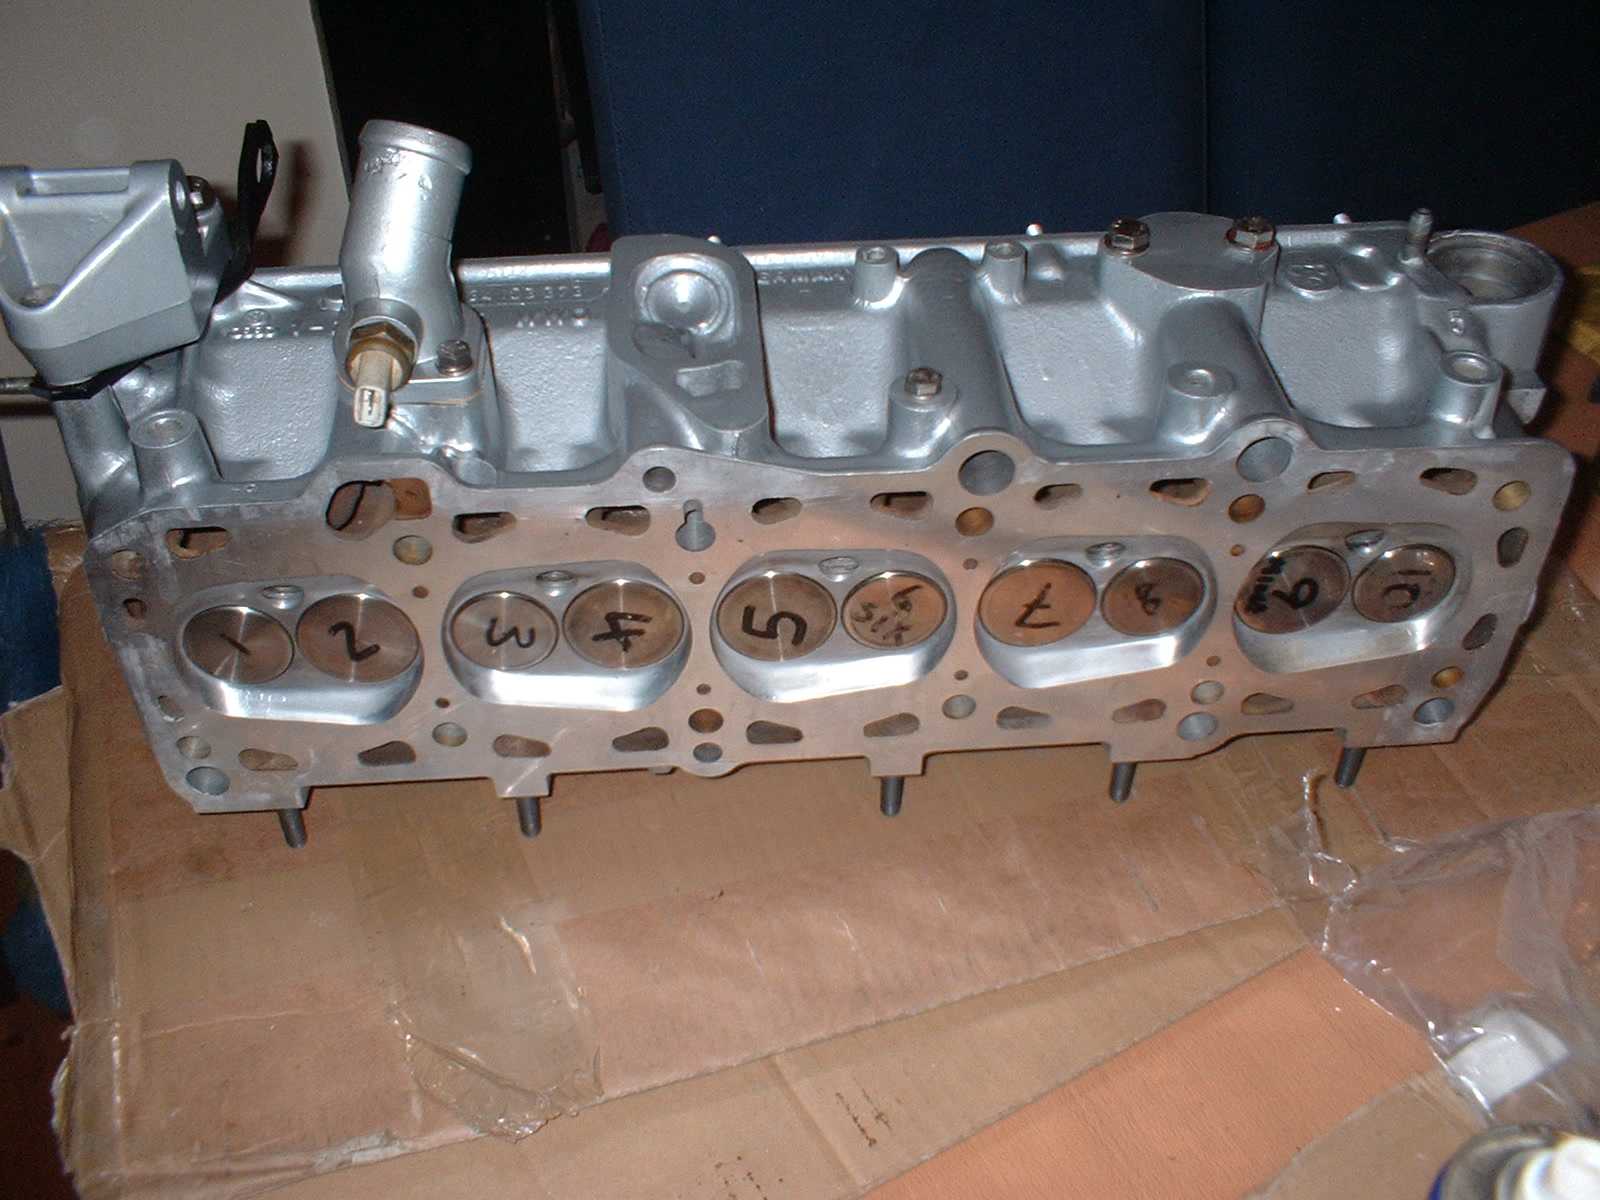
Looks more like a head now.
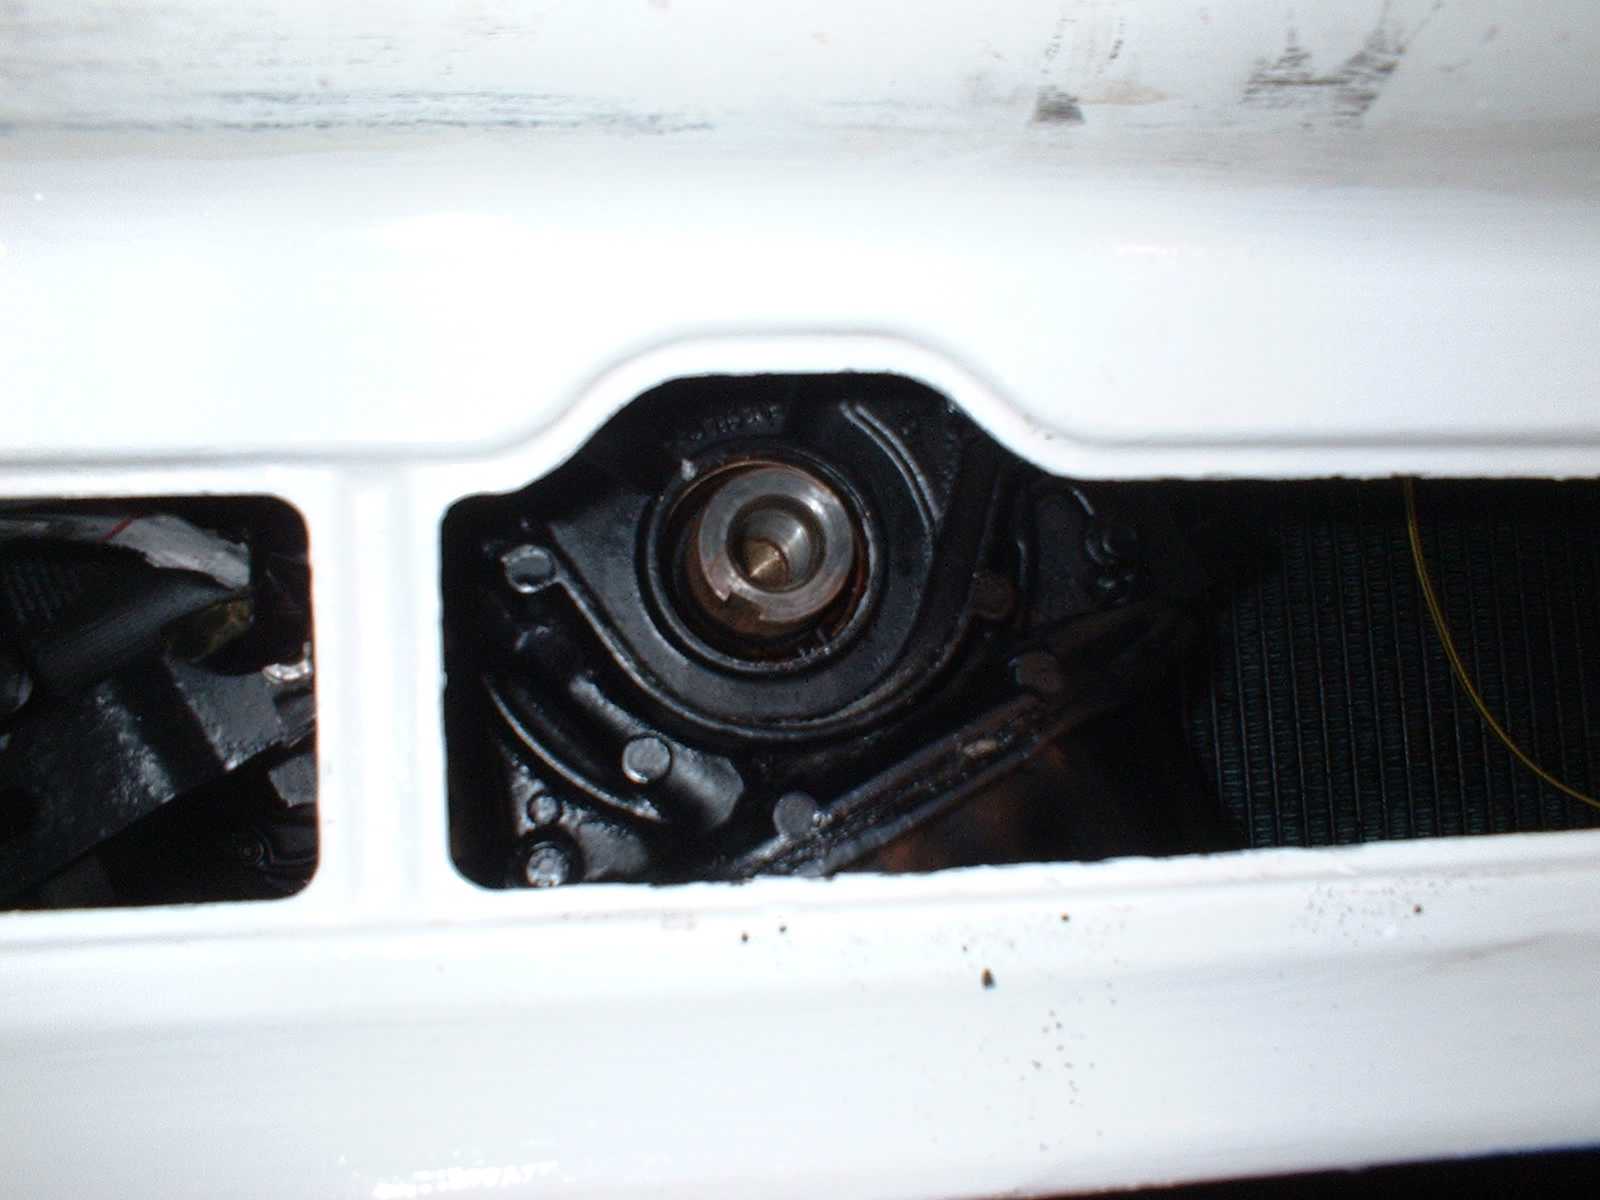
Here is the old crankshaft oil seal.
Mildly butchered with a cold chisel
Now removed. The old seal is on the right.....

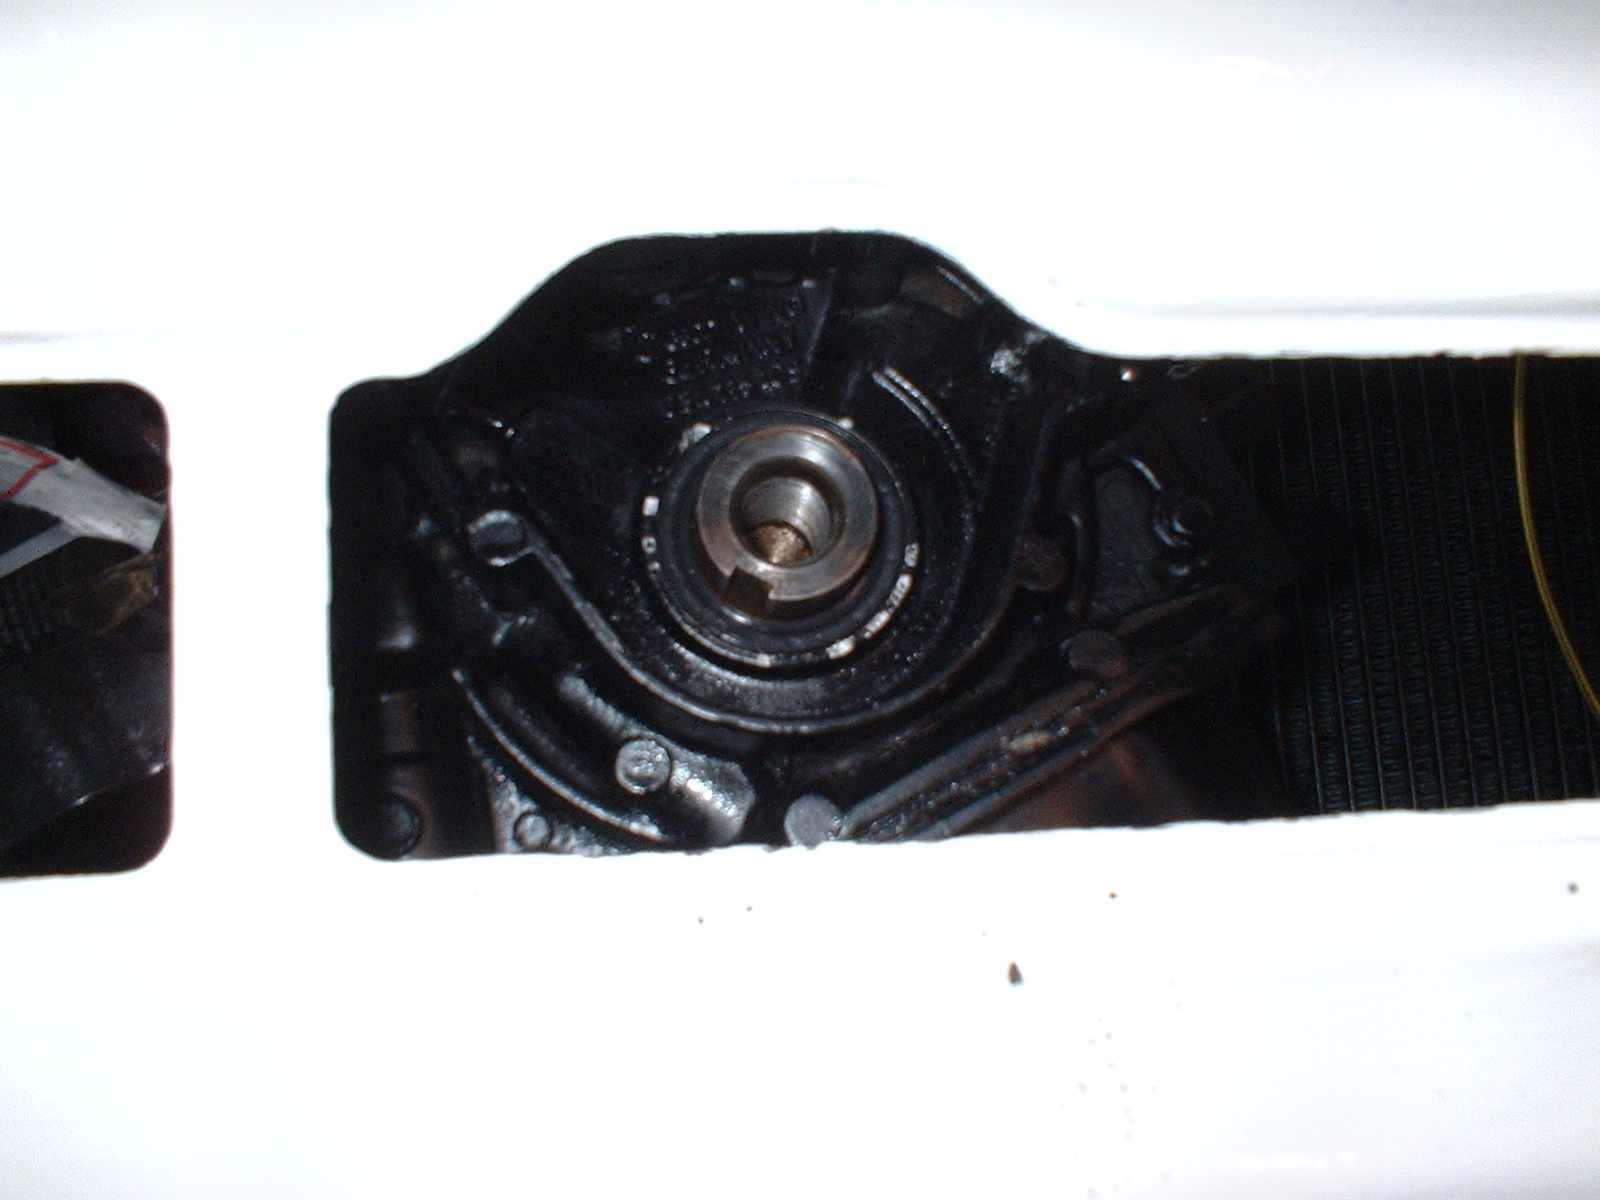
This is where the new seal goes
Now fitted and gently tapped home
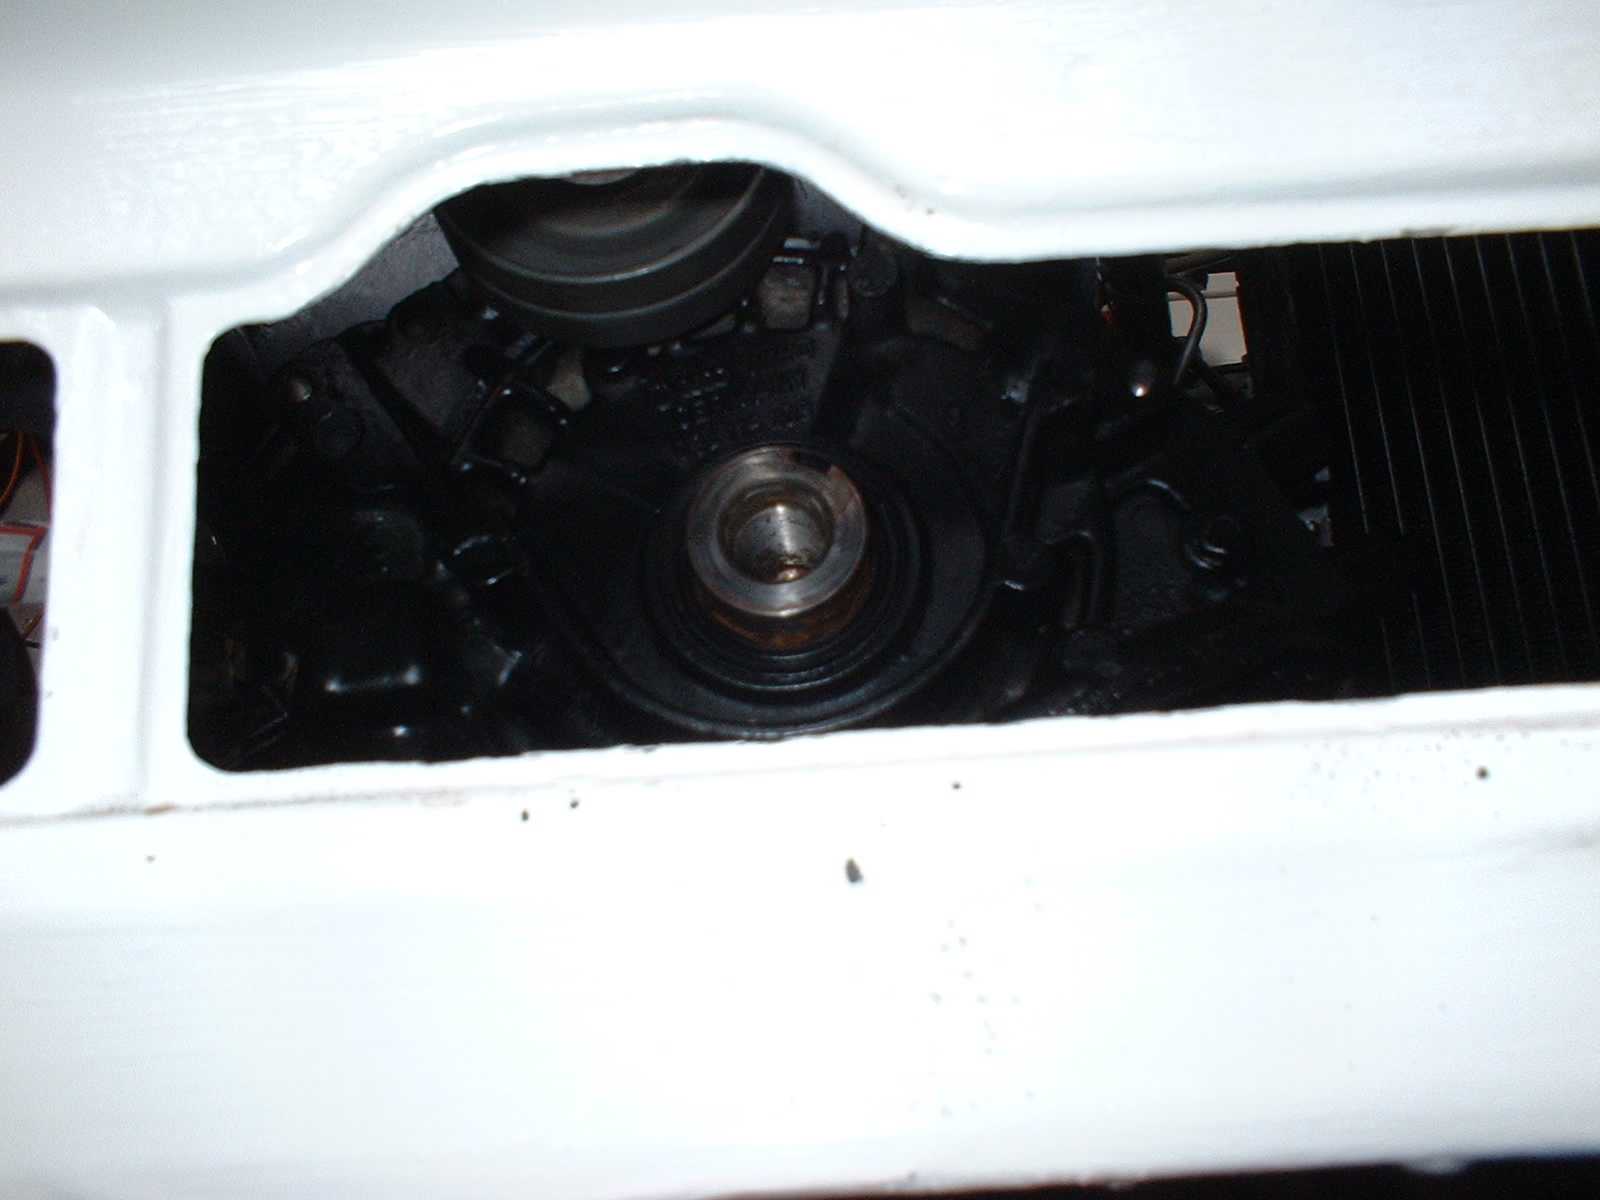
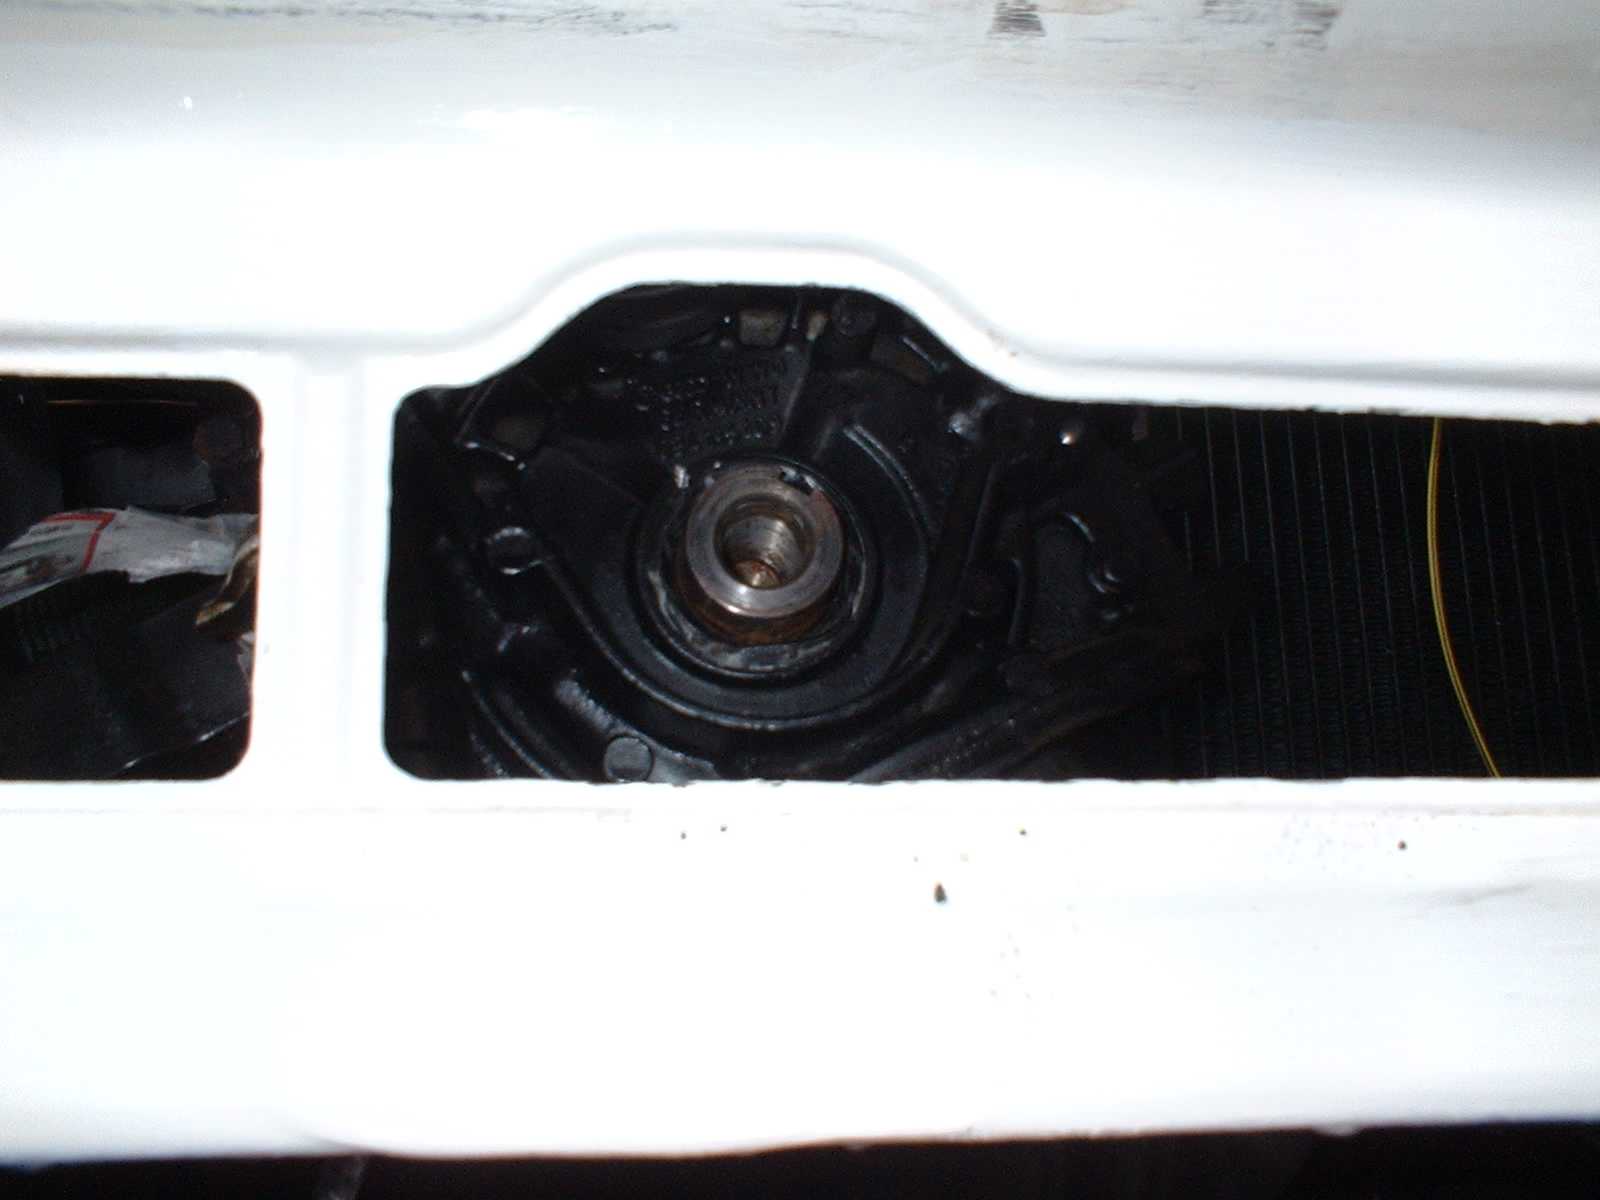
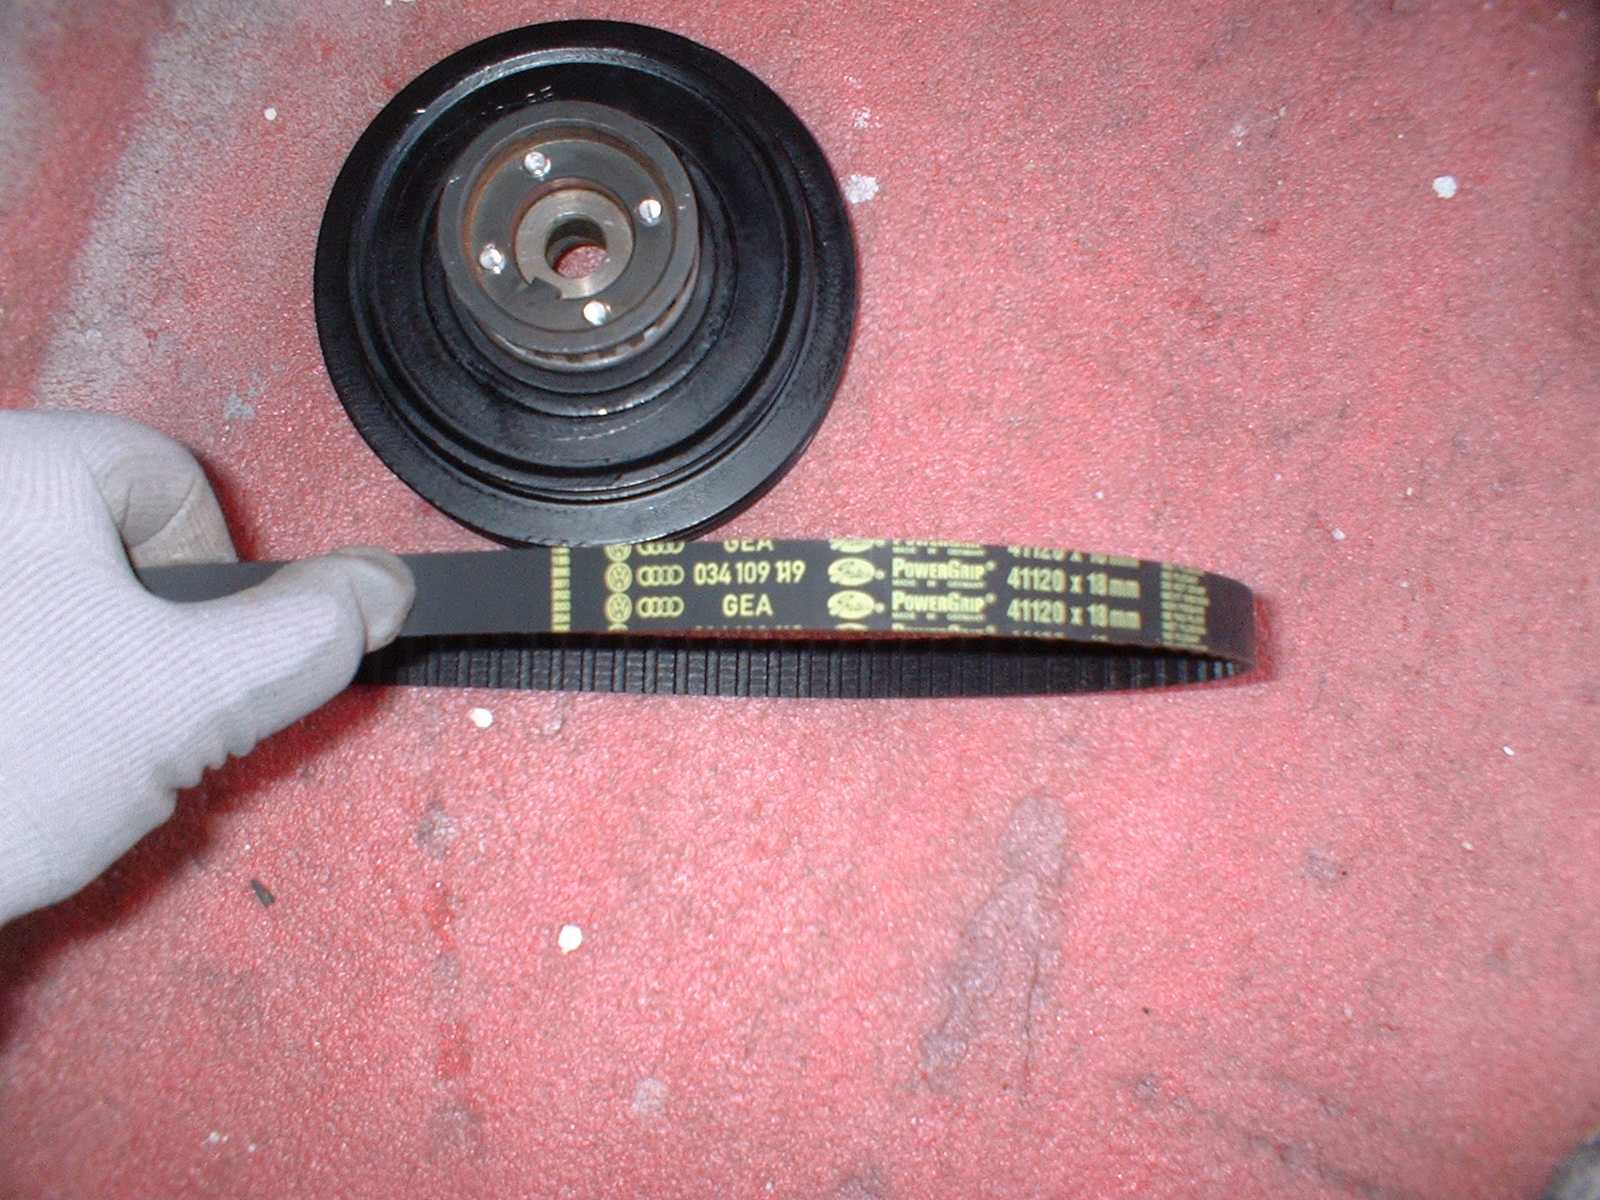
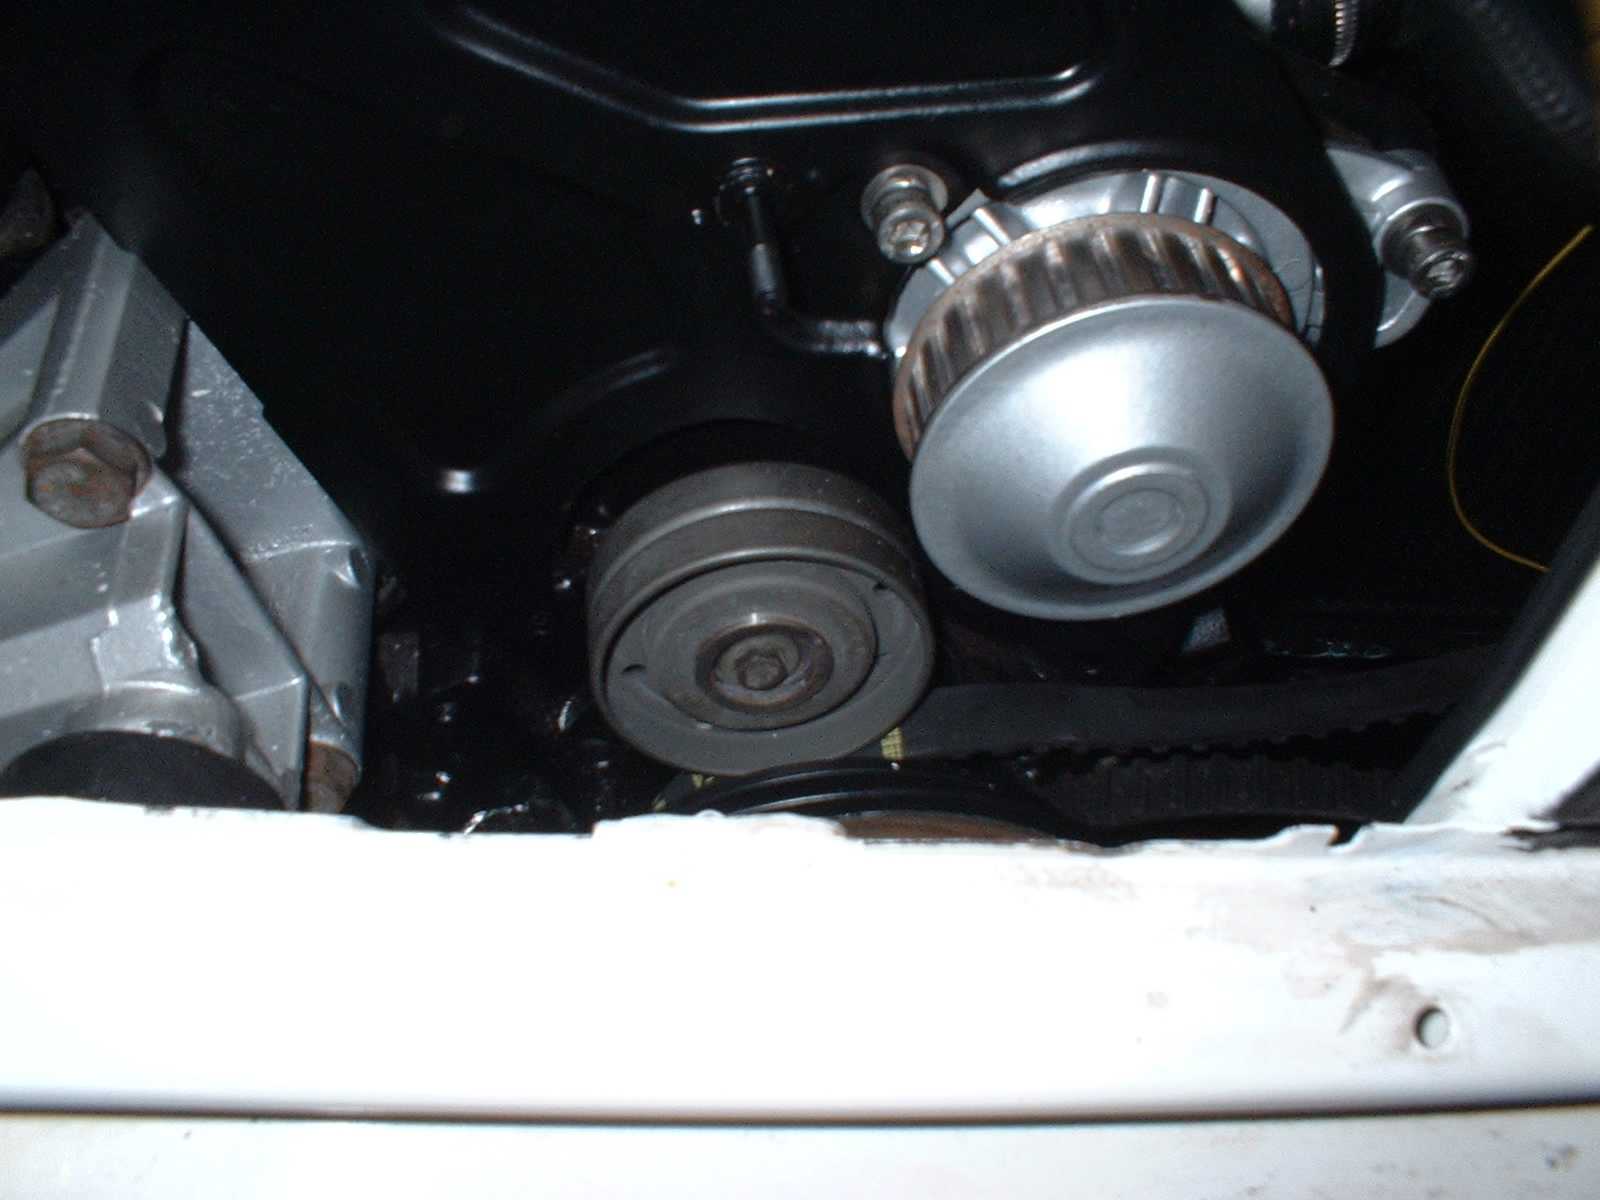
The crankshaft pulley and new cambelt

Audi use Gates as their OEM too....
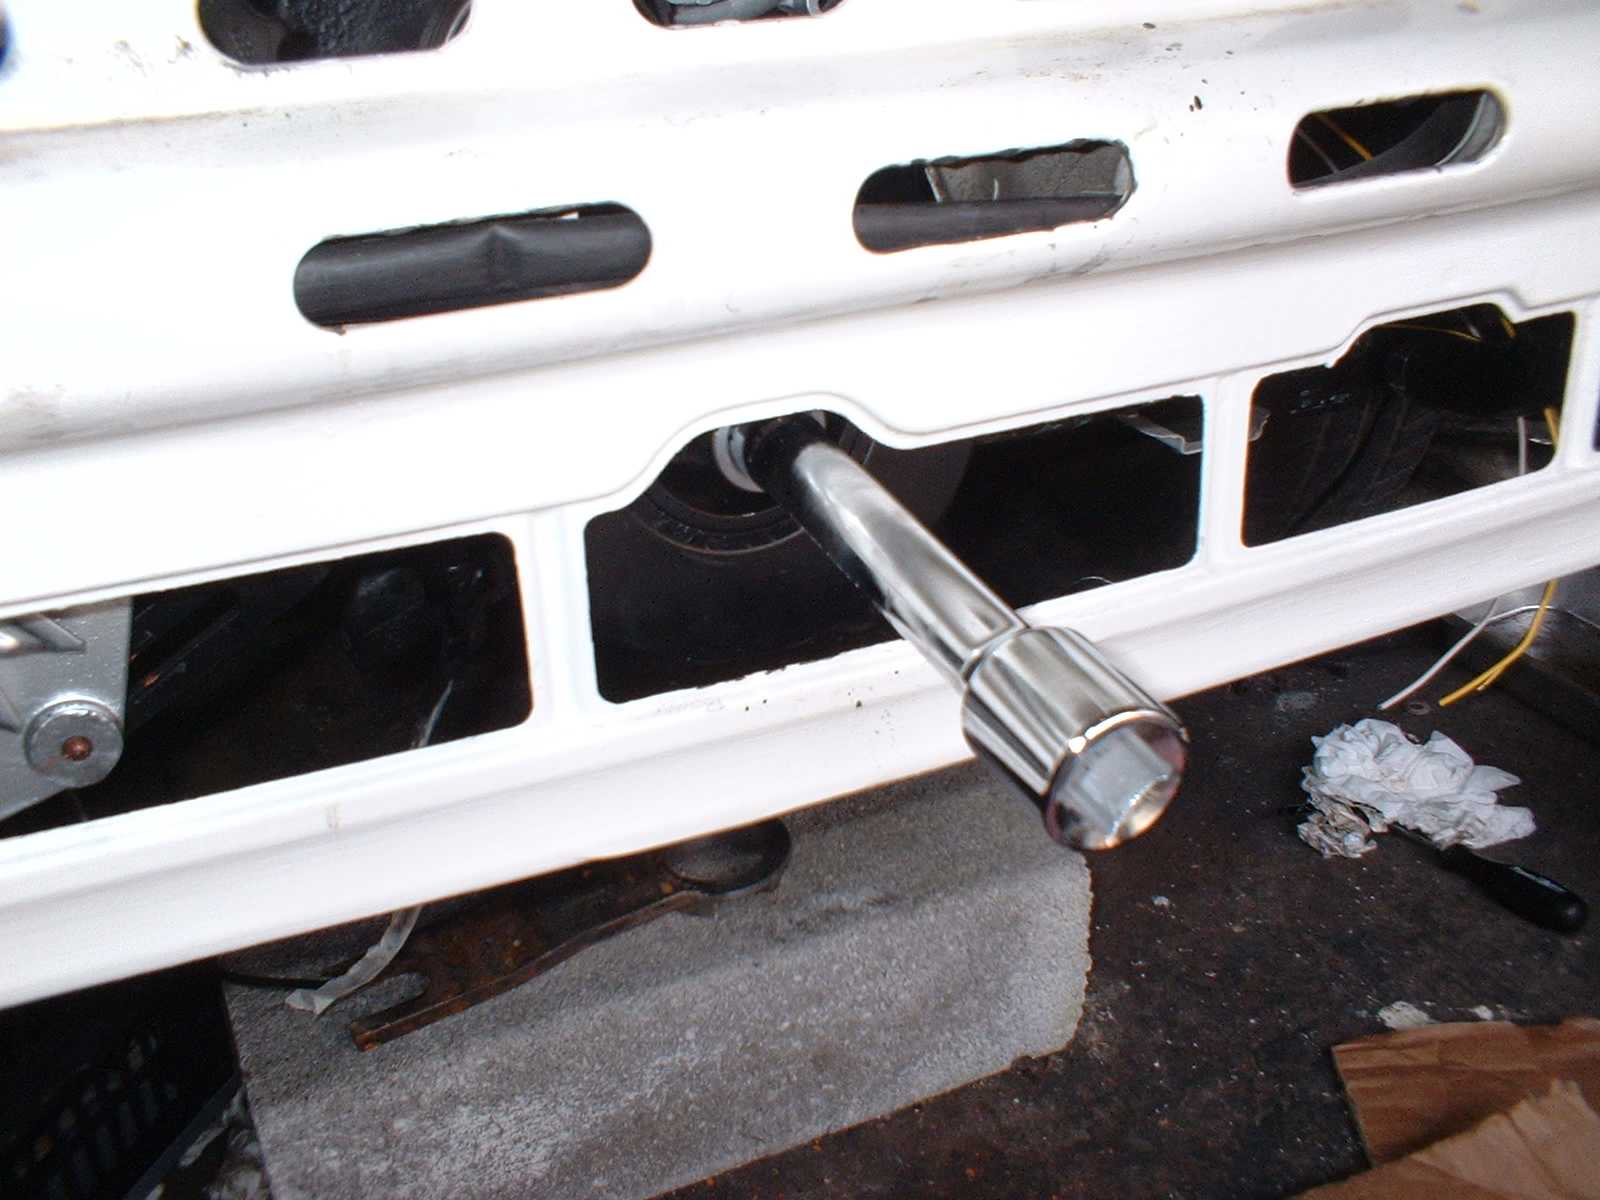
One Futhamucker torque wrench. This baby will do up to 850NM, but 450 will do use today. Over a meter long. It cost me 19euros to hire it for the morning.

The crankshaft pulley bolt cleaned up and slathered in red Loctite.
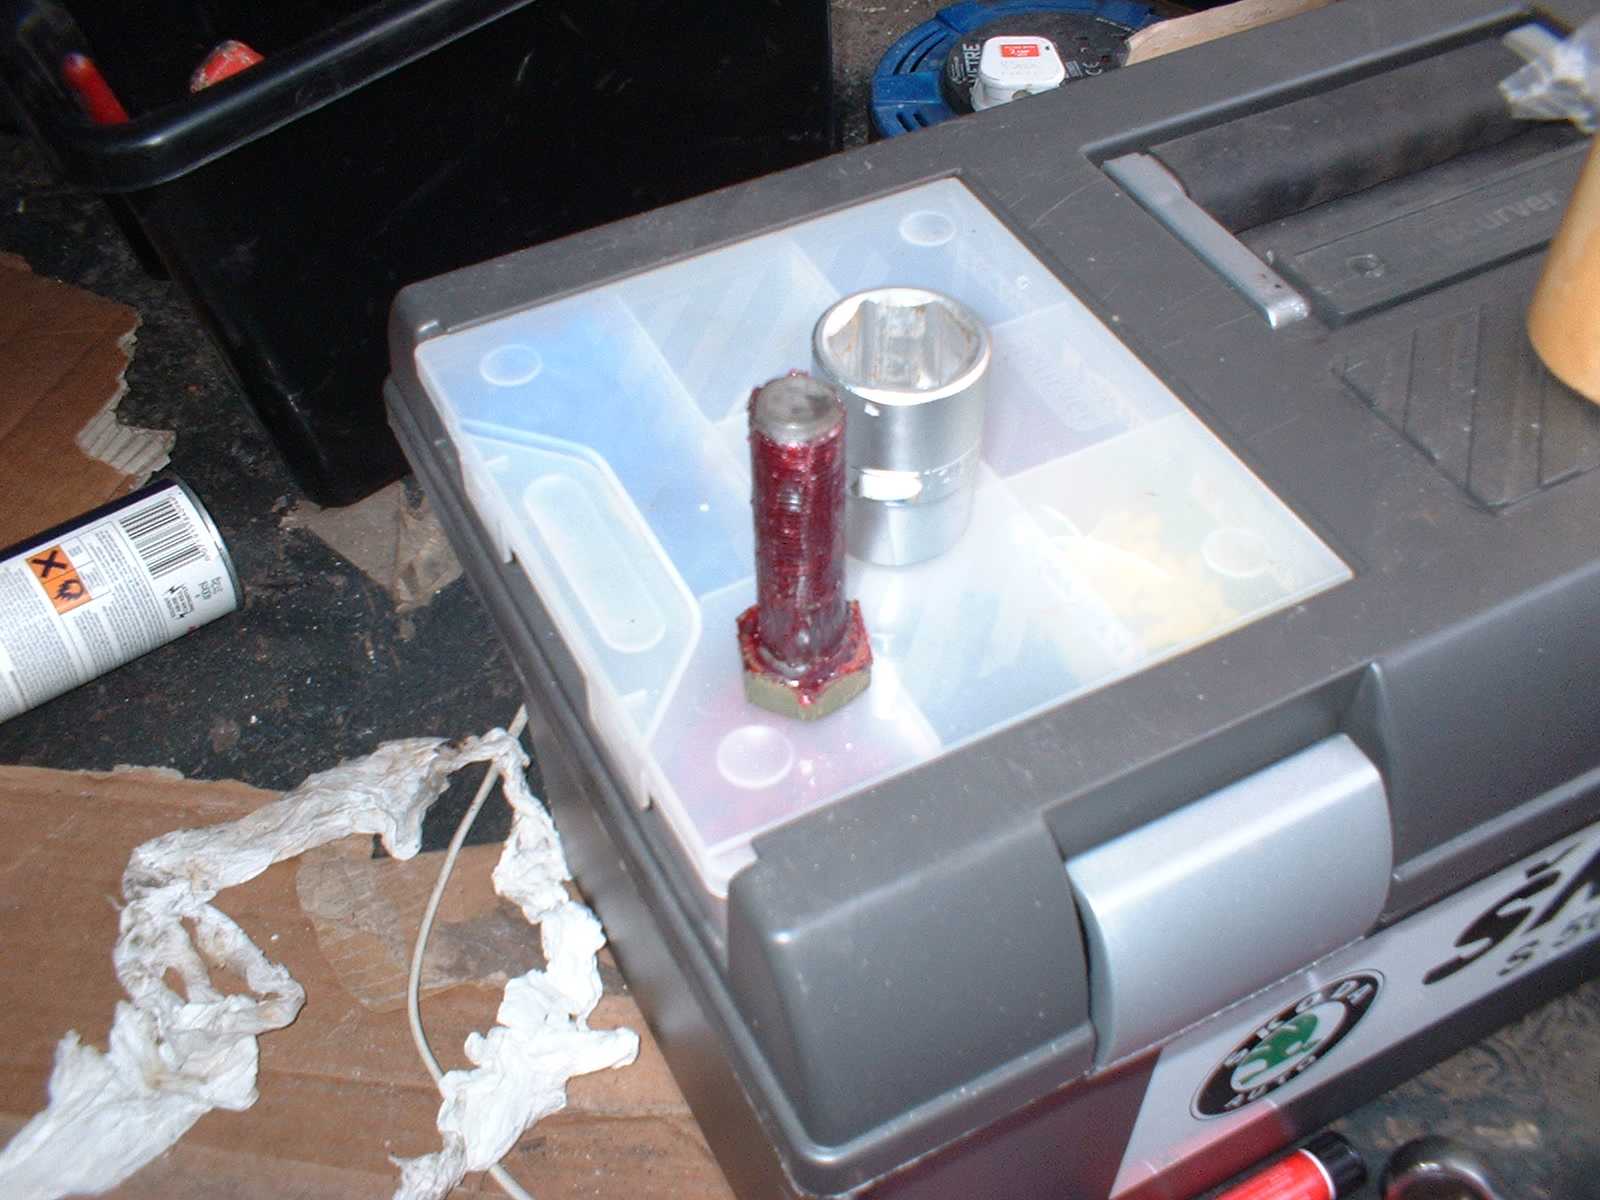
The pulley fits on easily and the main bolt can be hand tightened using the 27mm socket and 3/4" extension bar to take up the slack. You need to fit the cambelt at the same time as you fit the pulley assembly.
Here you can see the pulley and belt now in situ. Once you have the slack taken up on the bolt, rotate the pulley around to the correct postion, and use the Crank locking tool to stop the crankshaft turning.

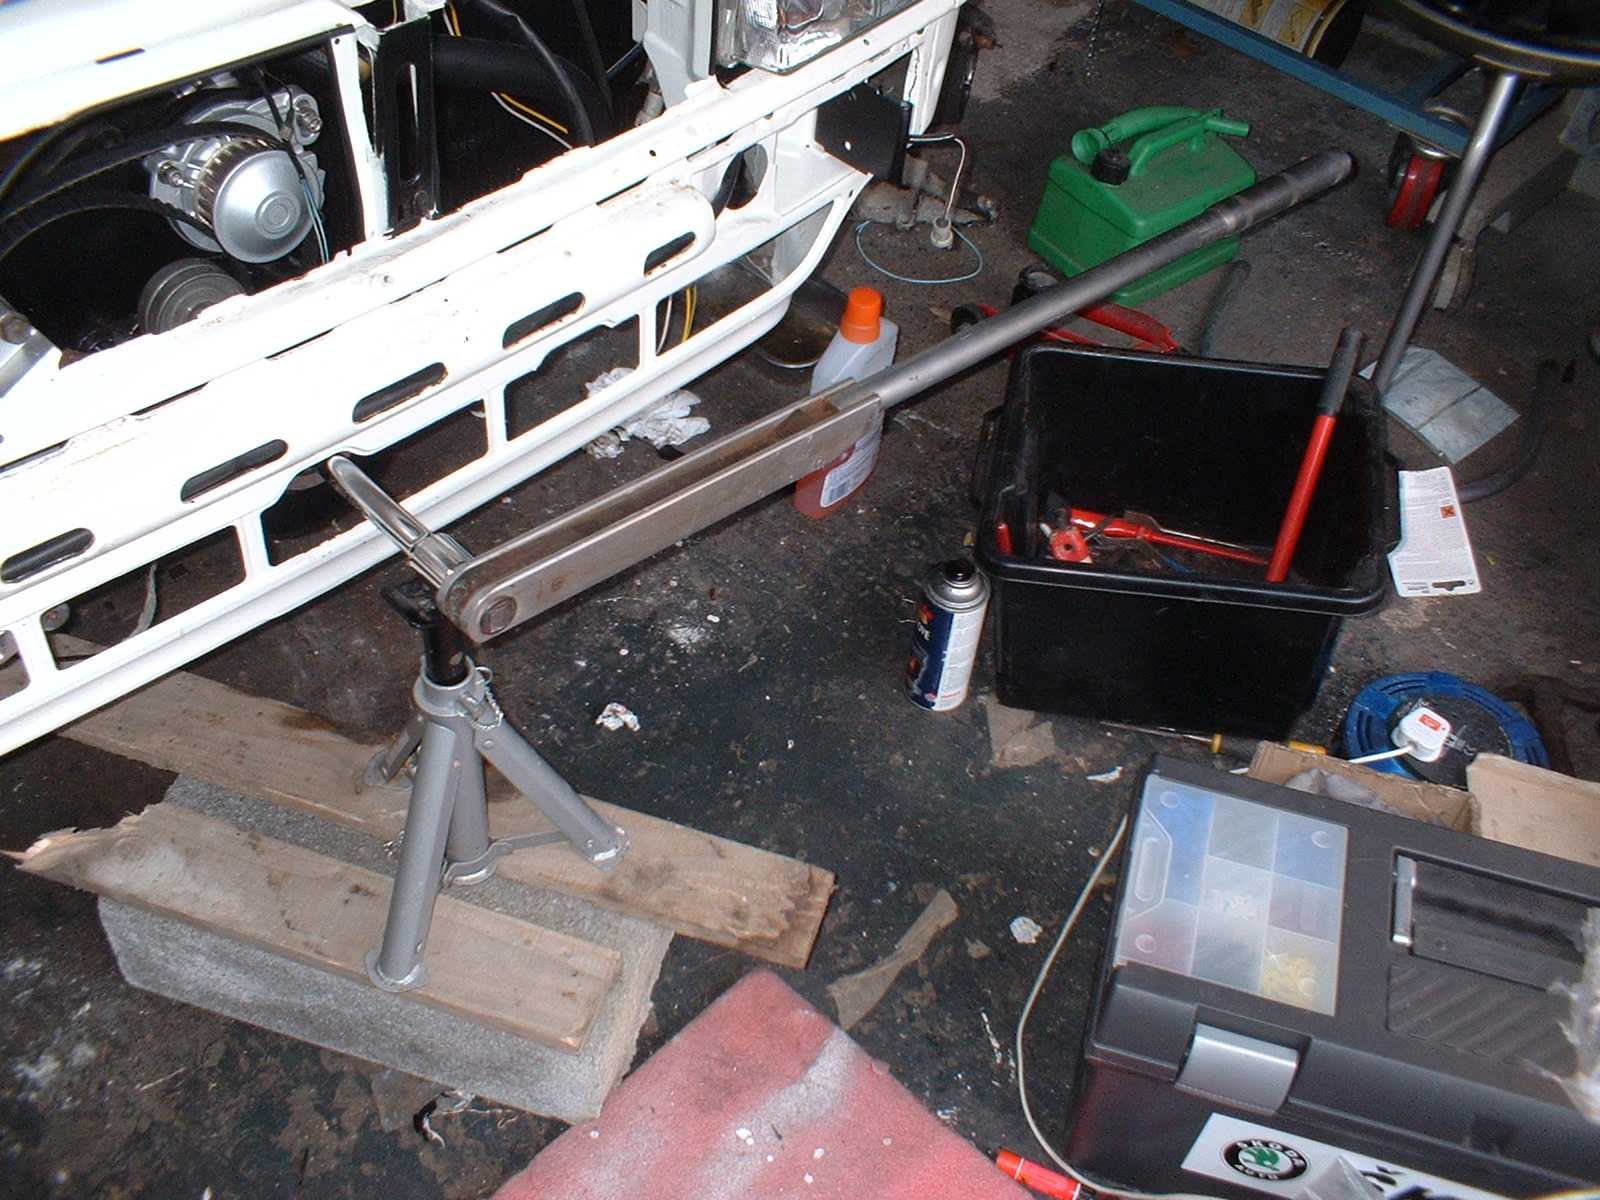
That really is a big torque wrench, and 450Nm is a large torque, so I made life easier for myself using a concrete block, wooden packers, and an axle stand. By supporting the end of the extension bar in line with the crankshaft axis, it means that I am just applying torque.
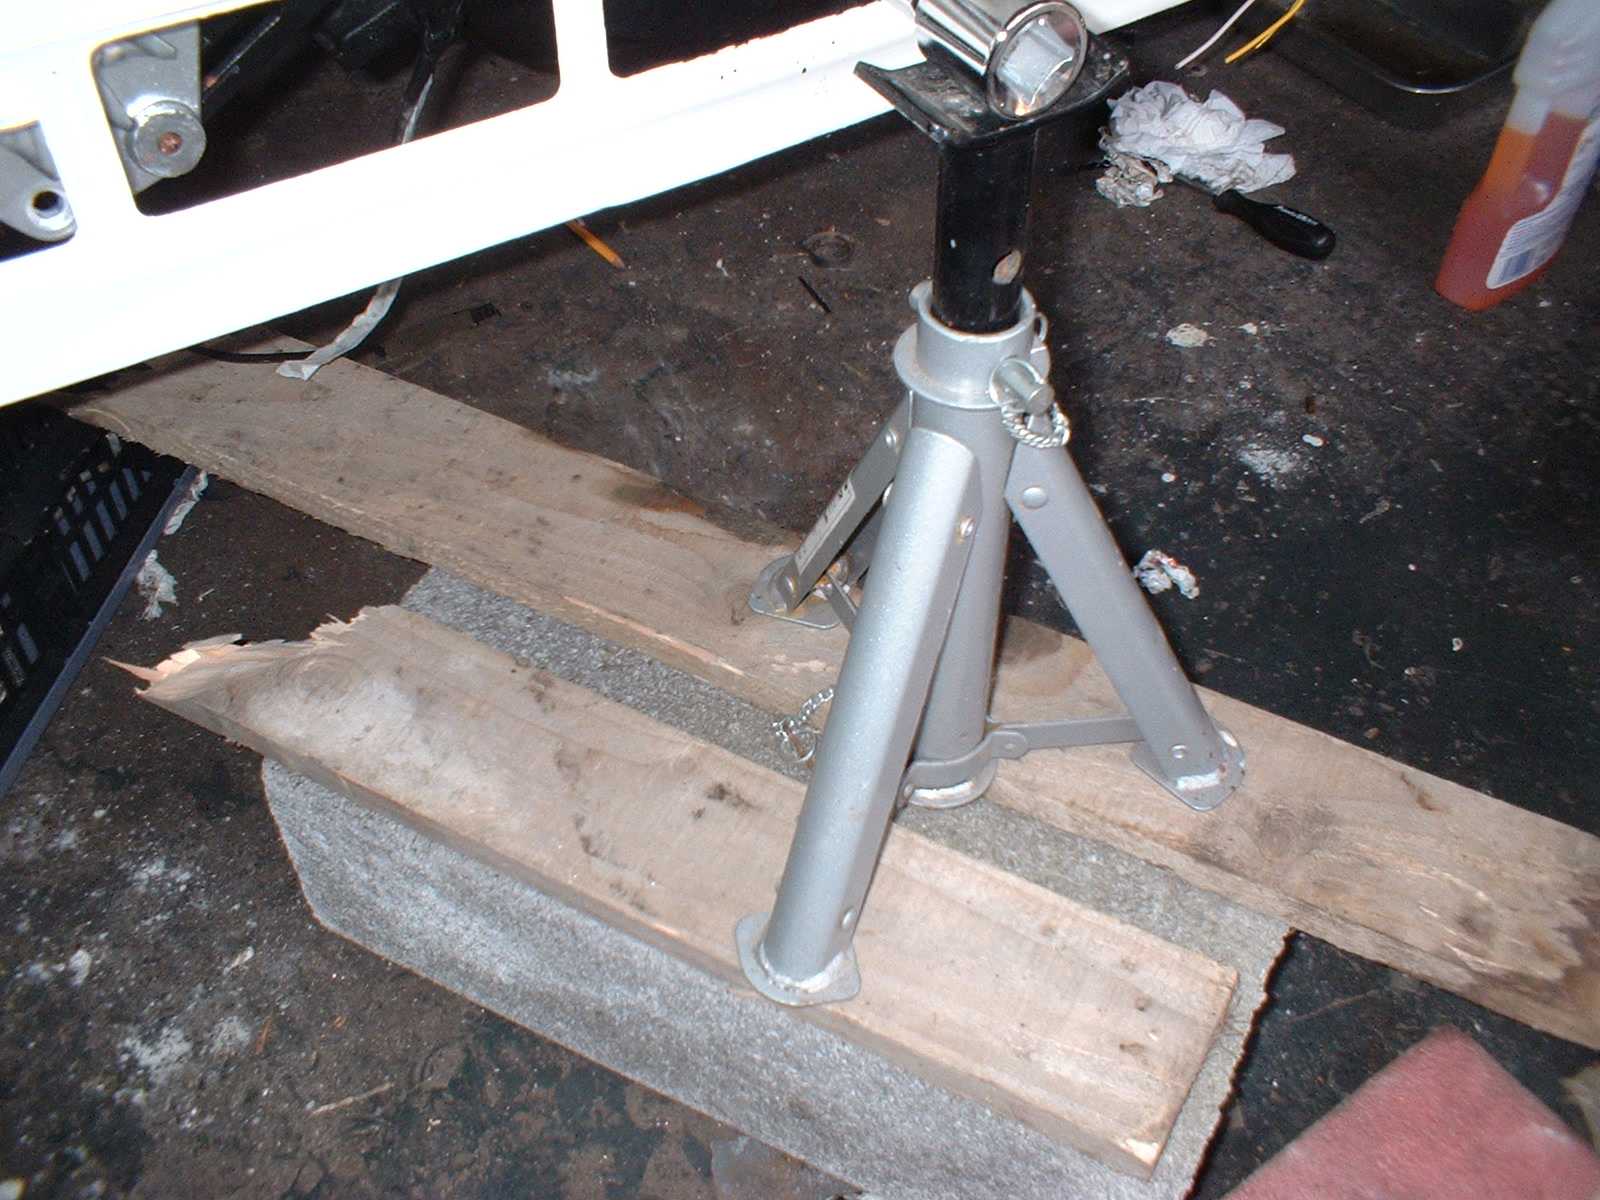
Like so. I just set the torque wrench to 450Nm, and wound it round until it clicked.
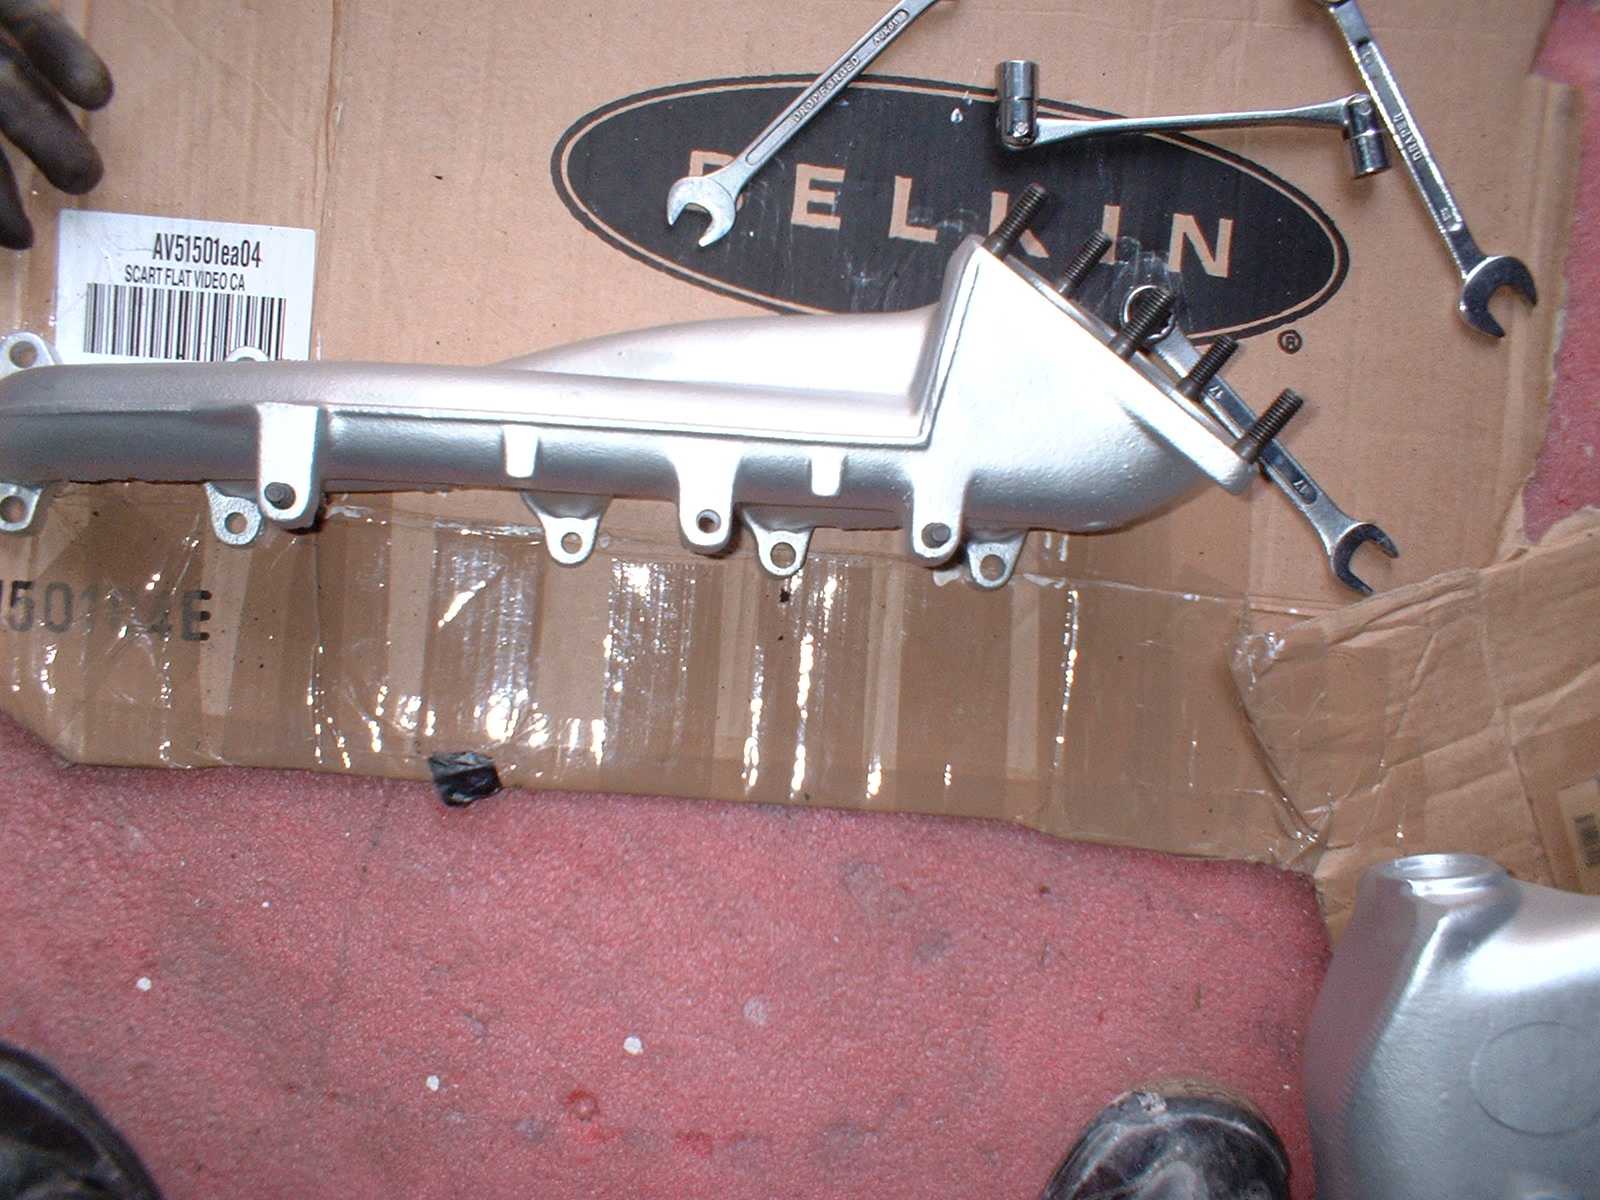
Here is the new exhaust manifold (sprayed with high temp paint) and the new studs for the manifold.
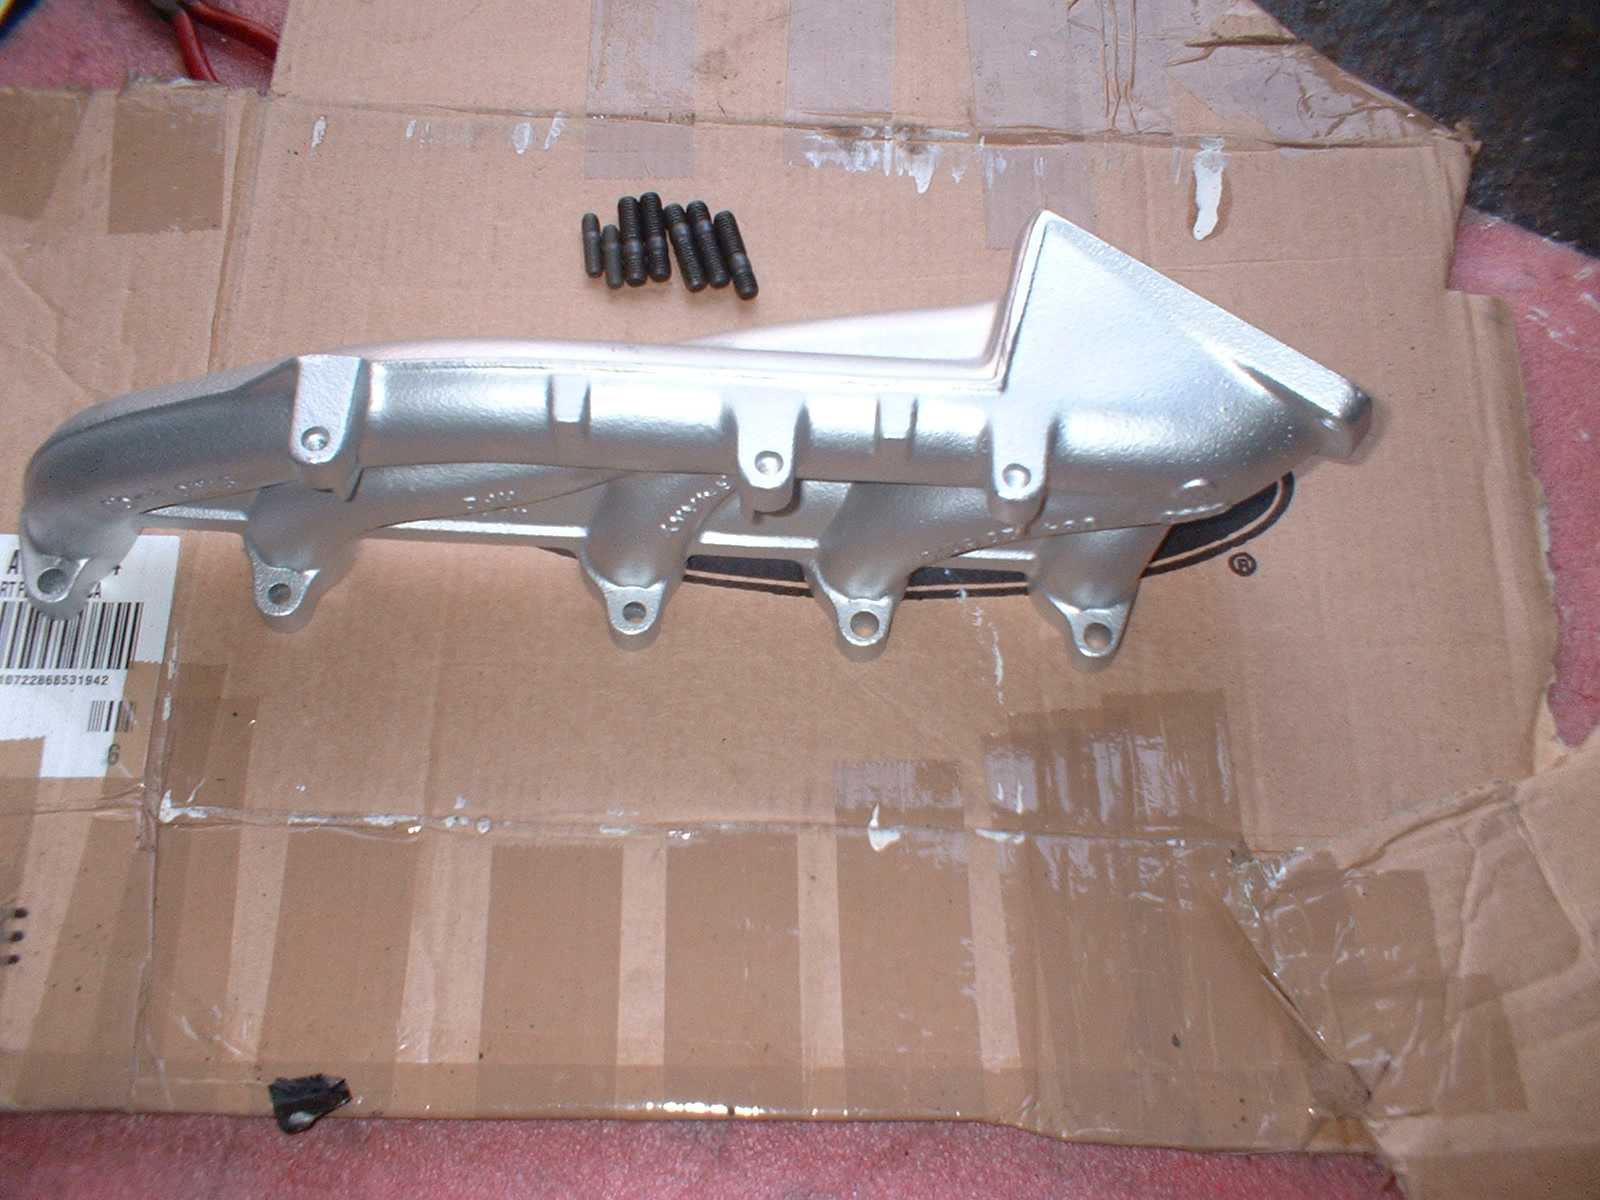
Studs now fitted.....
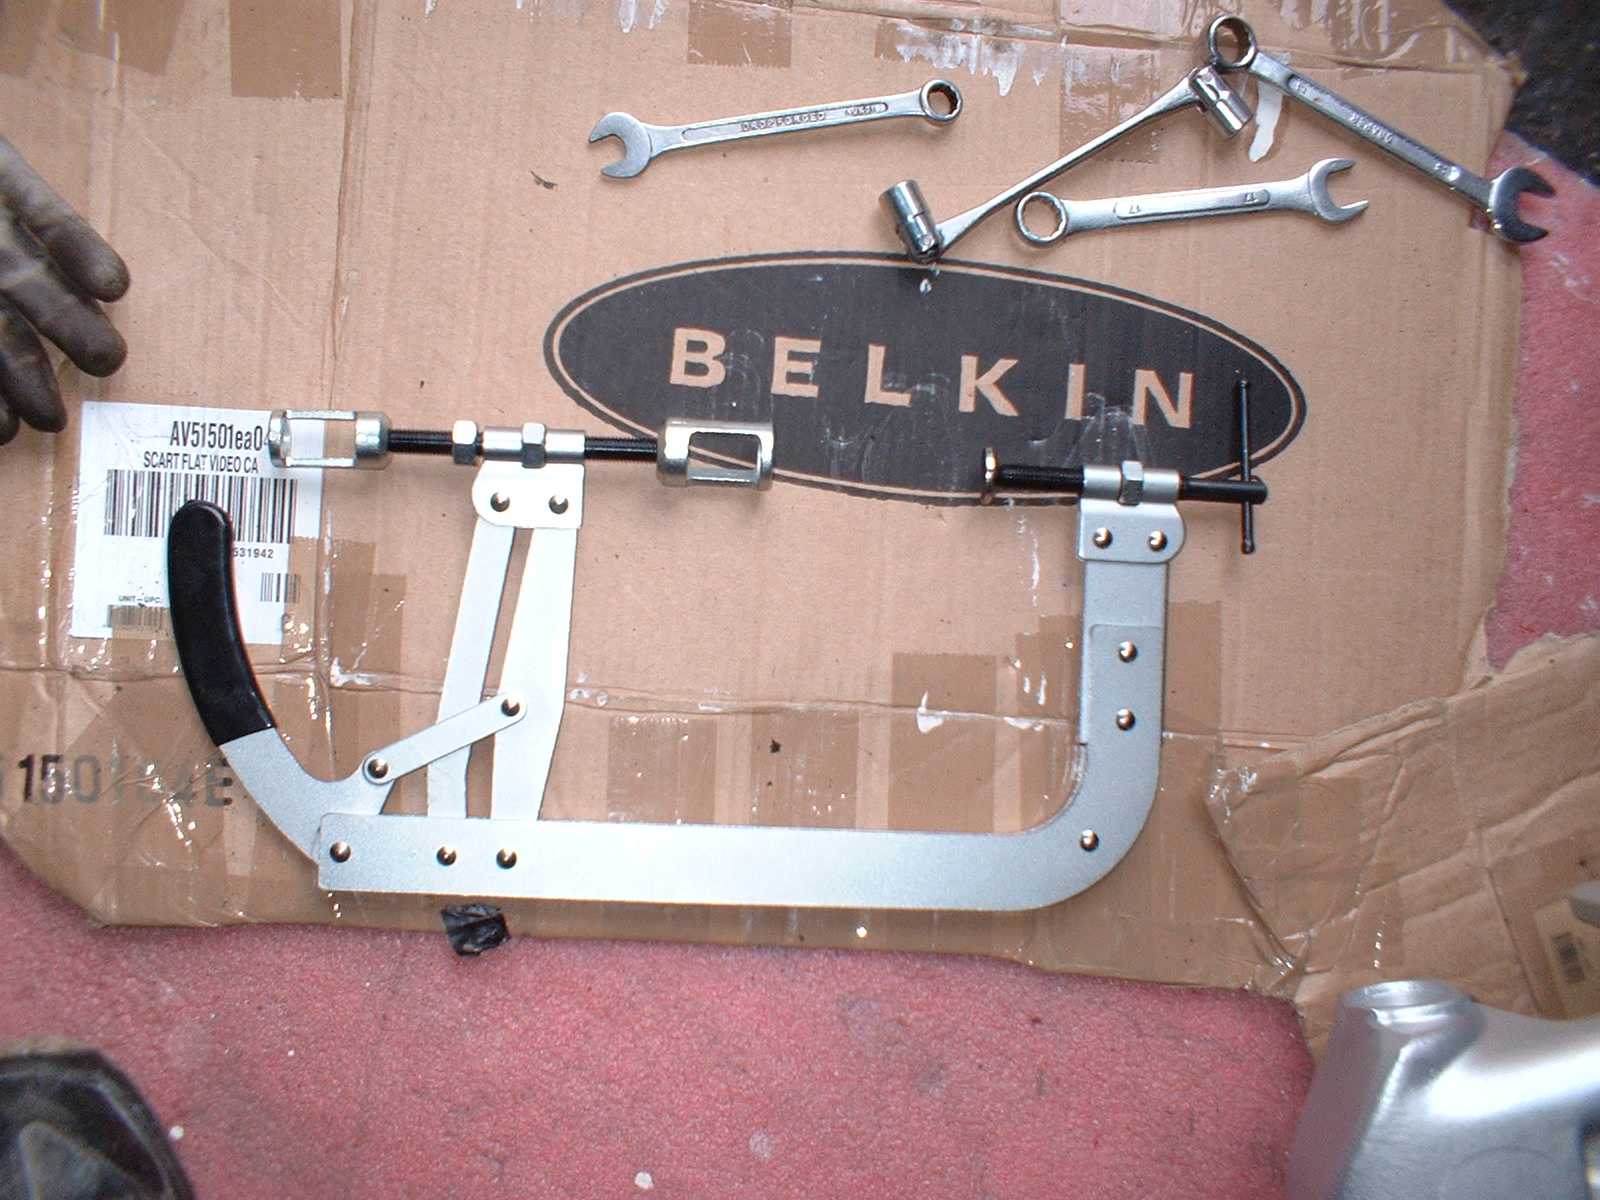
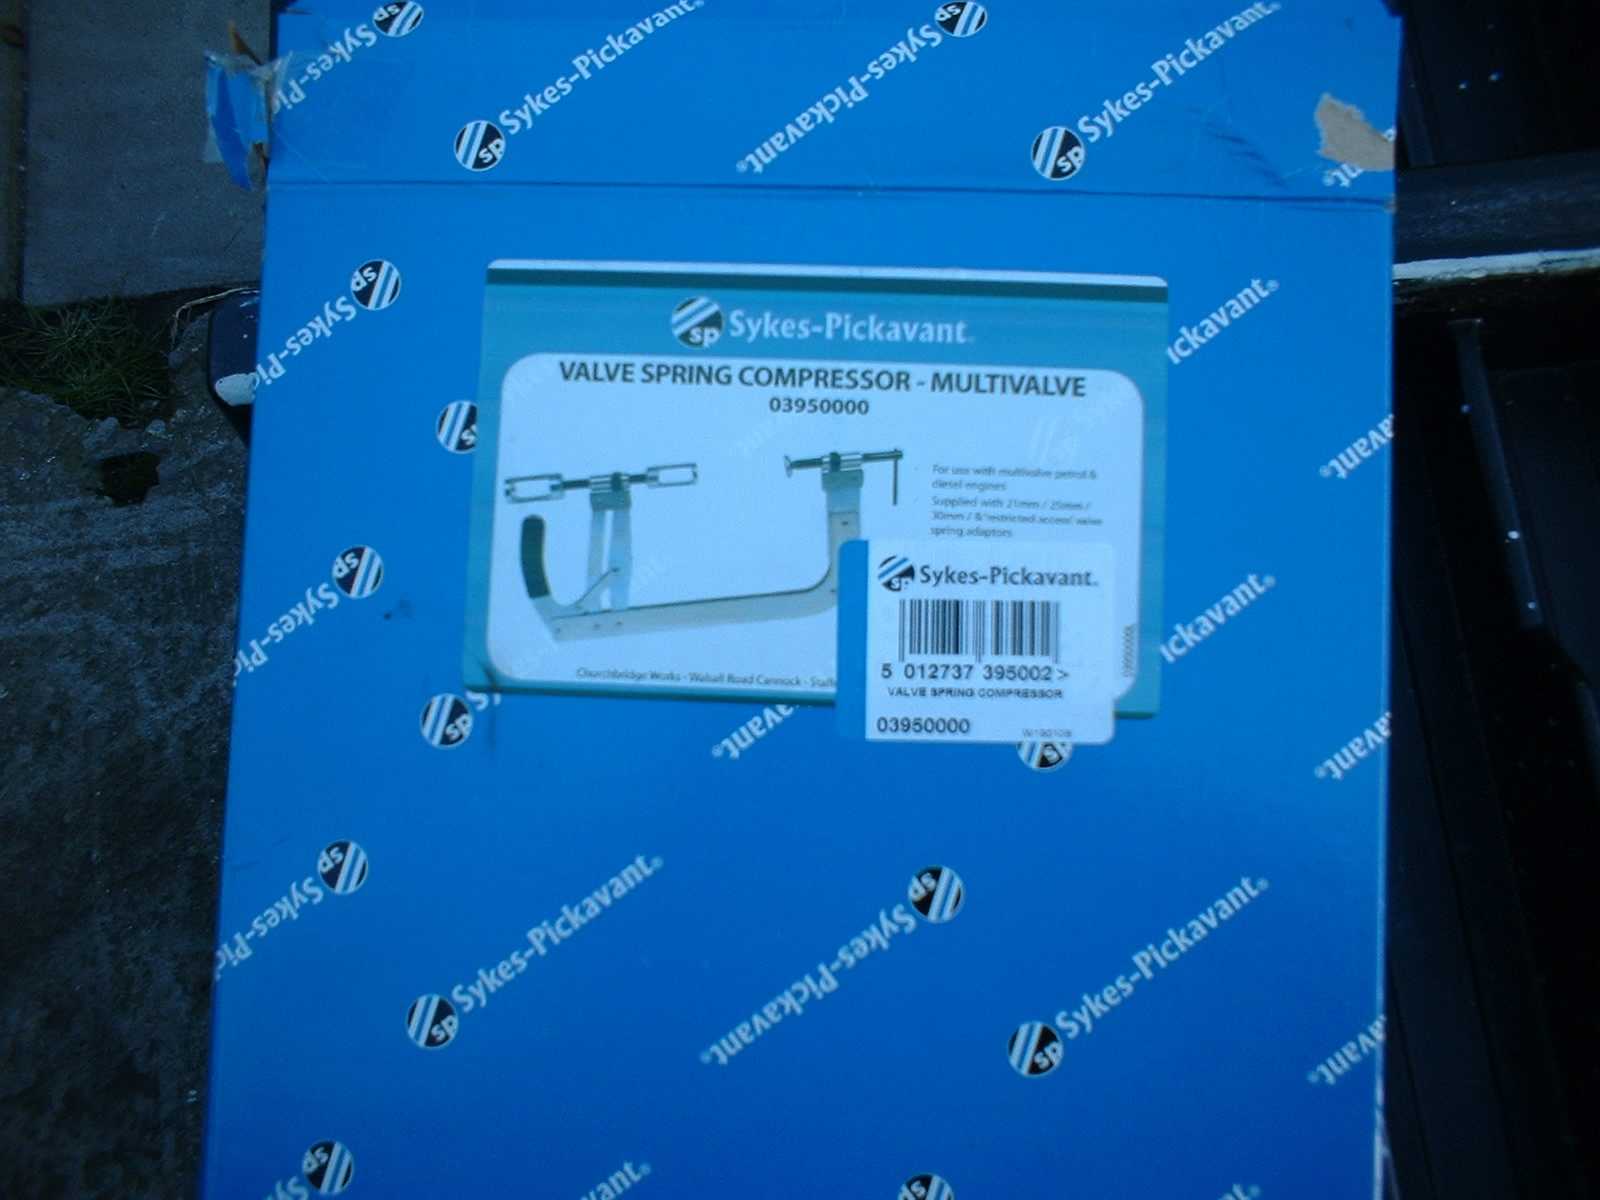
This is slightly out of sequence, but this is the valve spring compressor tool that I bought.
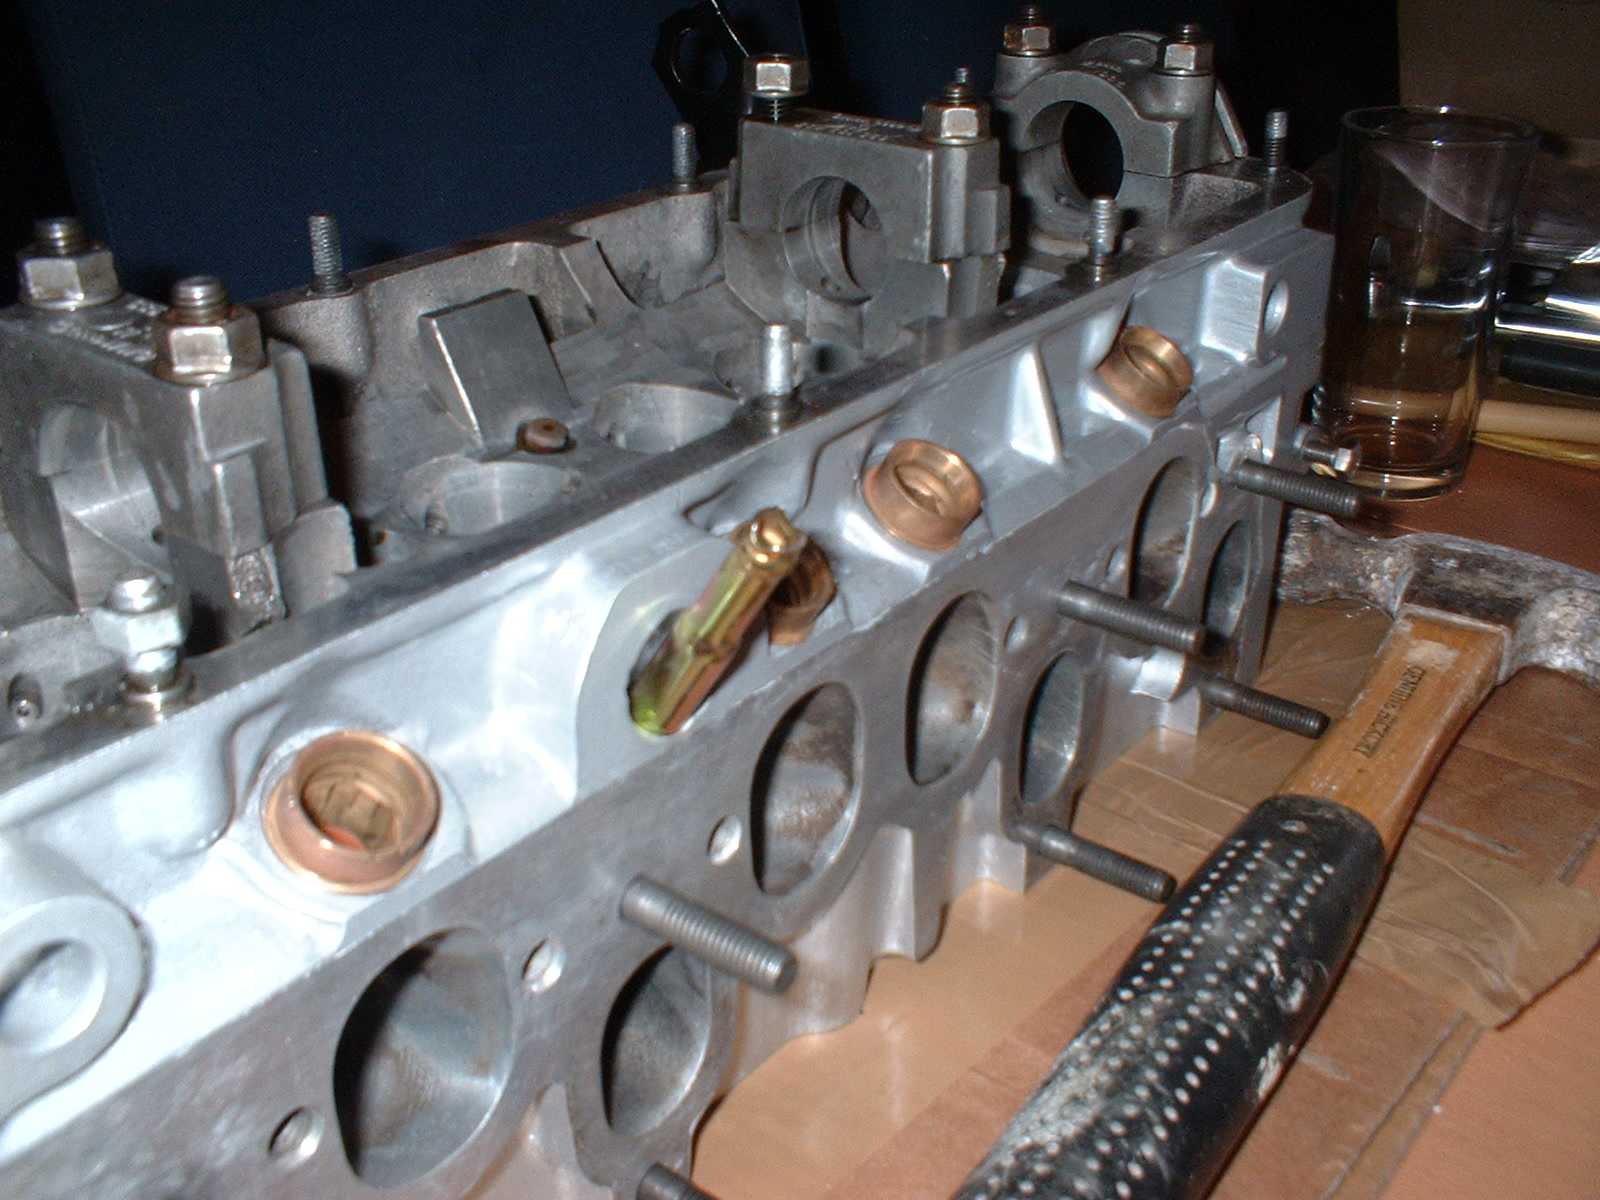
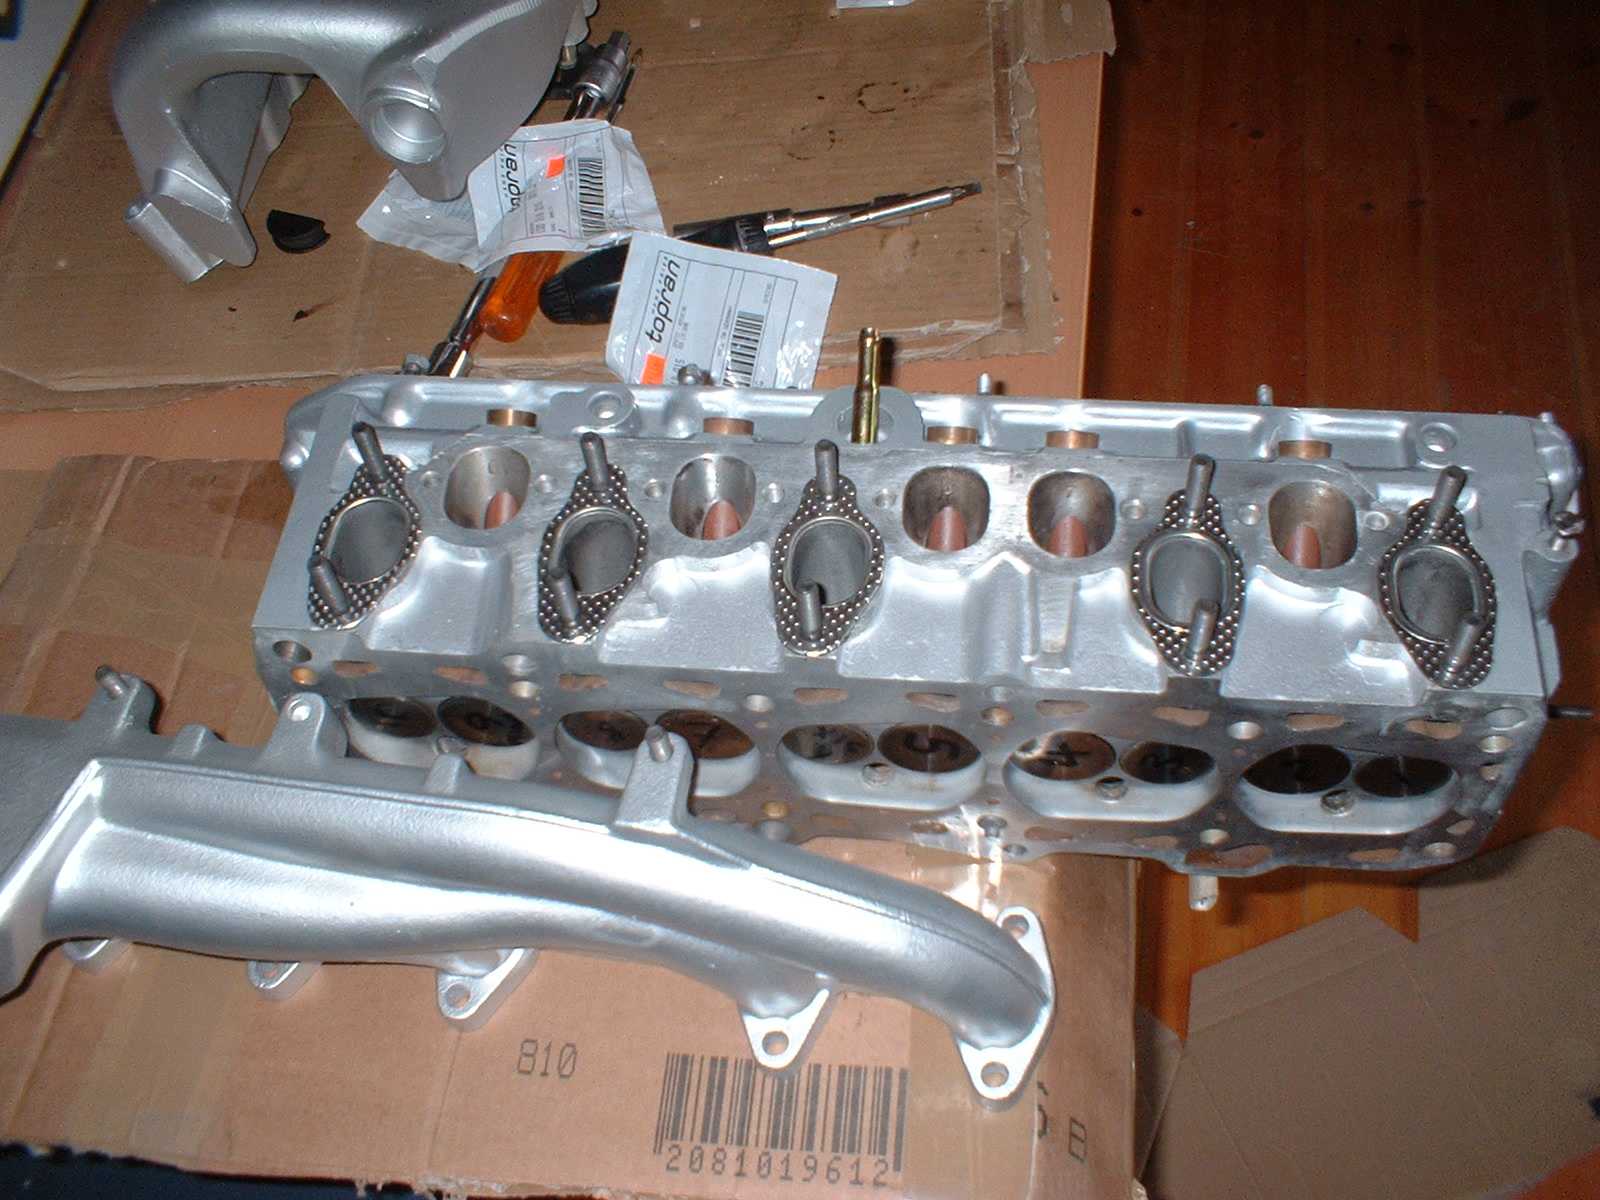
Here is the head ready for manifolds.
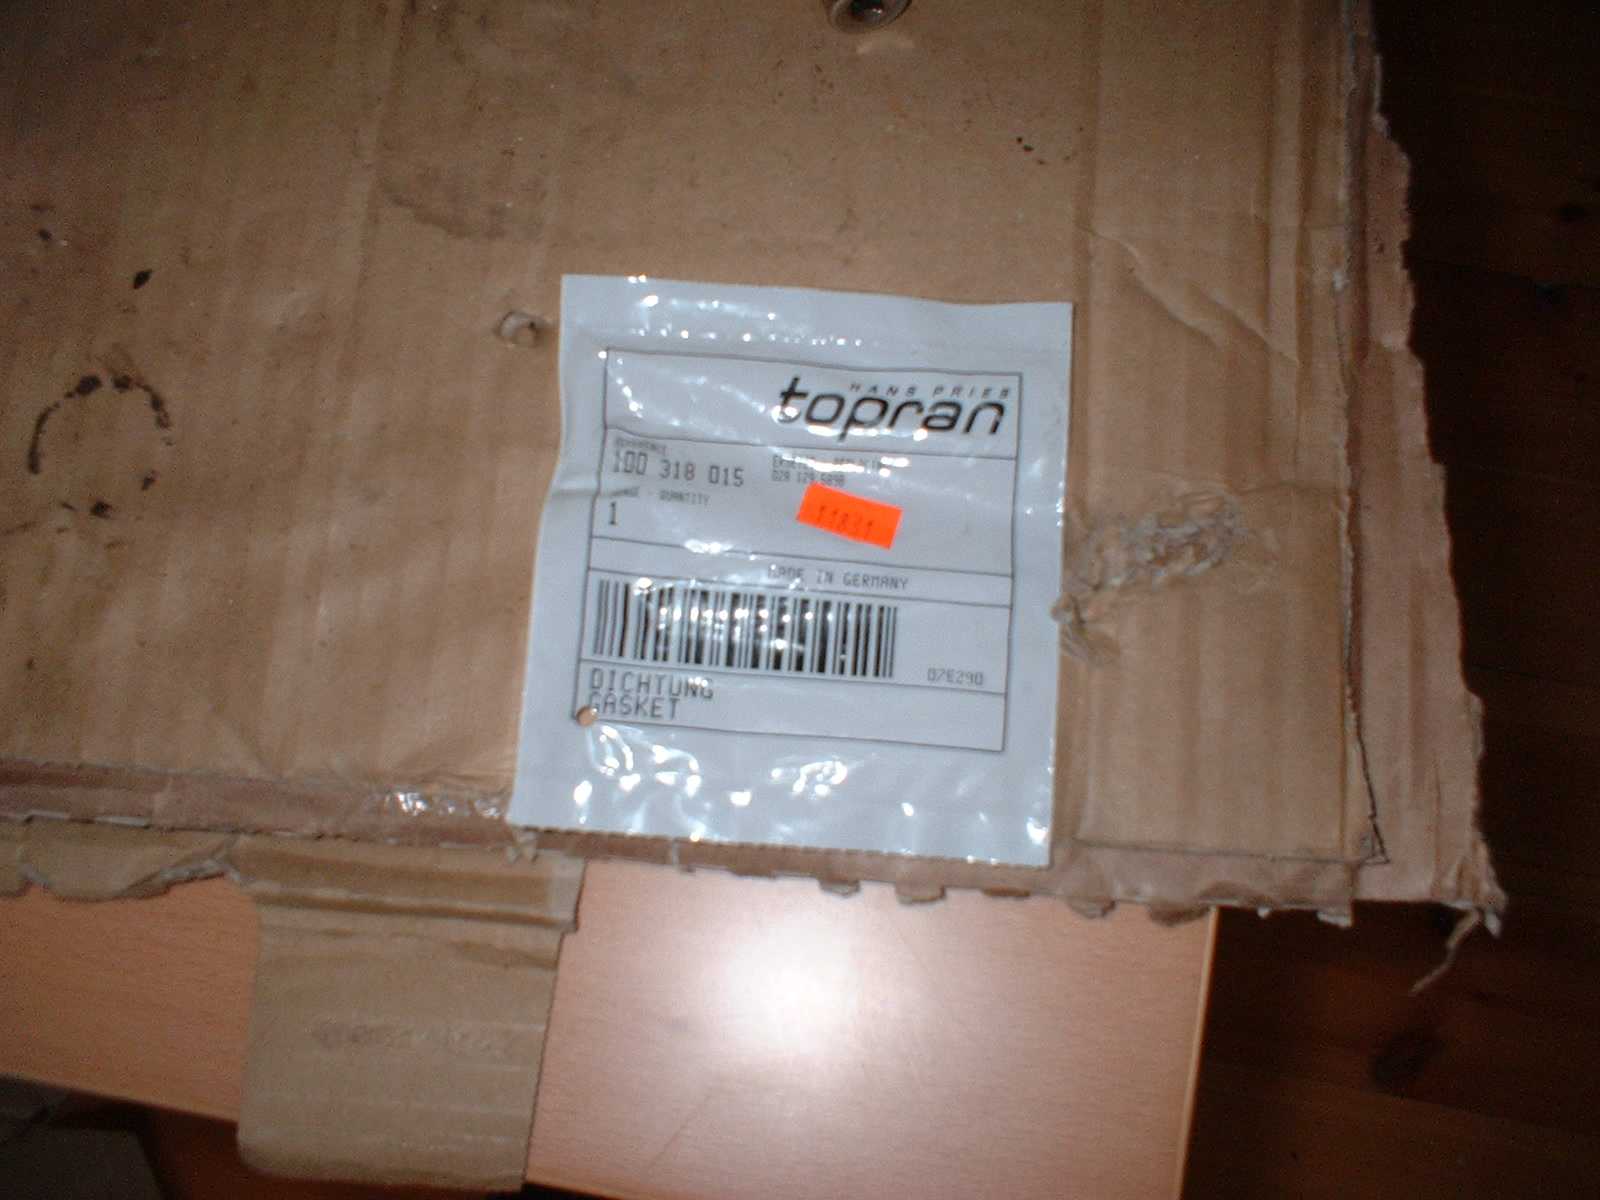
A "Topran" exhaust manifold gasket
5 gaskets in situ.
Now correctly in situ......
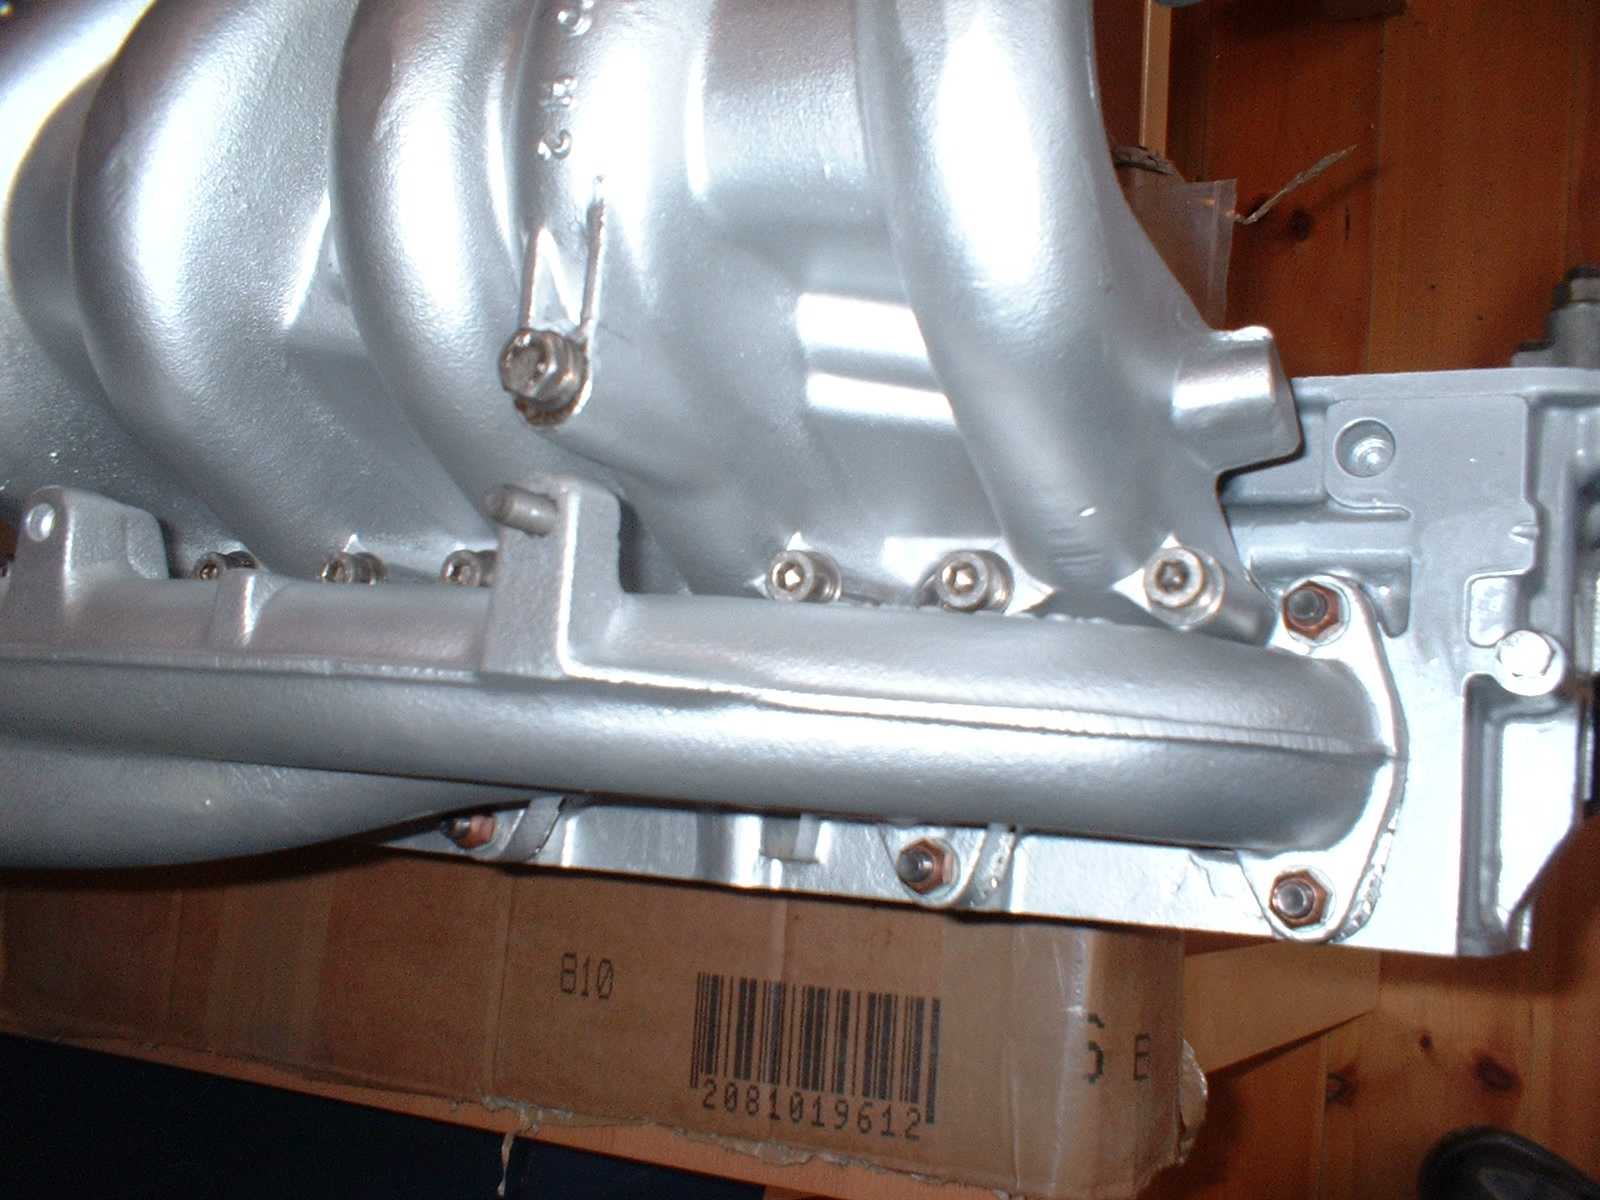
And the exhaust manifold bolted into position with it's nice shiny new copper nuts
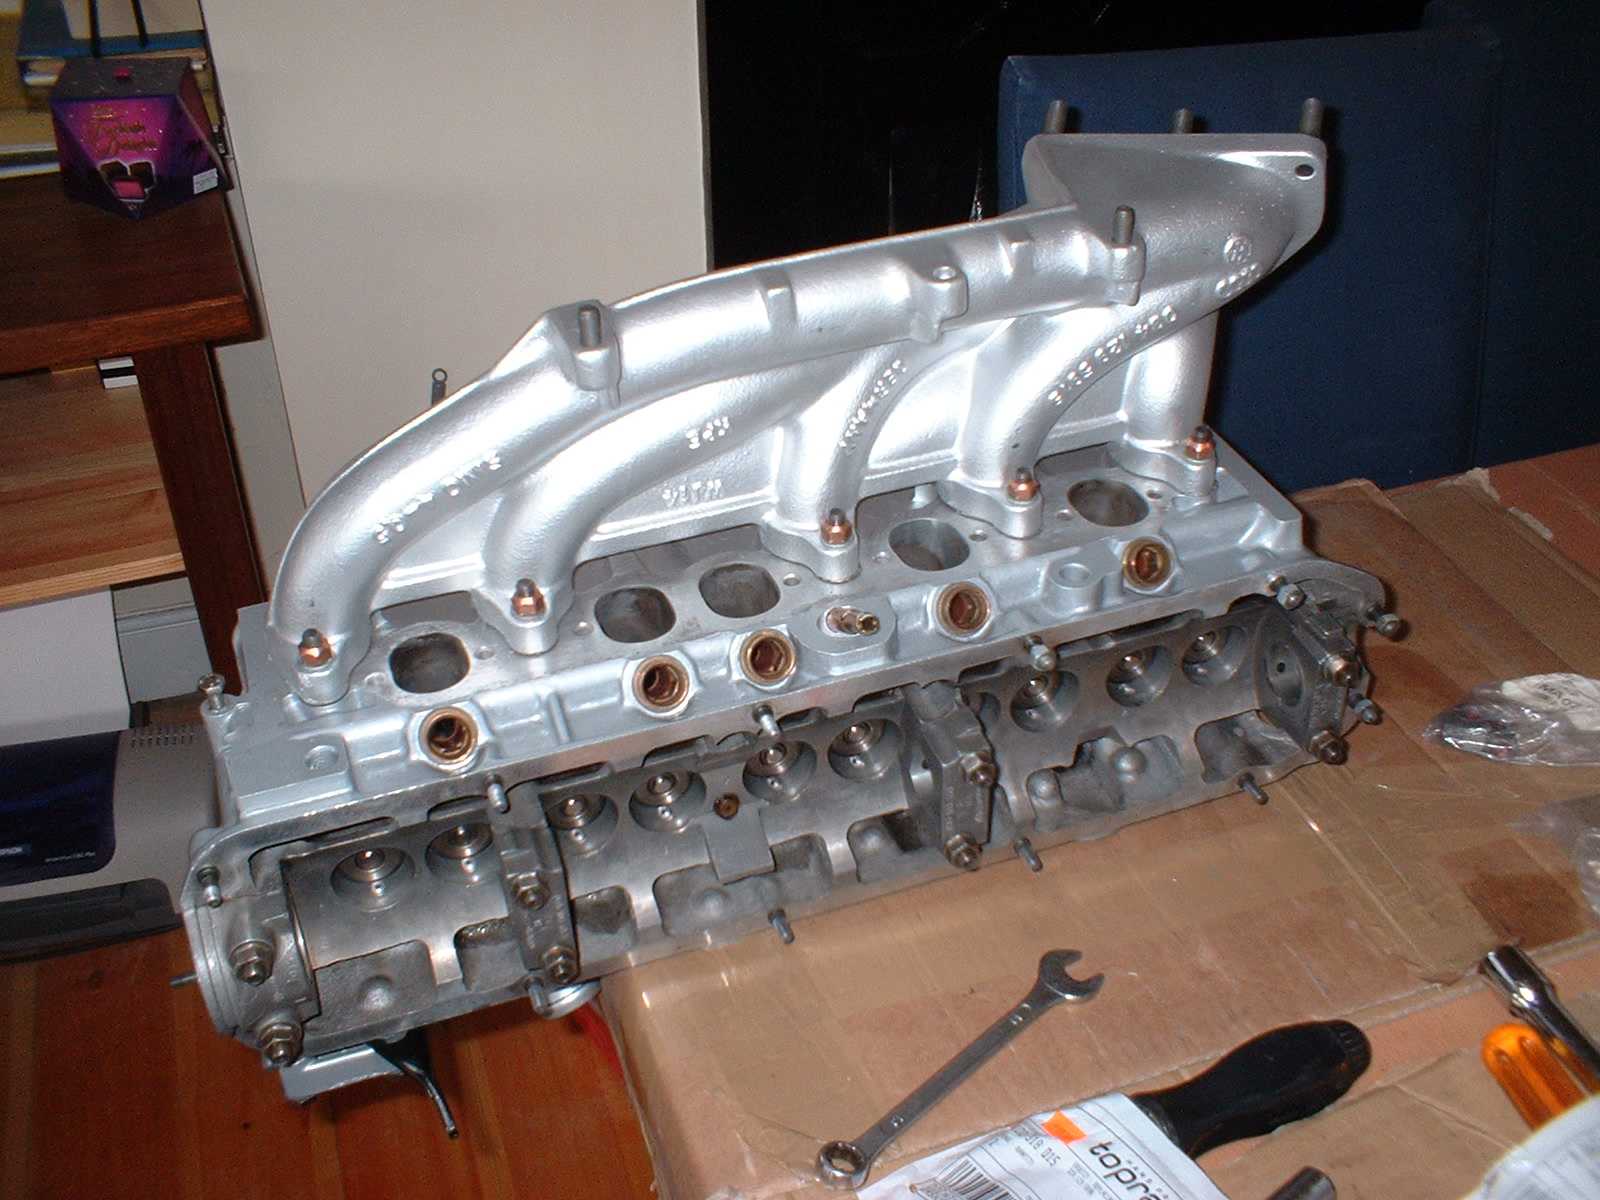
The inlet manifold gasket.
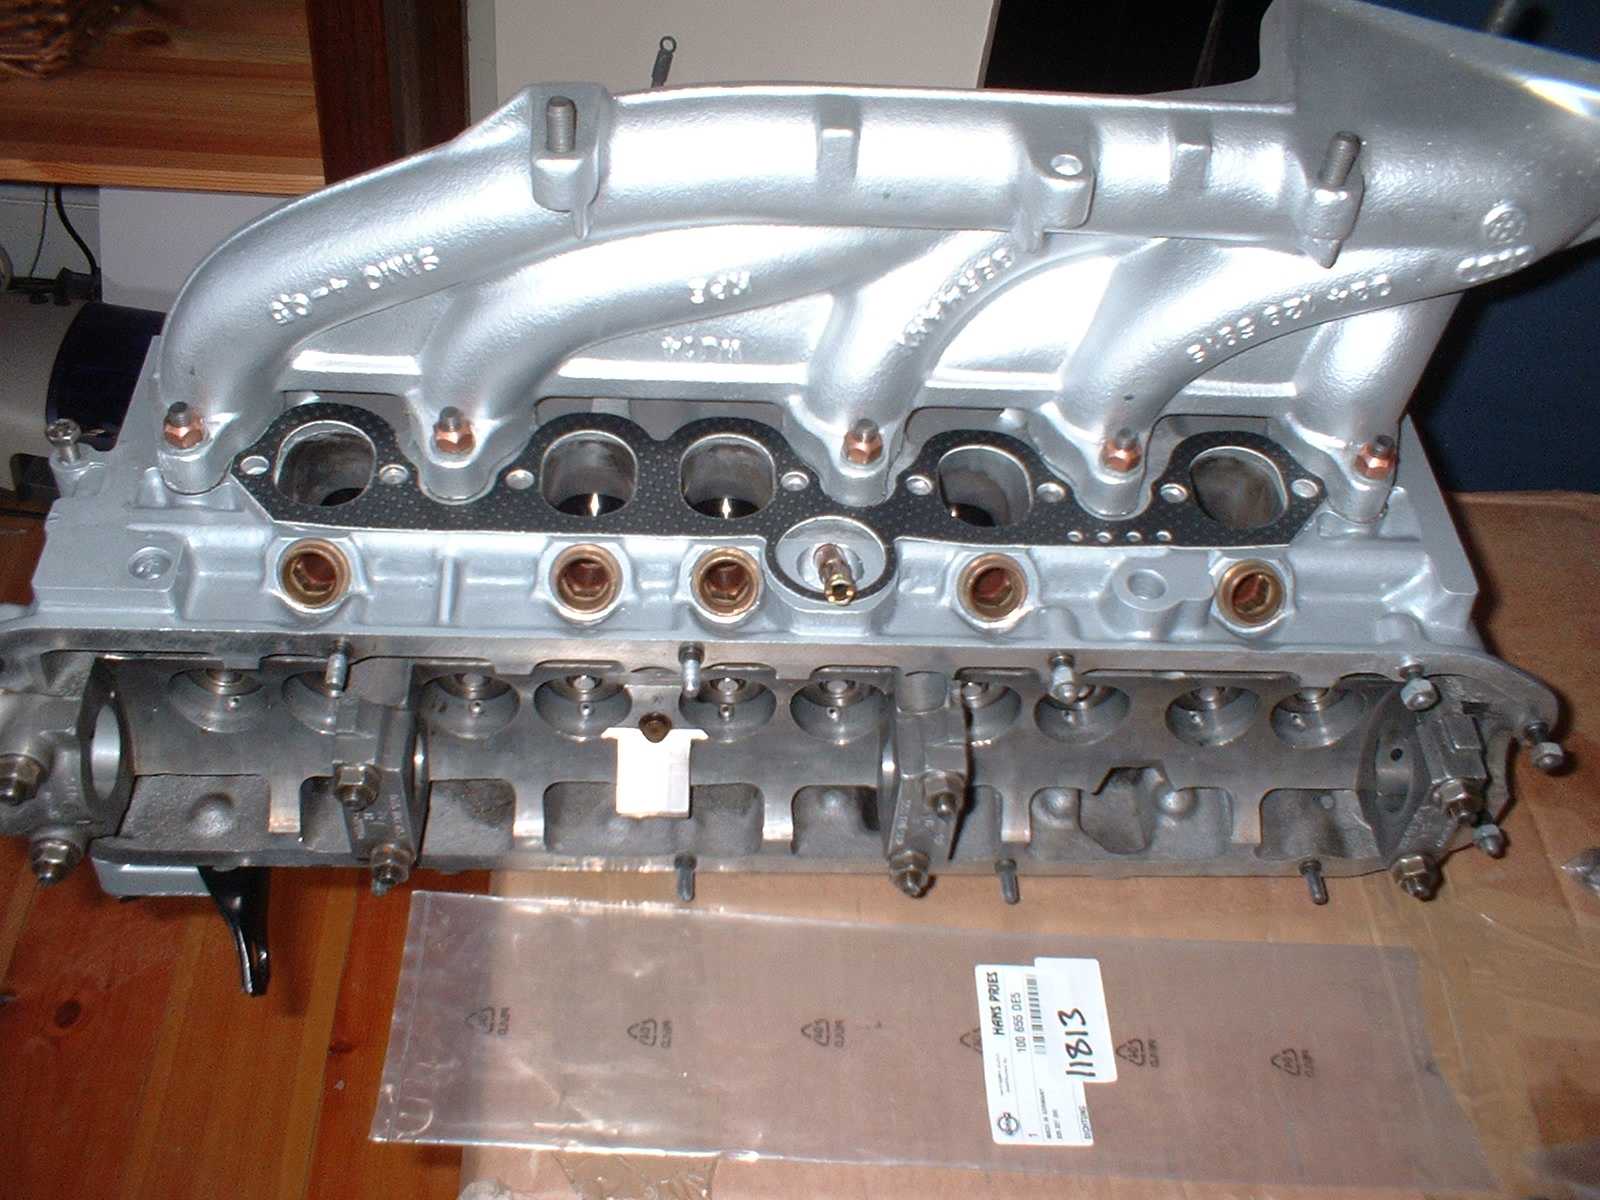
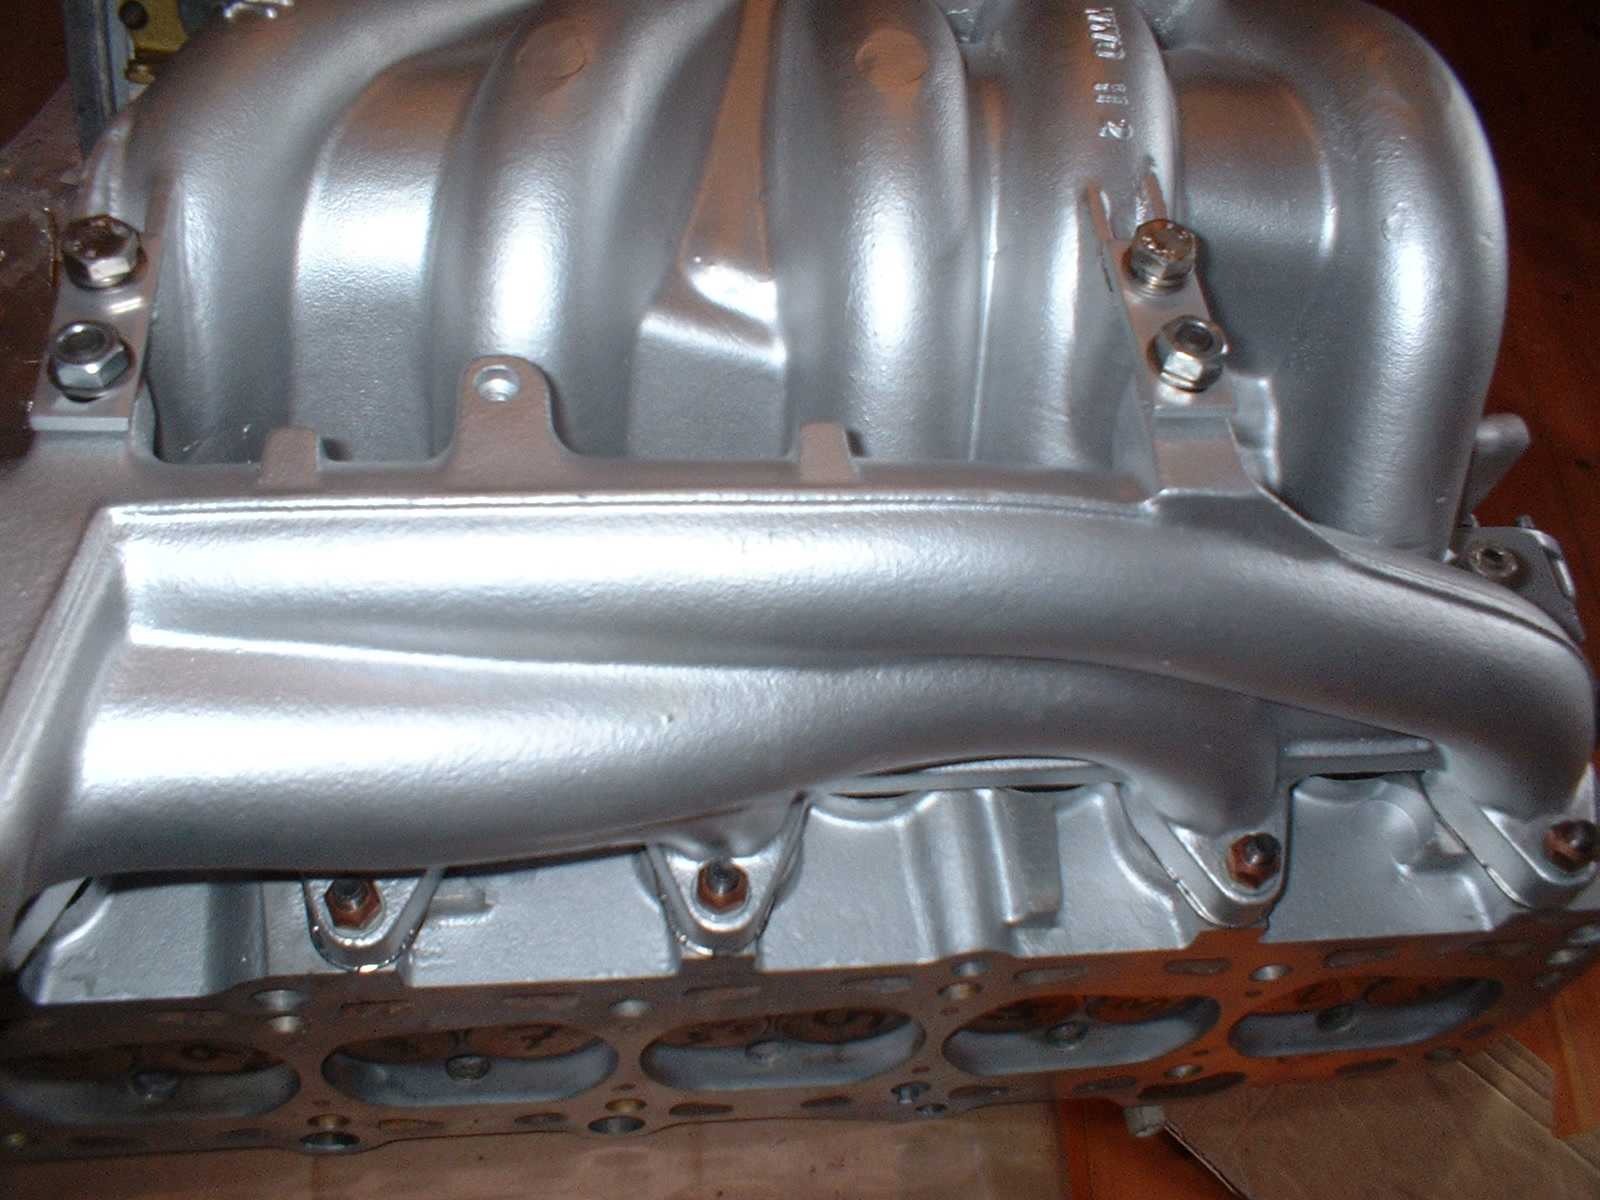
And the inlet manifold in situ
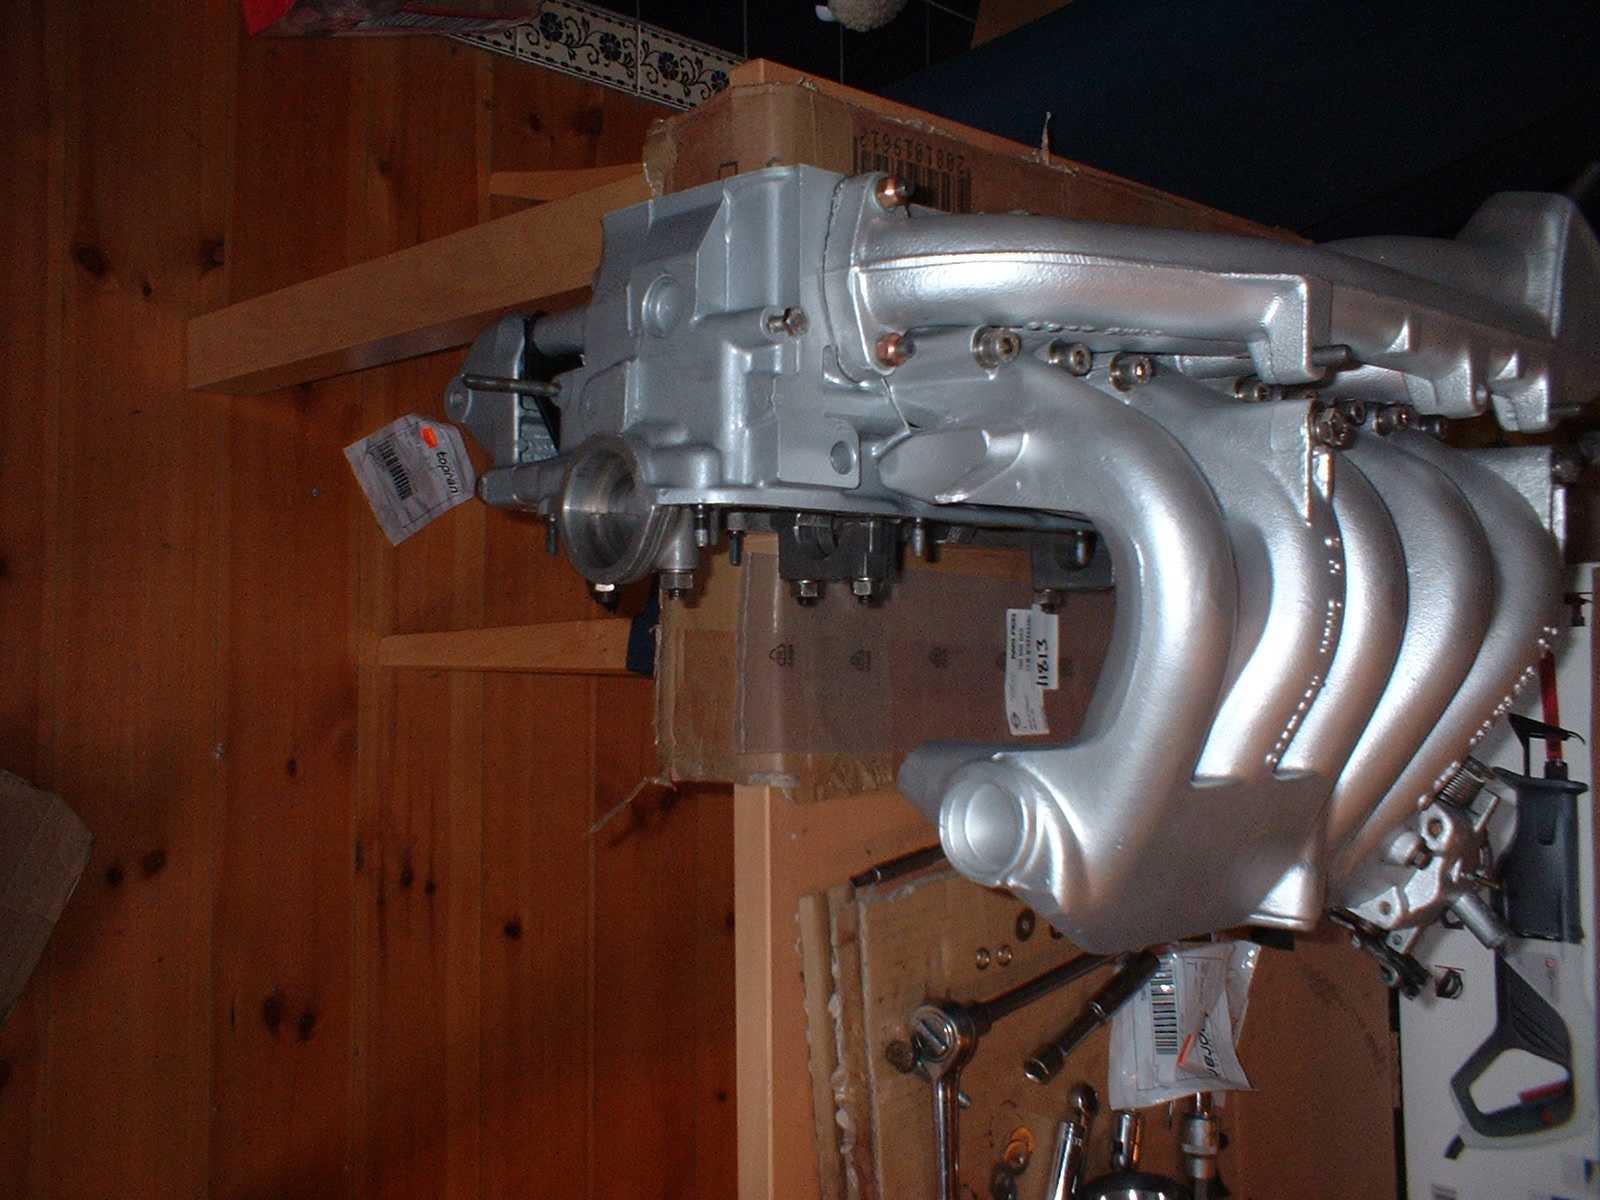
Secured by a line of allen screws
And the 2 connecting pieces finally completes the head assembly.
Hmmmmm.....
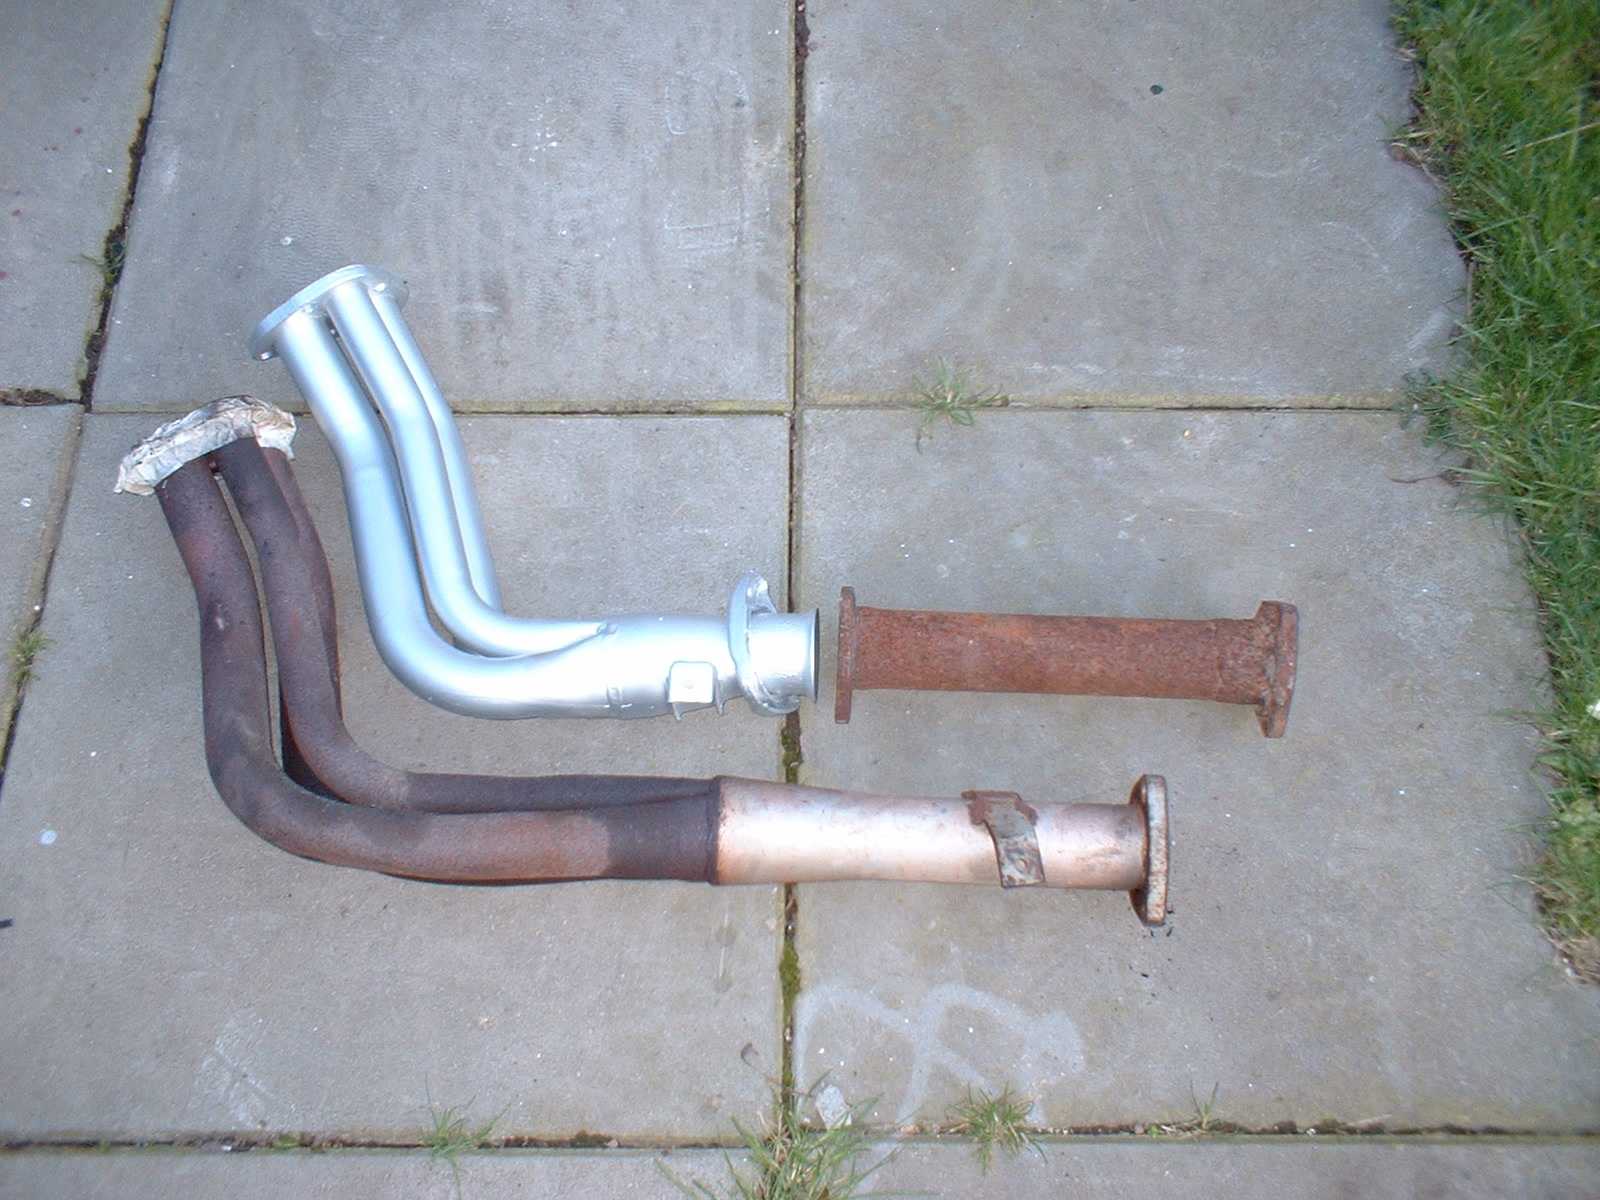
I'm replacing my servicable early style downpipe with the later type, as the later one that I got is stainless steel. The short pipe, is the "de-cat" pipe, which is not stainless, and I need to get a stainless one made up to replace it.
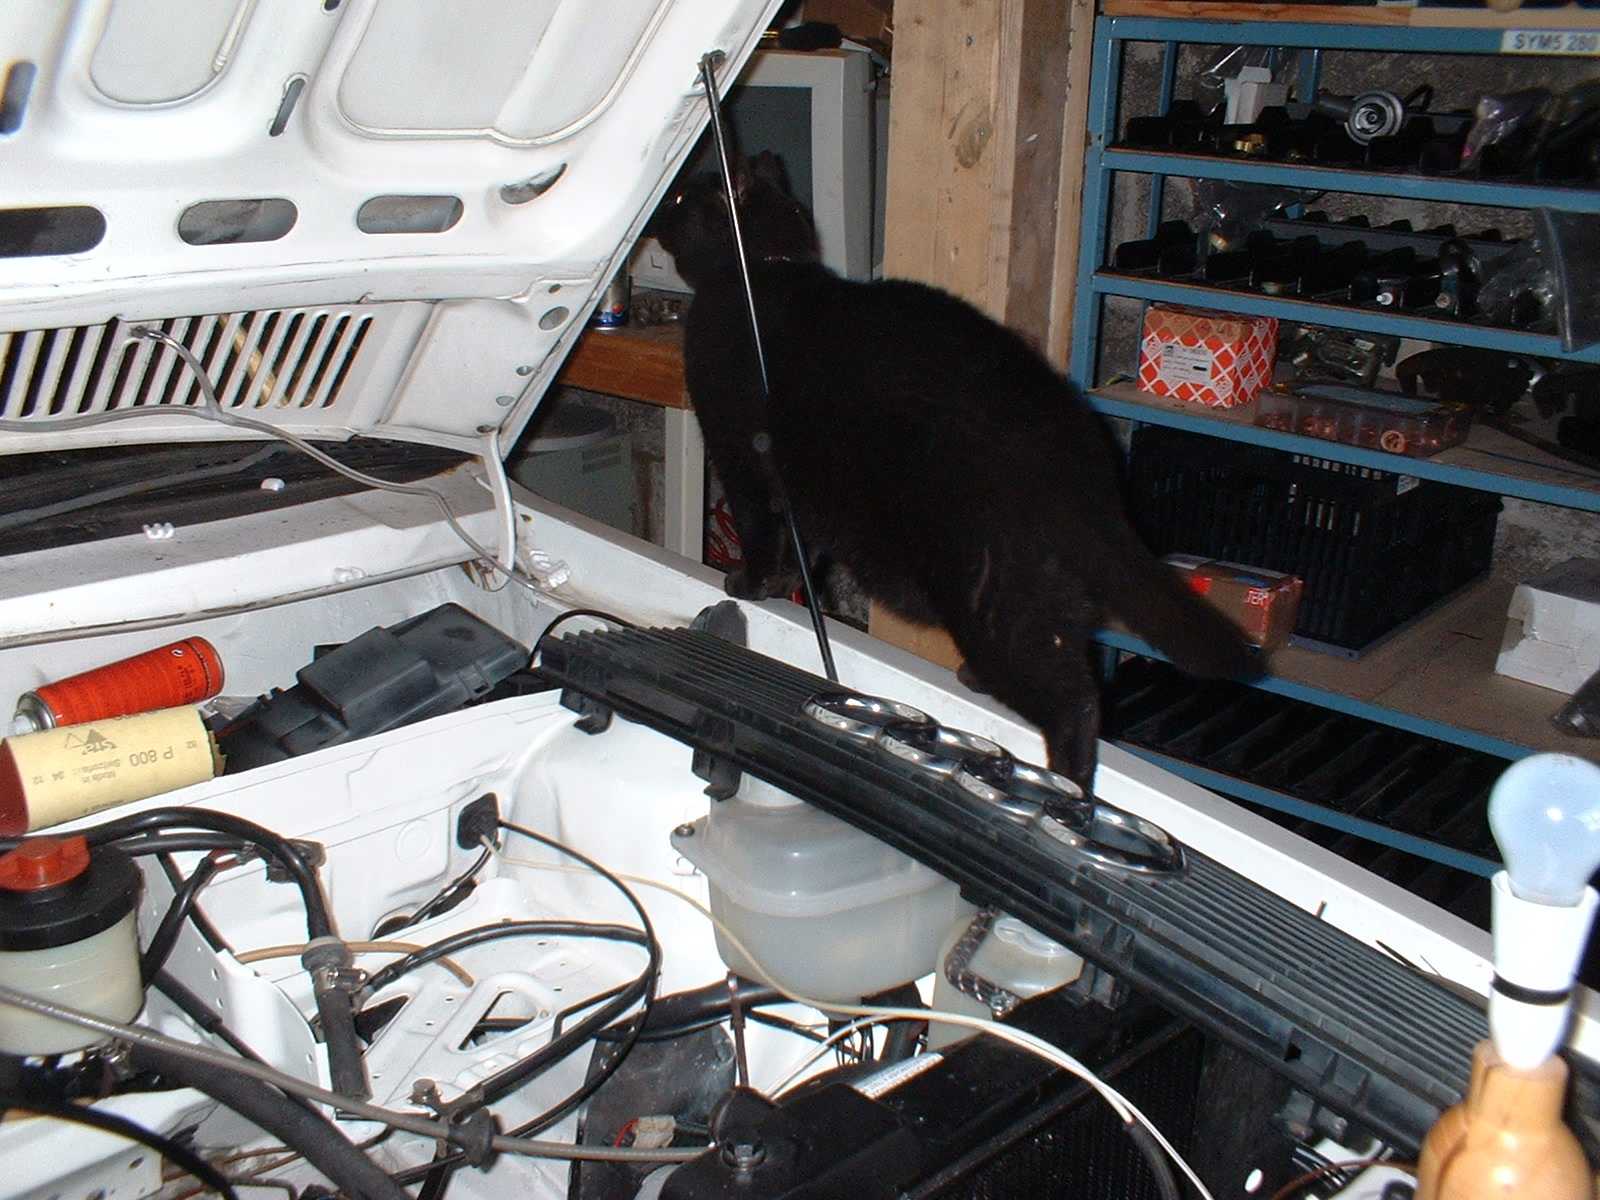
Squeaks the curious cat again......
Here I'm using a headbolt to check that the threads in the blok are clear and liquid free.
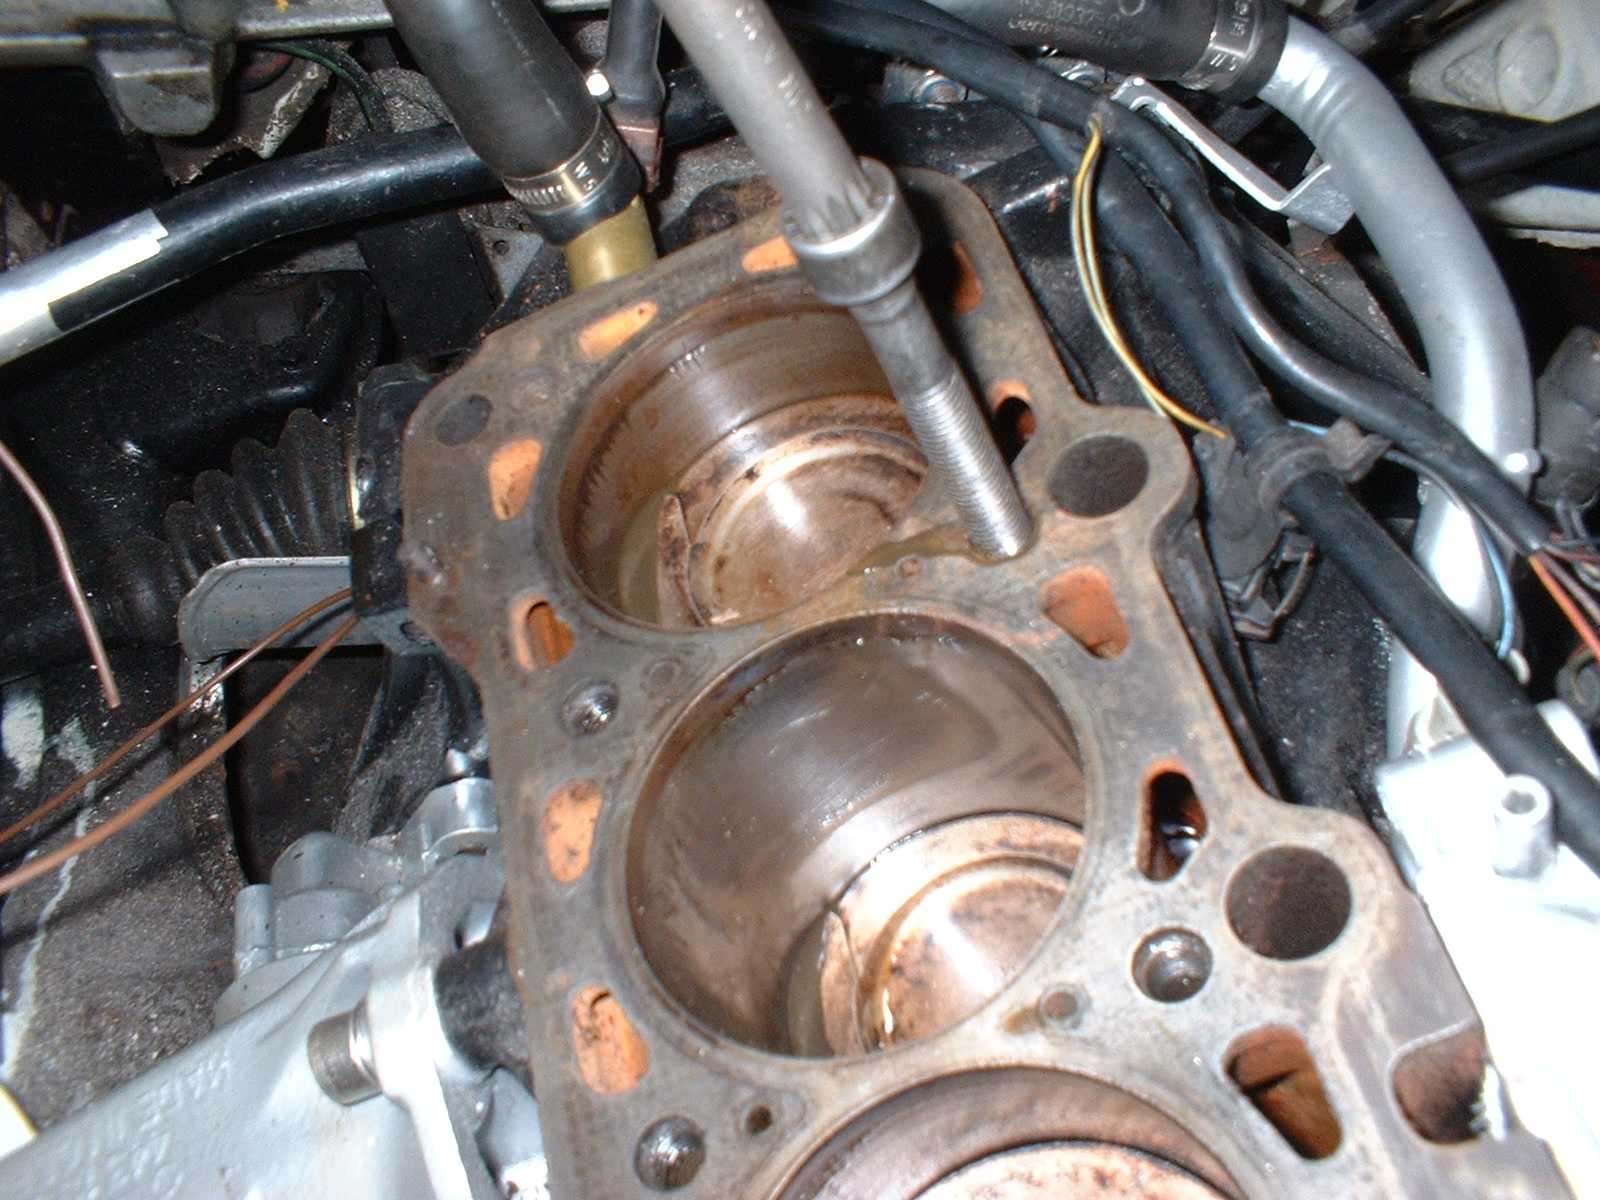
All clean now, and ready for the head
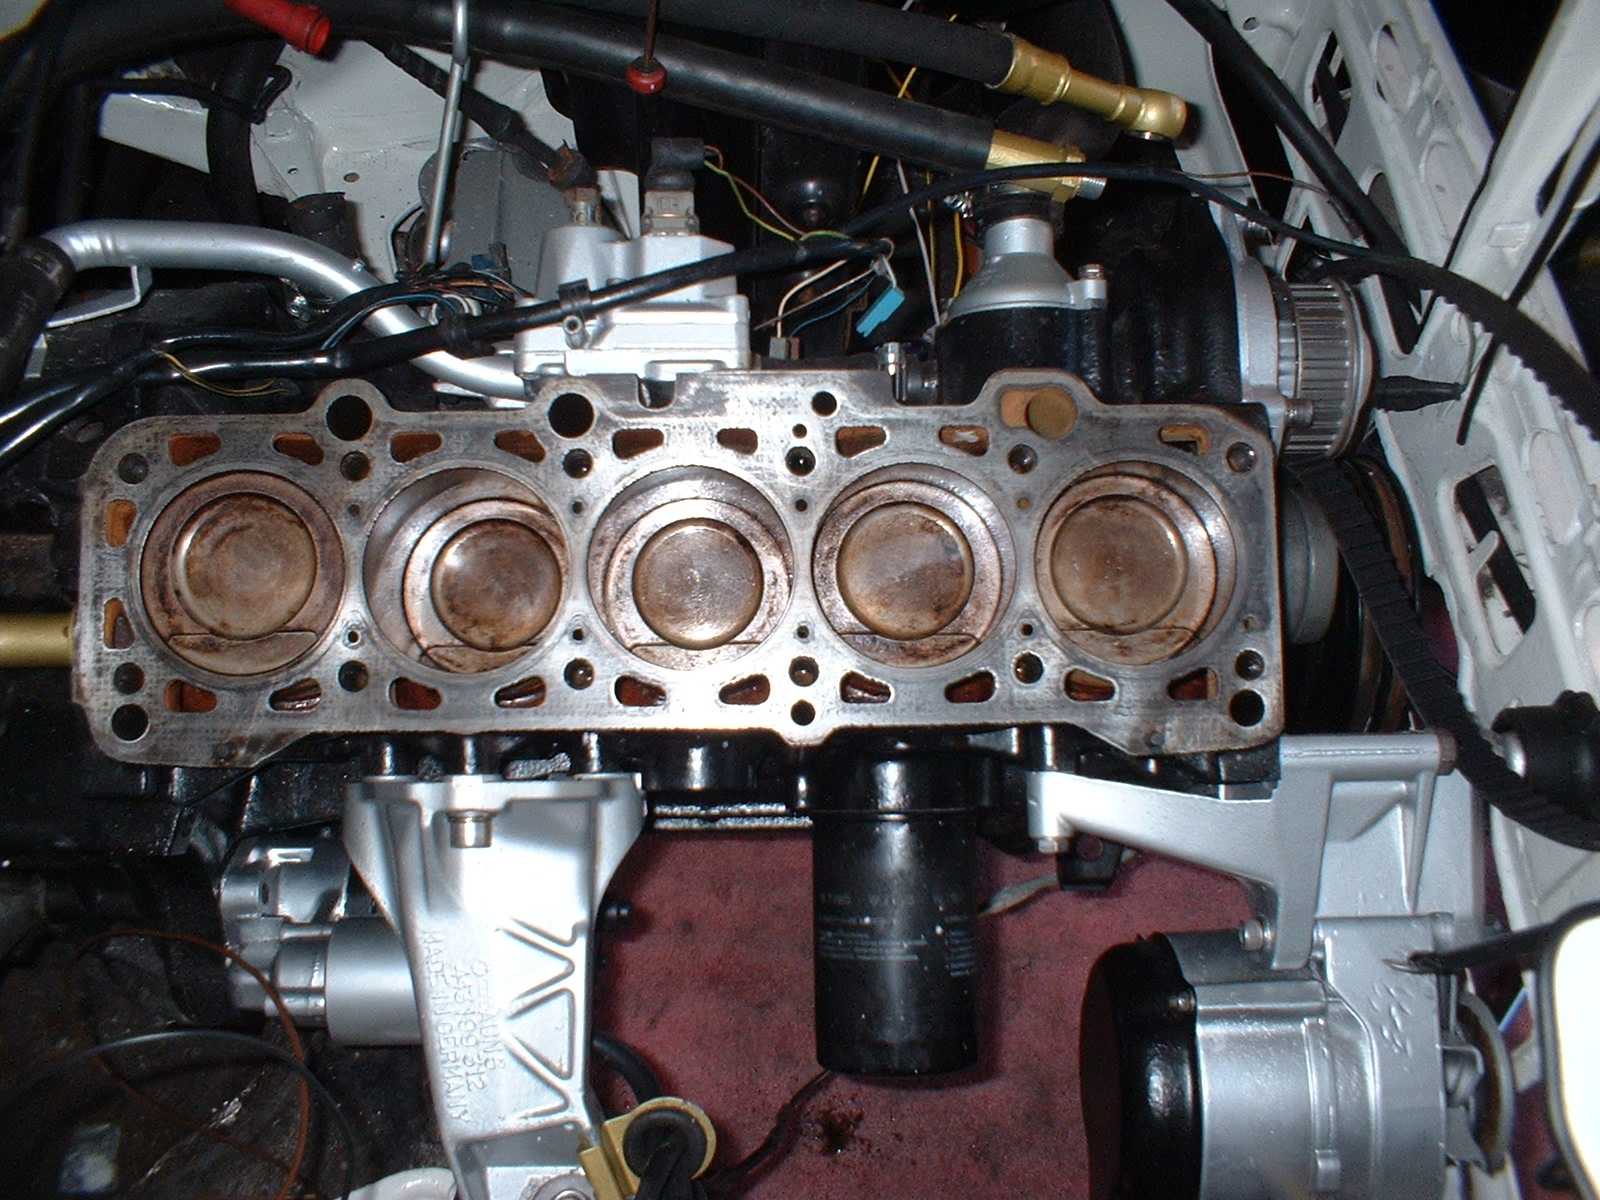
The new head gasket.
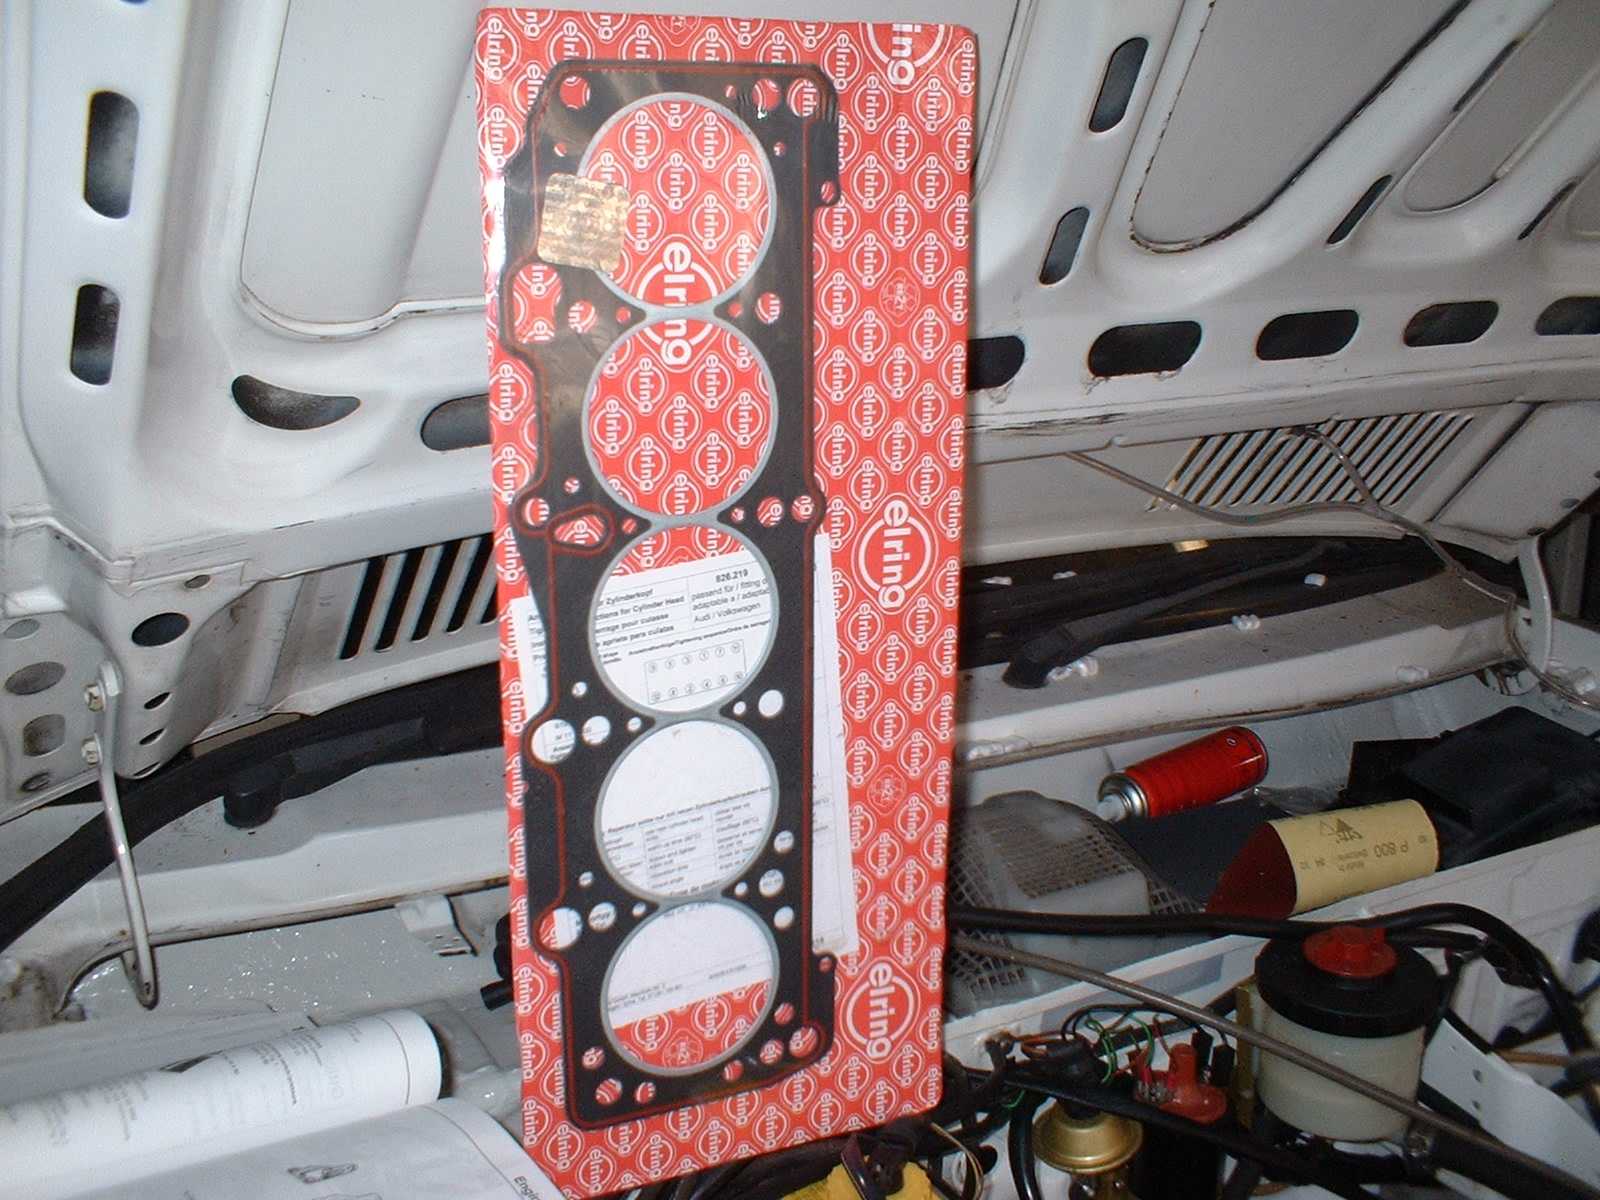
Which has a serial number, and a hologram.....
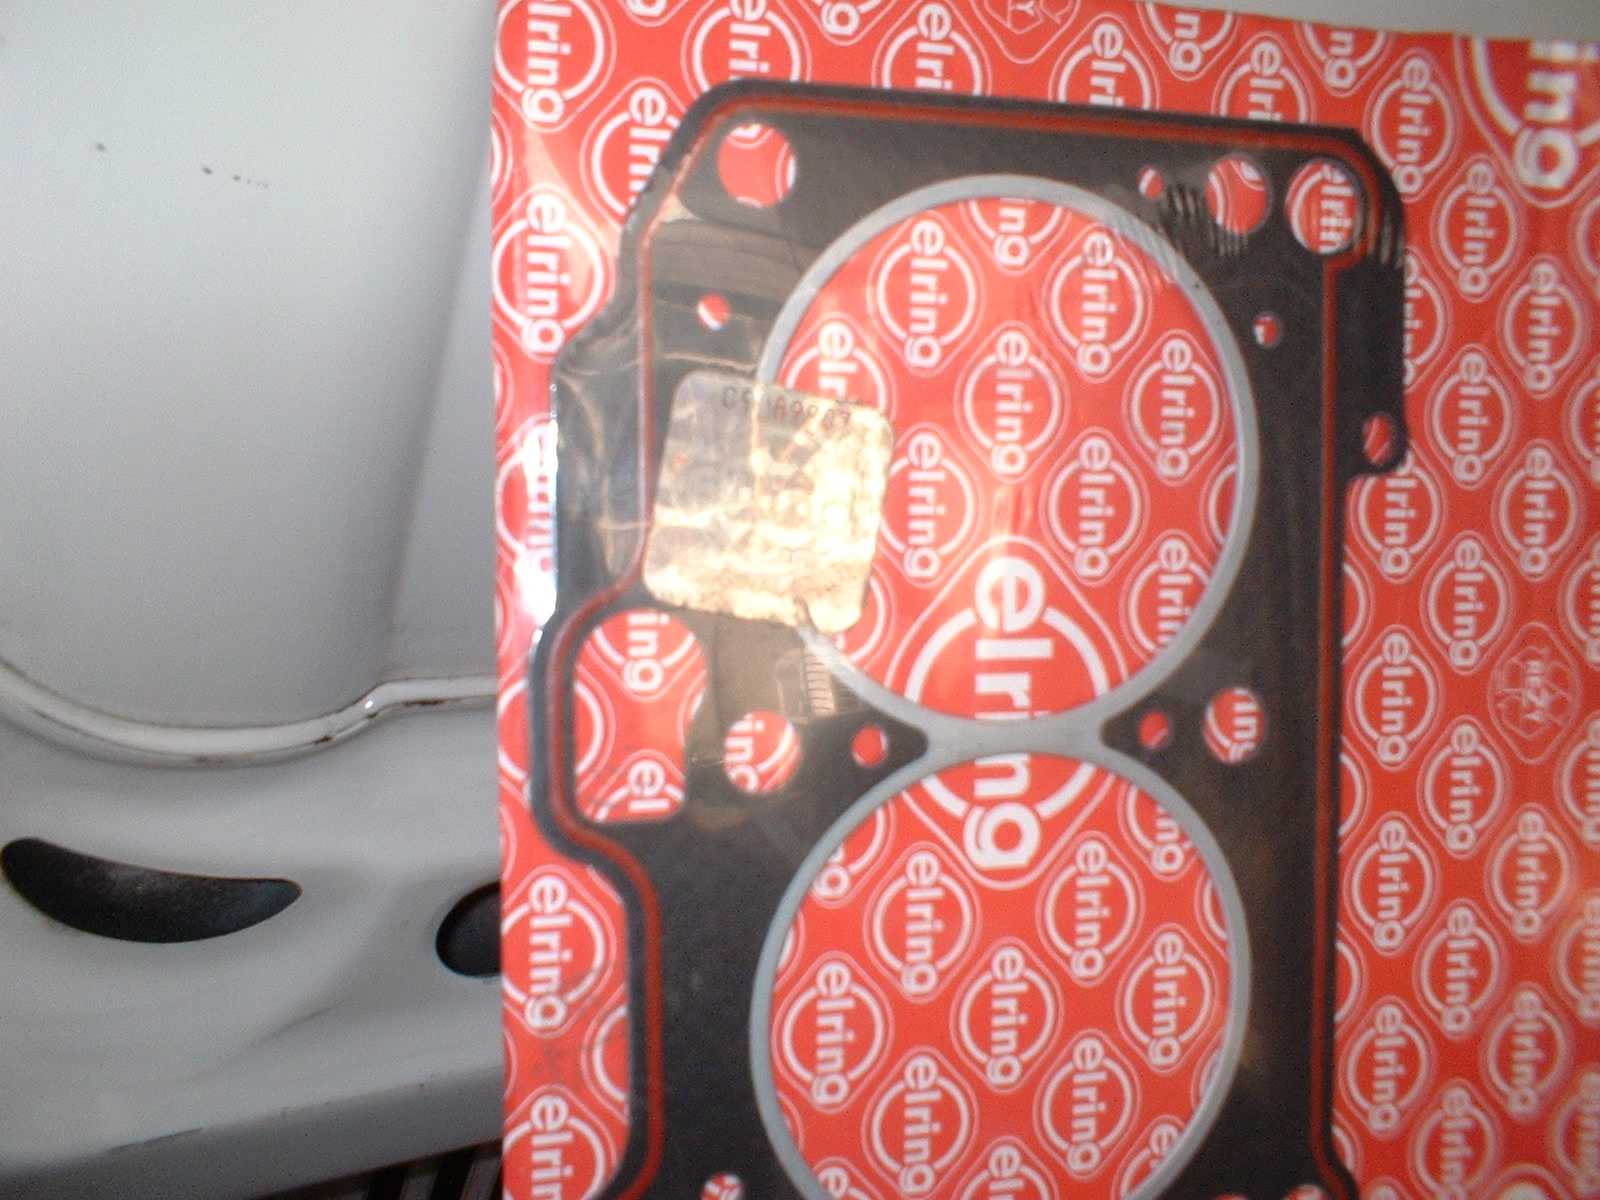
Gasket in place. It only goes on one way round, and locates to the two pins sticking out of the surface of the block....
Here is the head assembly ready to be fitted. It's pretty heavy...
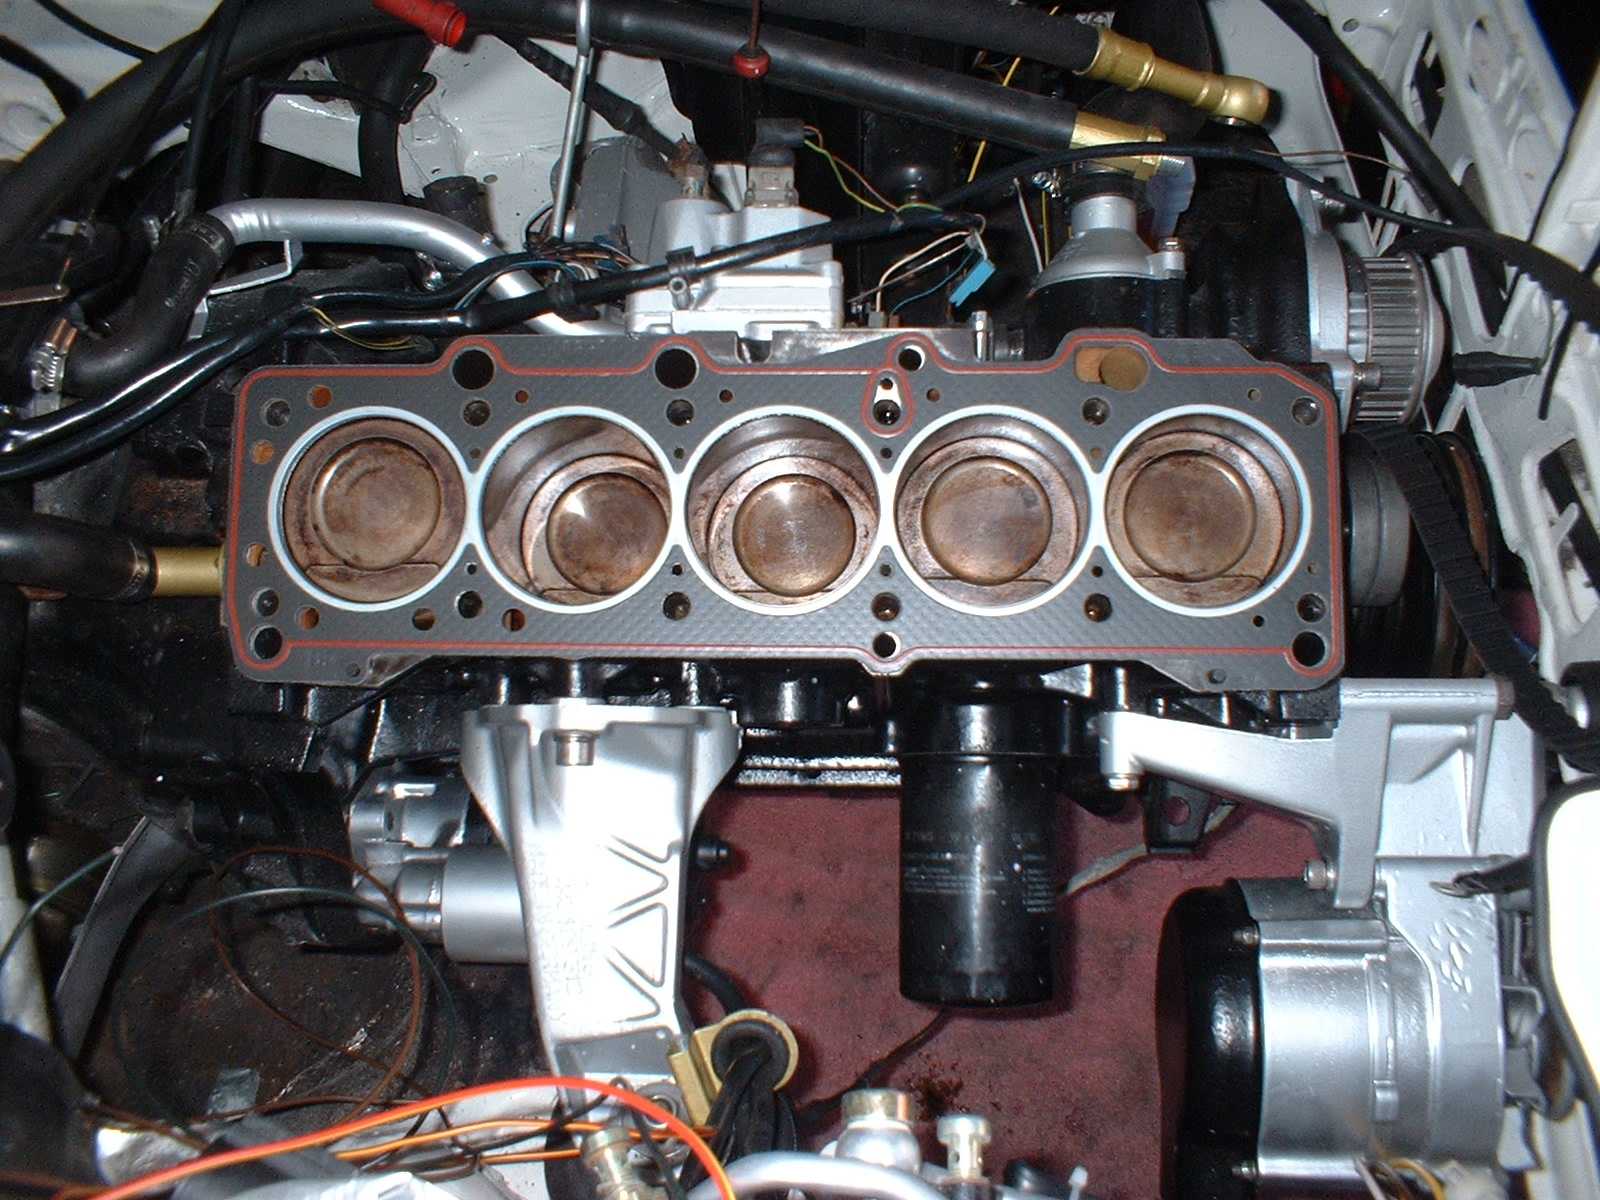
But I got it on anyway. I cleaned up the 12 bolts, and screwed them into position handtight, and then torqued them up as per the instructions.
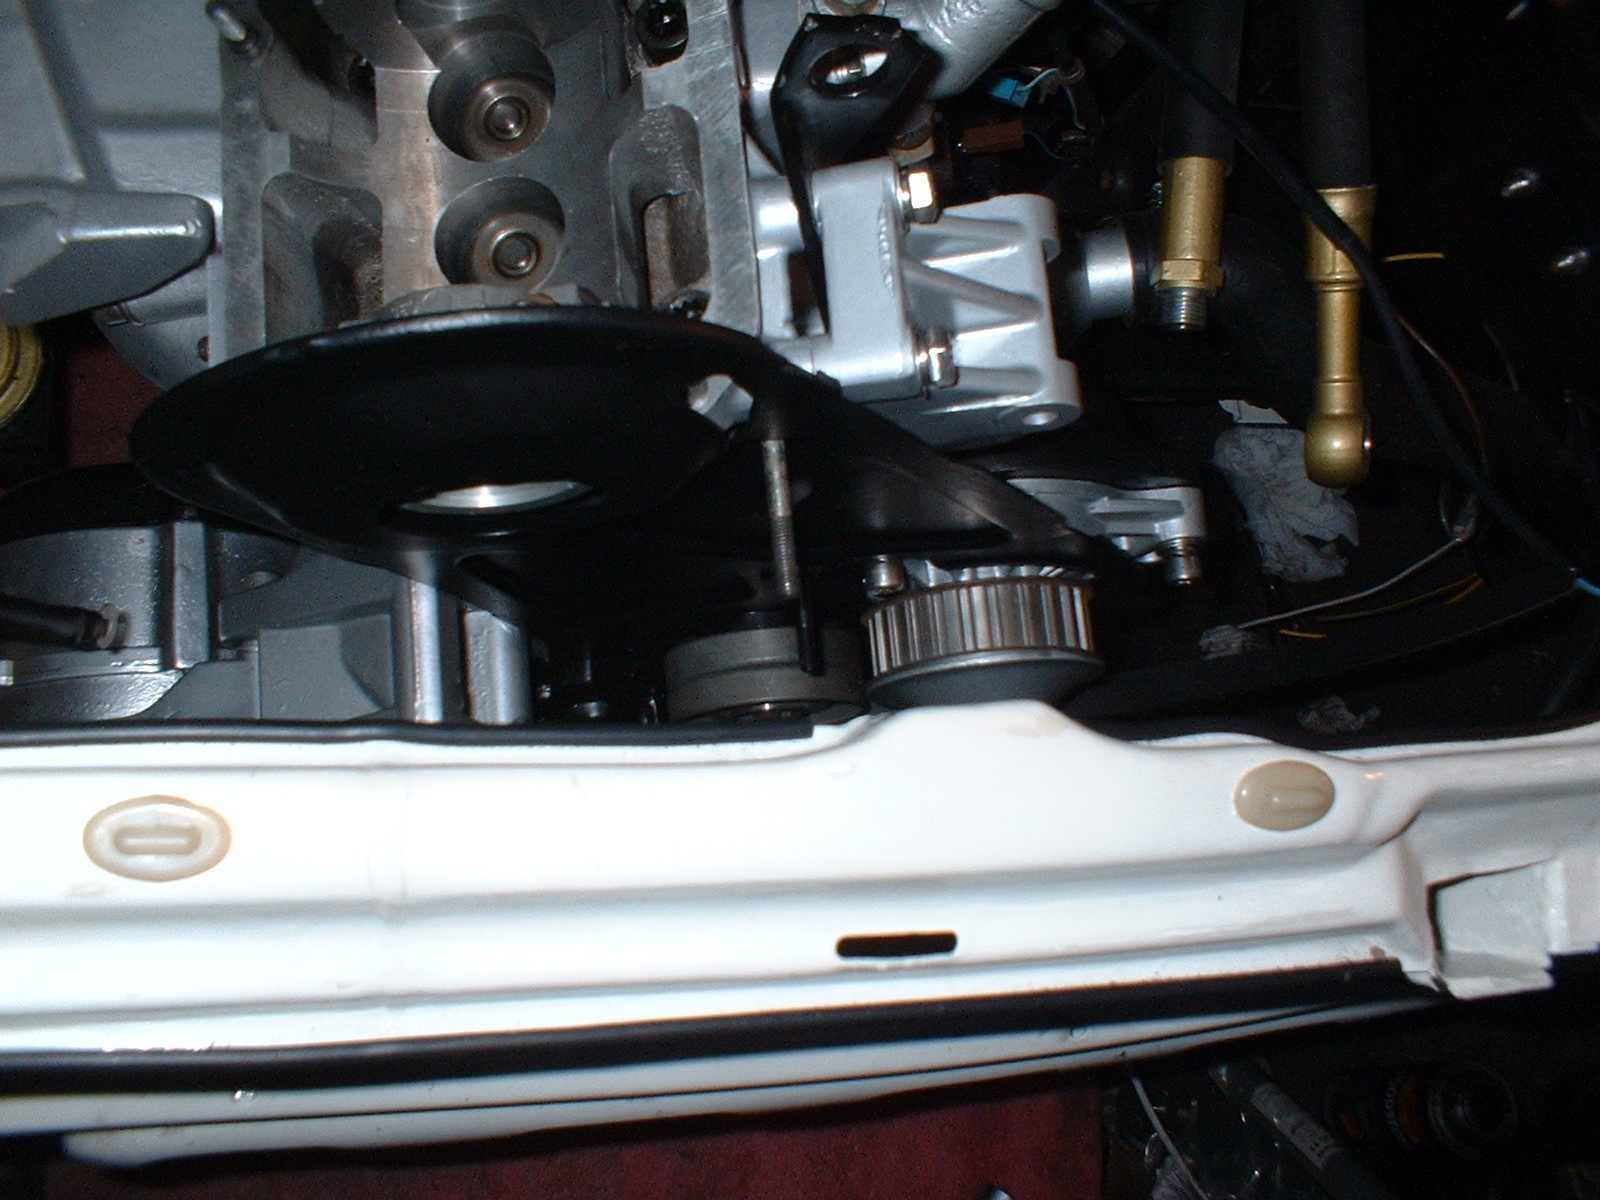
Here you can see the sheet metal cambelt cover backing plate in situ. To fit this with the water pump in position, you need to remove 2 of the pump screws (left and bottom), and move the pump up a little, so tha the hole in the backing plate drops over it. Then replace the 2 screws. The cam belt also needs to be pushed down and to the right out of the way....
You can see how it fits
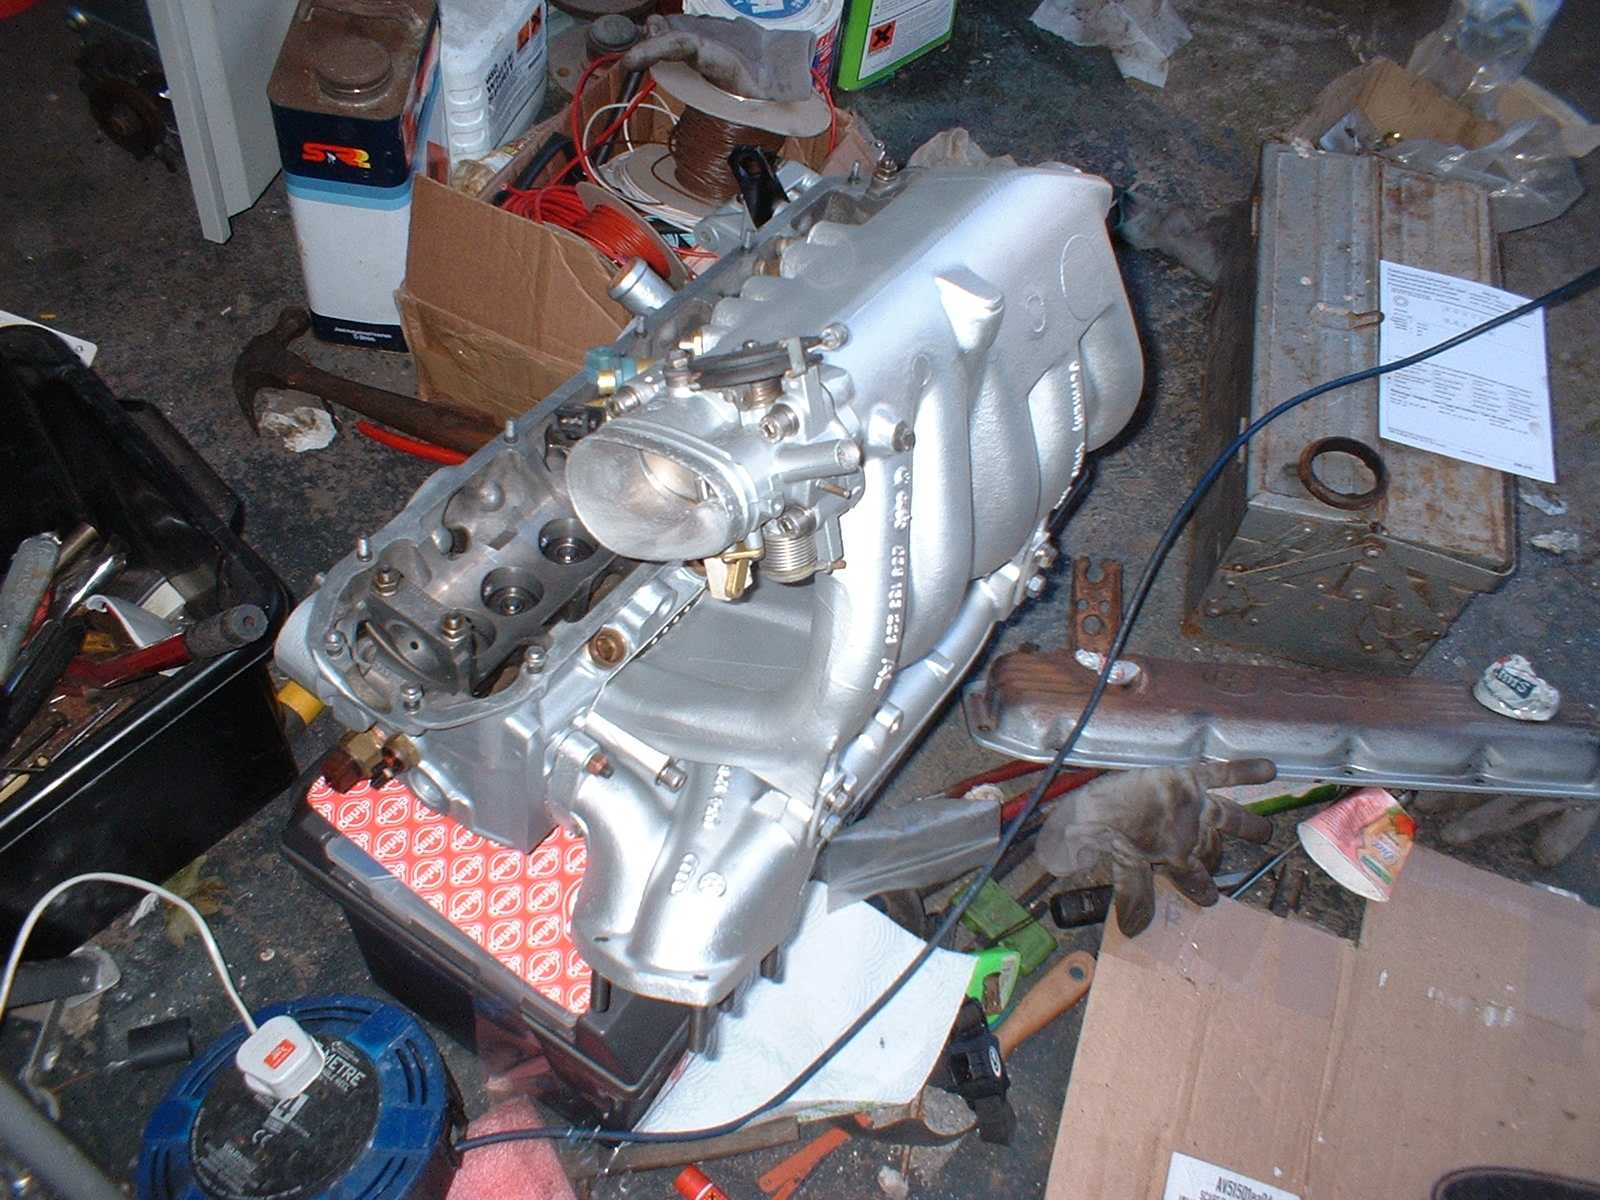
It looks nice with the cam cover on
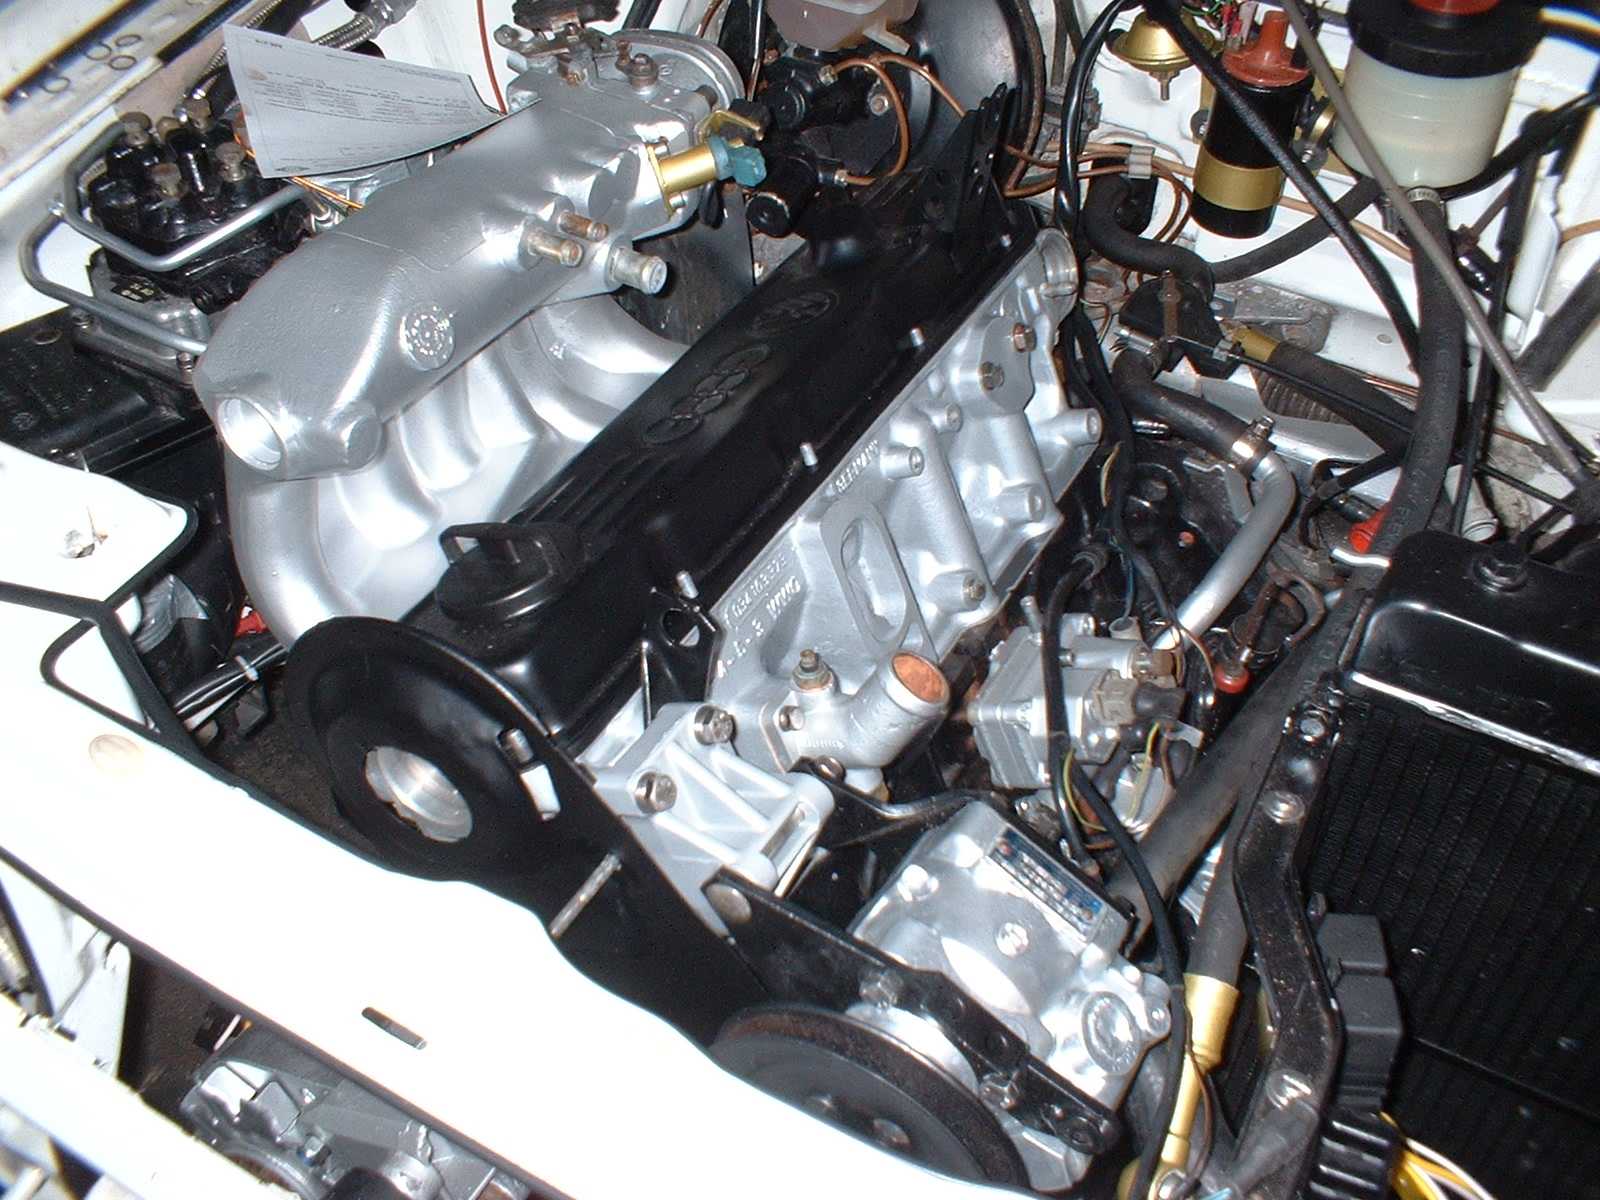
I think that this will be worth all the work....

You just can't keep this cat out of the car.....

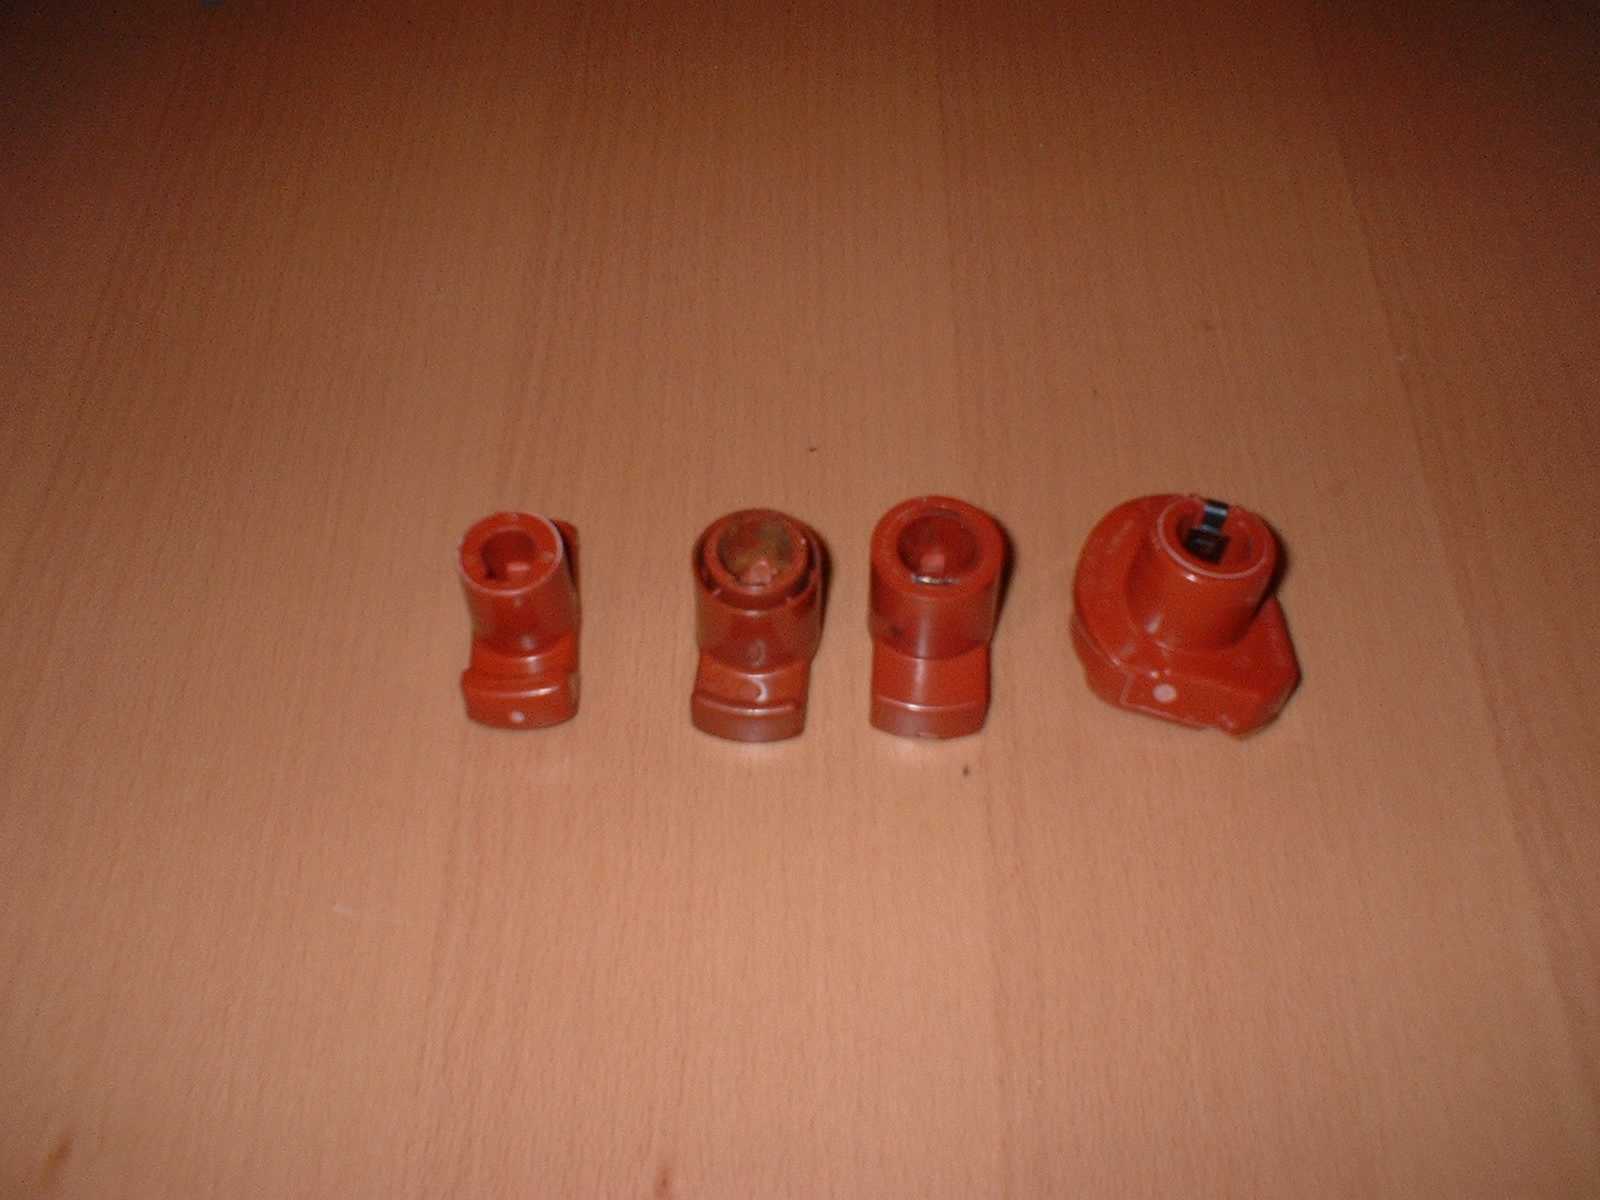
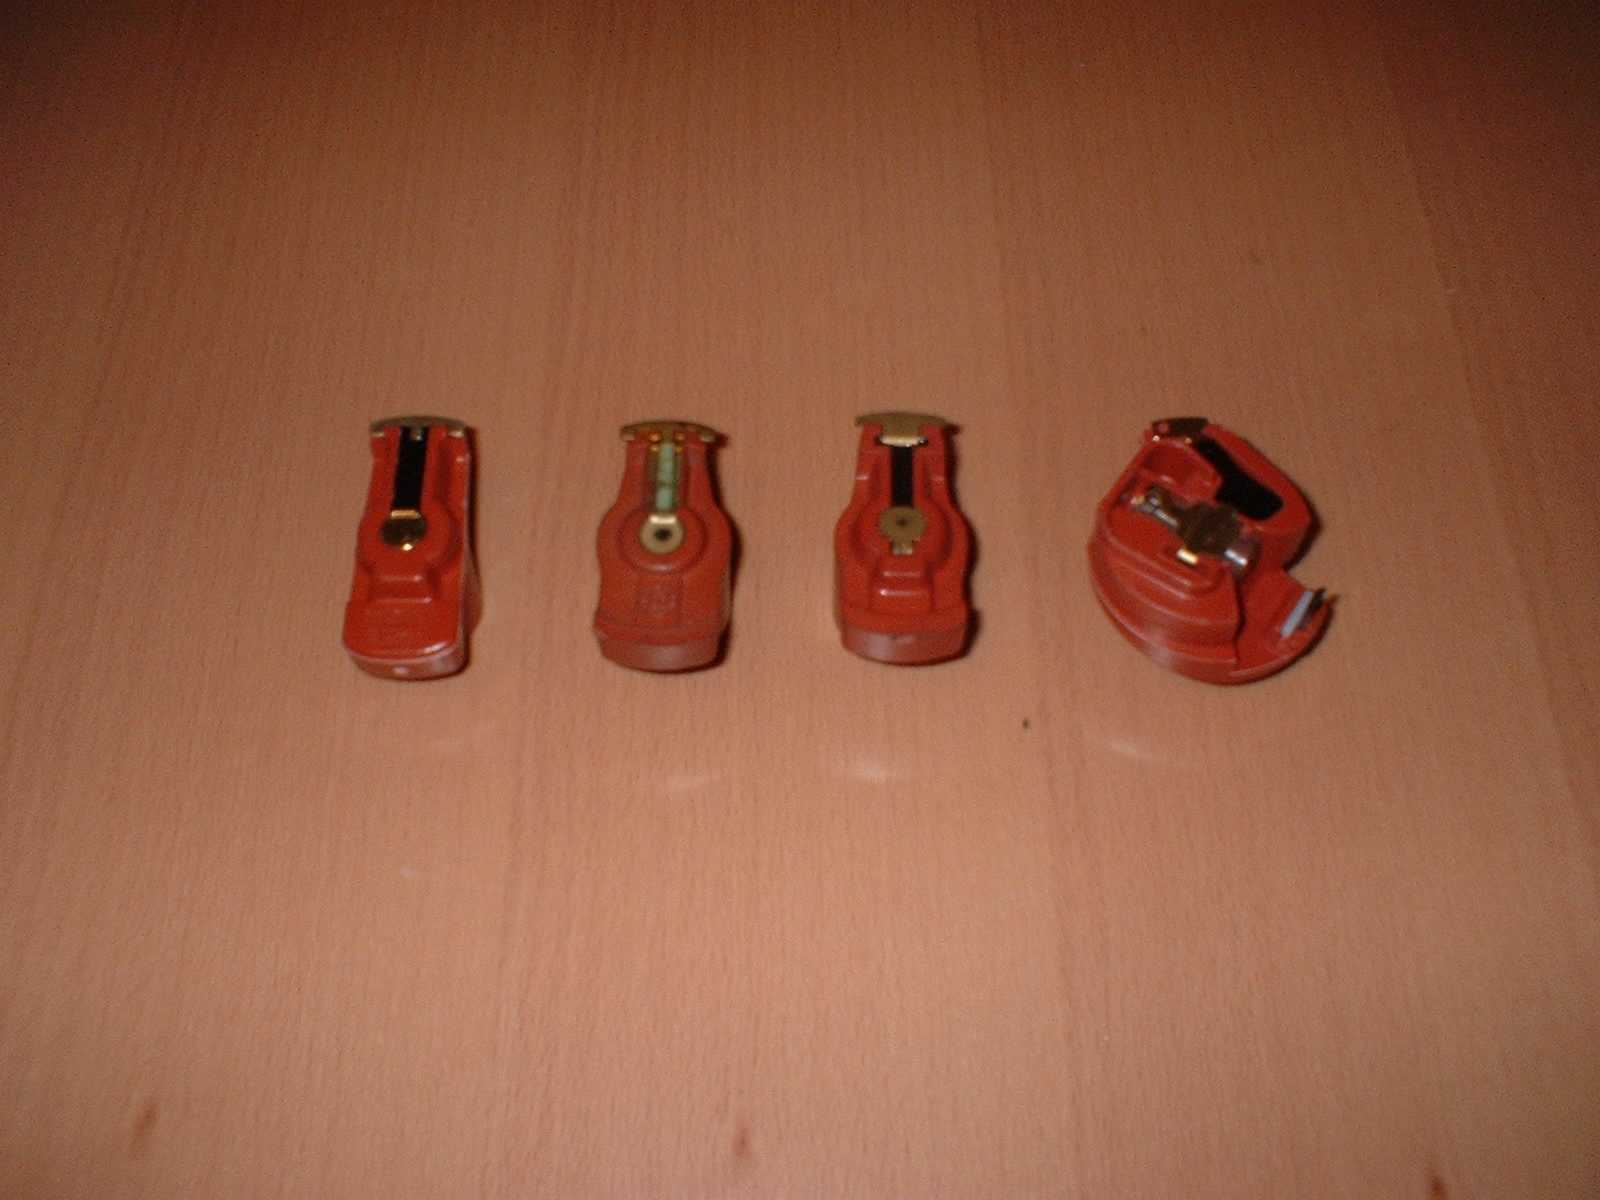
Four different rotor arms. From the left..... A new one for a WR
The old from a WR
Taken from my CQ dizzy
The new CQ rotor arm
And from the underside
From the left..... A new one for a WR
The old from a WR
Taken from my CQ dizzy
The new CQ rotor arm